DBeaver PRO allows you to work with different types of databases, including cloud-hosted ones. Today, we want to guide you step-by-step through creating a connection to Google BigQuery using two different ways.
Connect with a standard wizard
With DBeaver’s connection wizard, you can connect to different types of databases, including those hosted in the cloud. To create a connection to BigQuery using a standard wizard, perform the following steps.
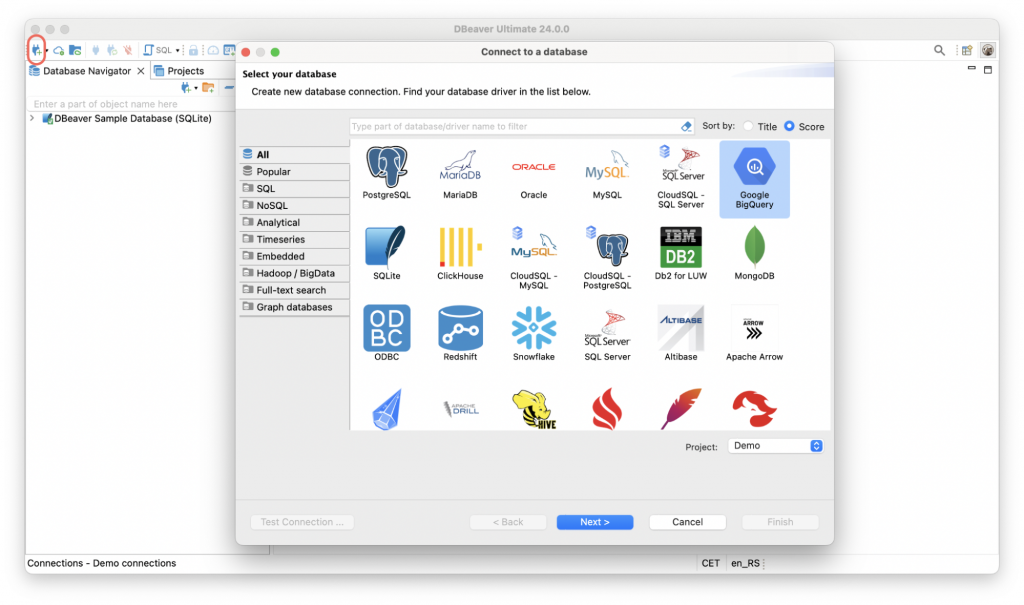
1. Open the DBeaver app and click the “New Database Connection” button at the top of the application toolbar. Choose BigQuery in the list of database drivers, and then click the “Next” button.
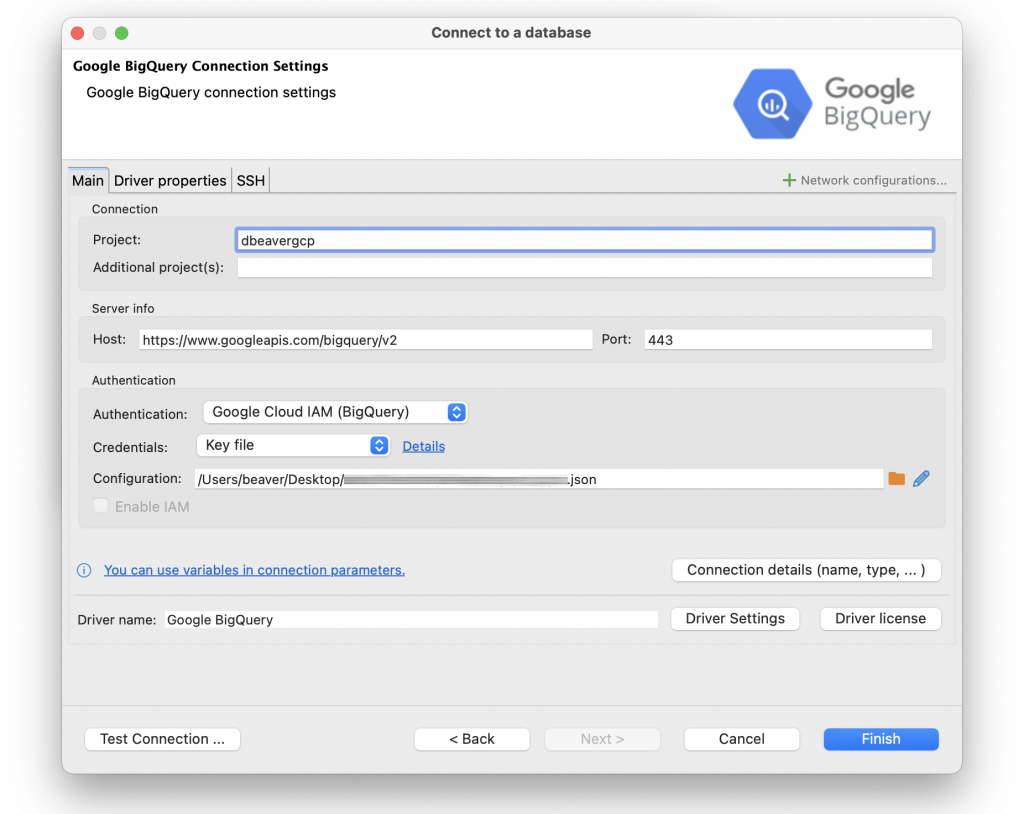
2. In the next step, you need to fill in the Project, Port, and Host on the main tab. Then, select a credentials type to pass an authentication. DBeaver allows you to authenticate with Google Cloud IAM to access your cloud databases in three ways:
– with default credentials;
– using a GCP key file;
– via SSO.
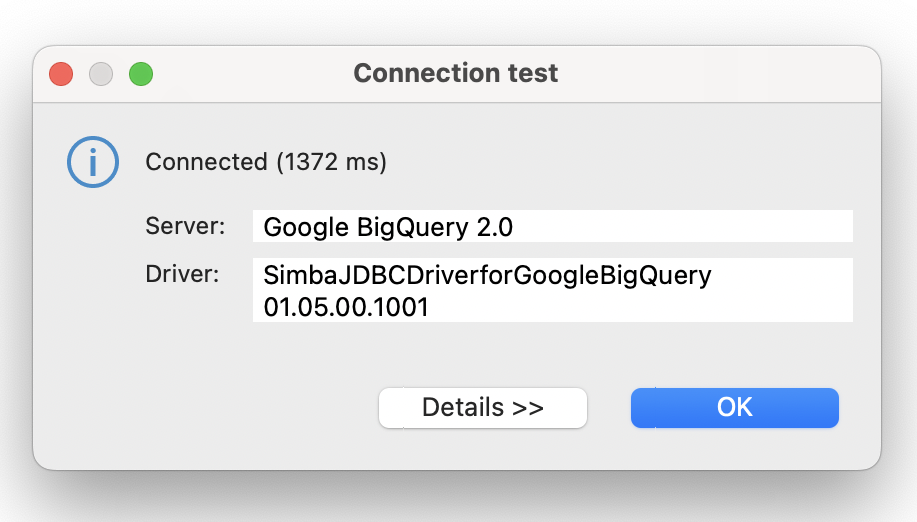
3. After completing all the settings, you can check if everything is correct by clicking the Test Connection button. If the connection can be established, you will see a window with the result and driver information.
4. Finally, the last step is to click the “Finish” button. The new connection will appear in the navigation tree.
Connect using Cloud Explorer
In addition to creating a connection using a standard wizard, you can use Cloud Explorer, which provides a single point of entry for all of your GCP databases.
With Cloud Explorer, you can set up your cloud configuration one time and then work with the tool as a “mission control center” to create connections, edit configurations, and add as many new configurations as needed. Cloud Explorer also enables creating the connection with far fewer properties that you need to specify when using a standard wizard.
When you use Cloud Explorer to connect to a database, you first need to set up the Google Cloud Platform configuration in DBeaver. To create a connection to a Google BigQuery database by using Cloud Explorer, perform the following steps.
1. Start by clicking on the Cloud icon on the left part of DBeaver top toolbar.
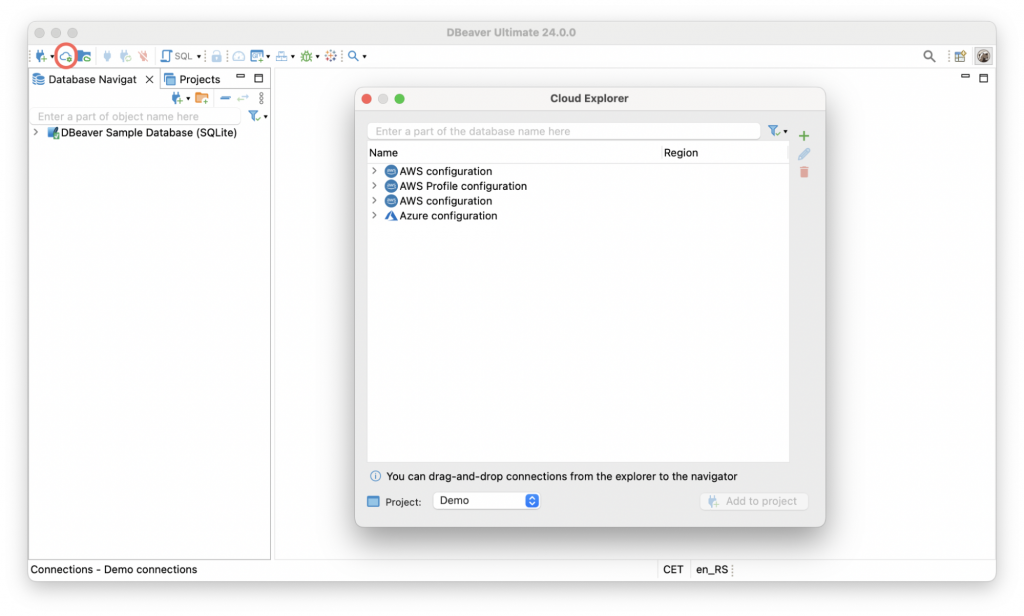
2. In the window that opens, click on a “Plus” button and go to the tab “Google Cloud Platform”. Here you need to choose the credentials type and pass the authentication.
In our example, we are using a Key file. Therefore, we specify the file path and project name.

After filling in the necessary fields, just click the “Apply and close” button, and you will see the configuration you created and the available databases.
If necessary, you can create as many configurations as you need, and they will be displayed by the list. In the Cloud Explorer window, you can conveniently switch between them.
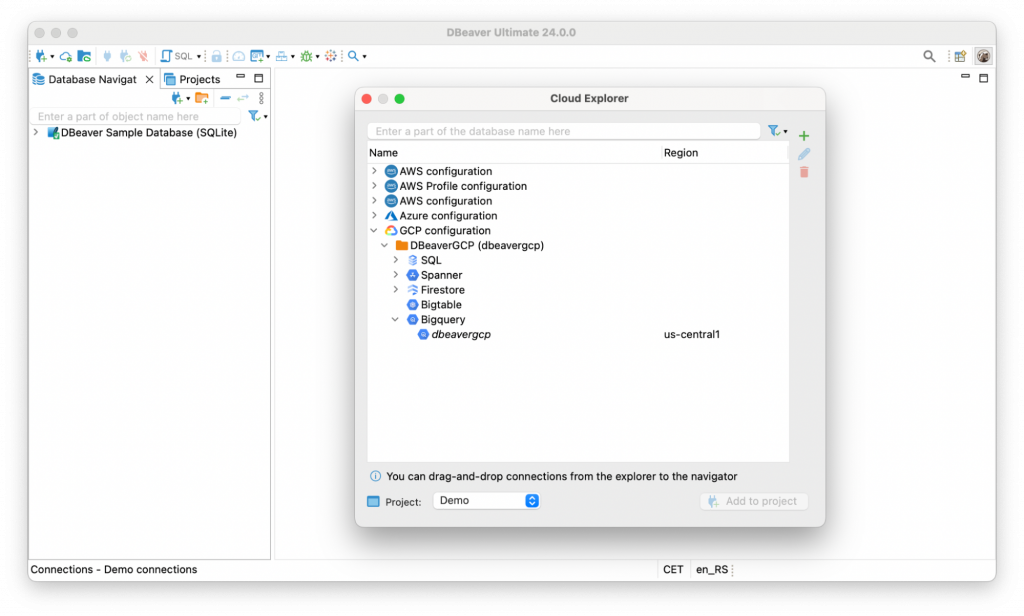
To add, edit or delete the GCP configuration, click on the Plus, on the Pencil, or on the Trash button accordingly.
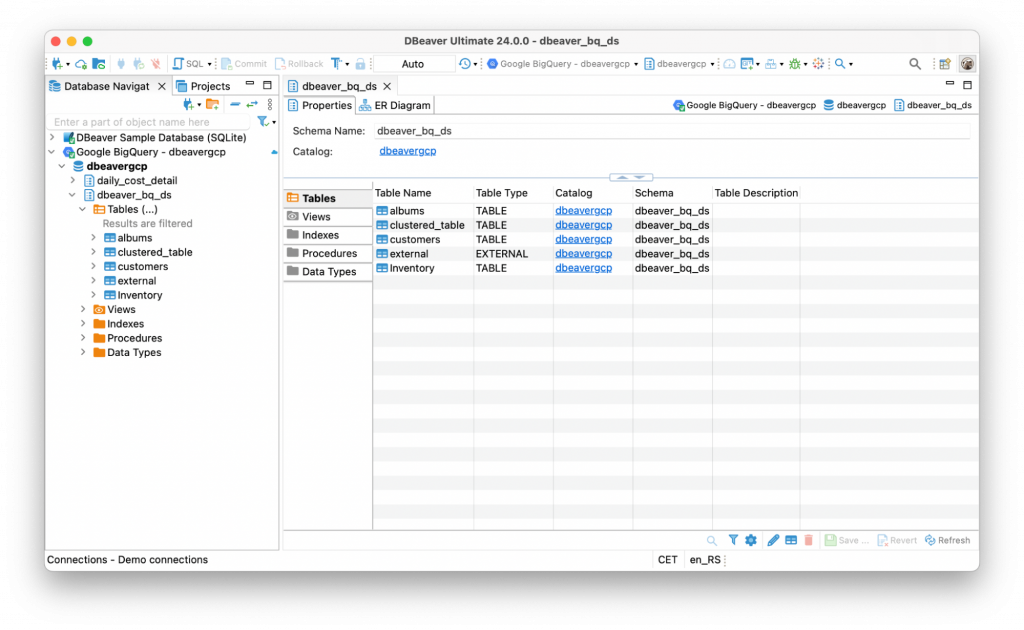
3. All you have left to do is drag and drop your database from the list in Cloud Explorer to the Database Navigator. You may notice that it will be marked with a small cloud icon.
To establish a connection, you need to click the Expand button or select your database and click the Connect button on the top toolbar.
Using the instructions above, you can easily connect to the Google BigQuery database using DBeaver apps. Connecting to cloud databases through a standard wizard works for all our PRO products. At the same time, Cloud Explorer in DBeaver Ultimate and DBeaver Team Edition allows you not only to avoid filling out many fields but also to work with several configurations and switch between them conveniently.