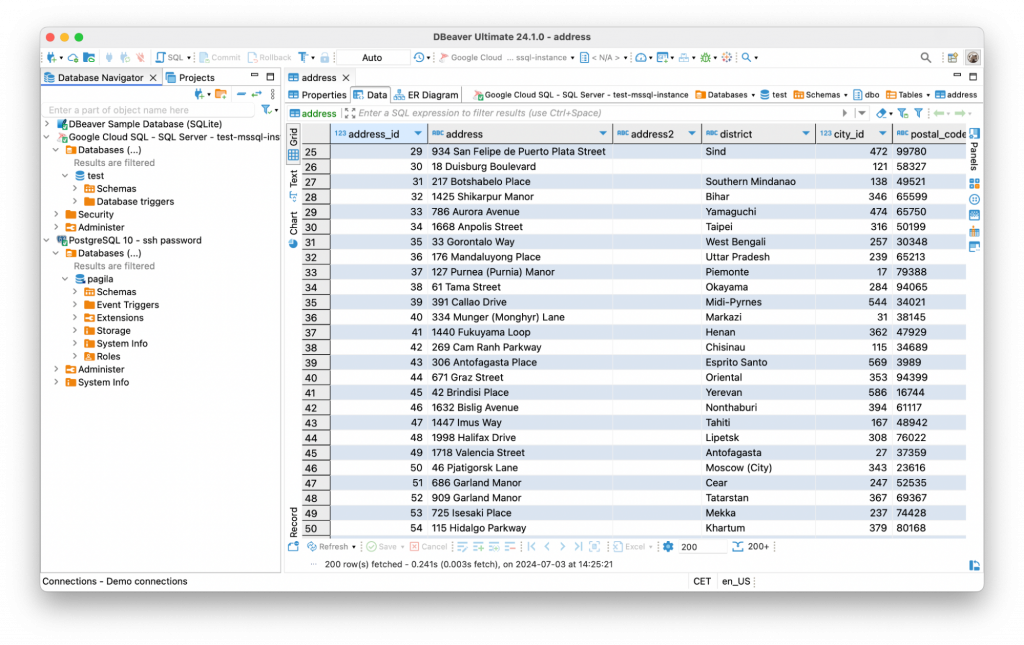
Migrating to a new database is a big undertaking, but the real work begins after you’ve moved the testing data, ensuring every column has transferred correctly. Manually comparing massive datasets is inefficient and risks overlooking critical discrepancies. DBeaver’s Data Compare feature simplifies the process by comparing data in two tables row by row, according to a unique key.
In this article, we’ll show you how to utilize this powerful tool to identify which rows differ and which were added or deleted, ensuring a smooth transition and providing you with the tools to launch your new database with confidence.
When the Data Compare feature is needed
DBeaver’s Data Compare feature can be helpful in various scenarios:
-
- Ongoing data synchronization and replication monitoring: If you have multiple databases that need to be kept in sync, or if you’re replicating data between databases, Data Compare can help you identify and rectify discrepancies regularly, ensuring consistency across your data landscape. This is crucial for maintaining accurate and reliable data in distributed environments.
- Pre-production testing and auditing data changes:
-
- Before deploying a new application or database update, Data Compare can be used to verify that test data in a staging environment matches the expected production data. Additionally, to maintain data integrity and track modifications over time, Data Compare can generate reports highlighting changes between different versions of your data, aiding in auditing and compliance efforts.
- ETL process validation and troubleshooting data issues:
- In Extract, Transform, Load (ETL) processes, or when unexpected issues arise in your database, Data Compare can help you pinpoint the source of the problem by comparing current data with a known good backup or snapshot. This allows you to quickly diagnose and resolve data errors before they impact downstream systems.
- Detecting data corruption and regulatory compliance: In the unfortunate event of data corruption, Data Compare can help you identify affected rows and columns by comparing them to a clean backup.
How to get started with Data Compare
Let’s look at one of the common use cases of using Data Compare, which is related to data migration from one database to another. Suppose you migrated from a PostgreSQL to the SQL Server database and now you have two versions of all of your tables. How can you find the possible differences between an old version and a new version? We’ll go through the process step-by-step, using the Address table as an example.
To use Data Compare, you must be connected to both data sources in DBeaver.
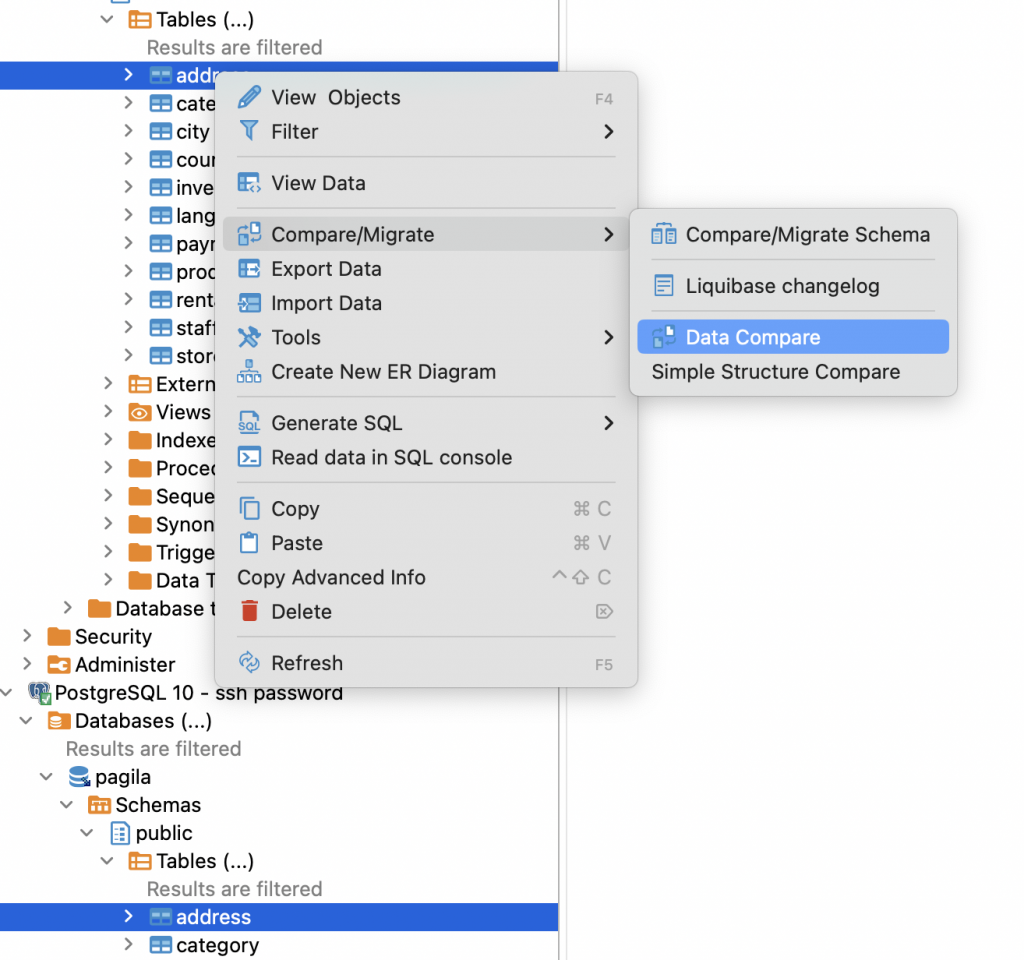
1. First, you need to select both tables in the Database Navigator, right-click on one of them, and go to Compare/Migrate —> Data Compare.
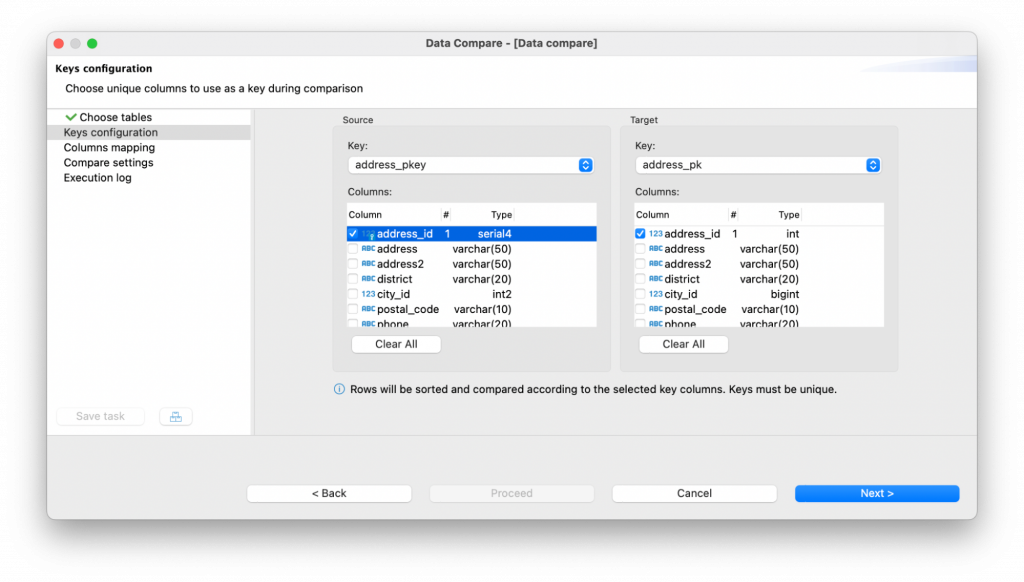
2. If your tables have primary keys, they will be selected automatically. In other cases, you must choose unique columns to use as virtual keys during the comparison. Be careful on this step, because an incorrect key selection will affect the comparison result.
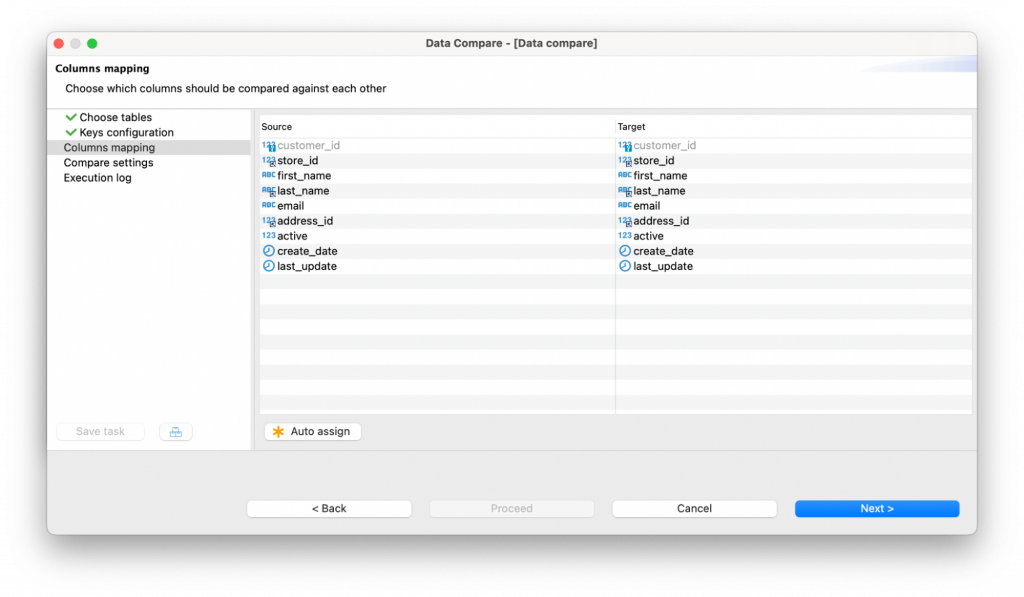
3. In the following step, you can check that all the columns are mapped correctly based on their names and data types.
In the unlikely situation that the automatic mapping does not work, you can change it by selecting the correct columns in the drop-down lists.
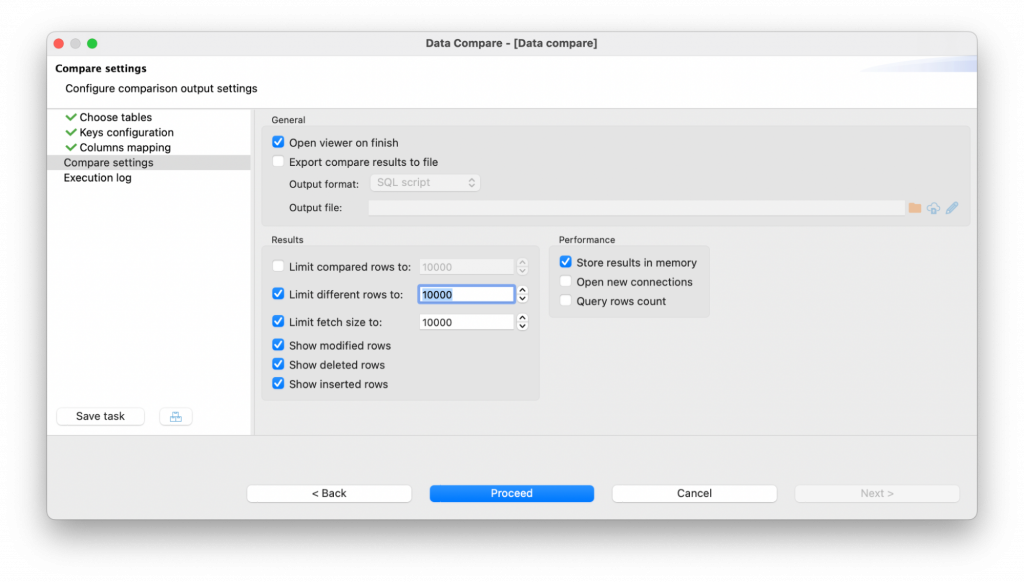
4. In the “Compare settings” step, you can check the “Export results to file” box and set the path to the file. That way, you will automatically save the script with all the necessary SQL statements. Otherwise, you can always copy the DDL generated during the comparison and run it in the SQL Editor.
Also, check the “Show modified rows” box to view all the changes applied to the data in your table.
5. All the settings are ready, and you can click the Proceed button.
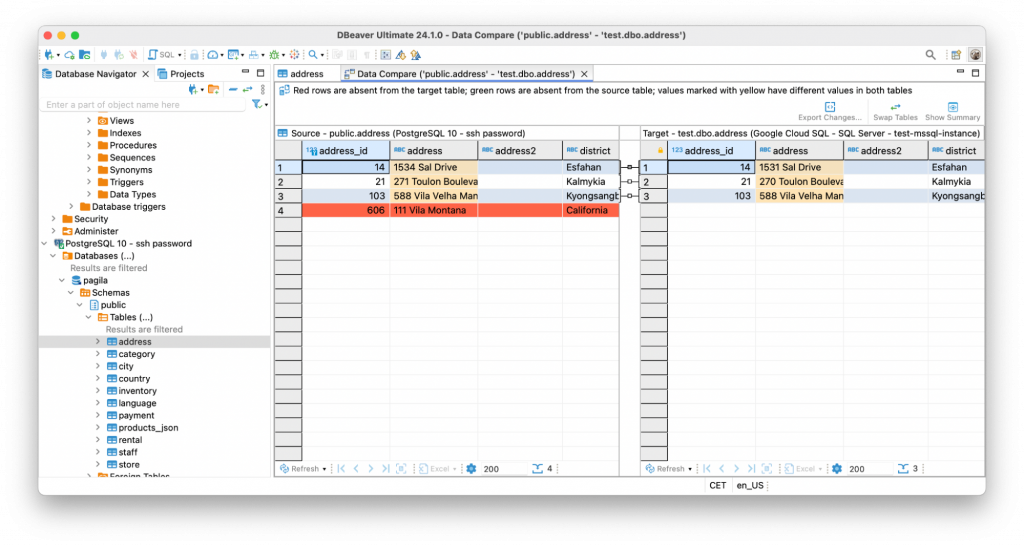
We can see that there are some changes appear after the migration: three rows changed and the table in Posgres from which we transferred data previously contains additional row now. This row is absent in our new table and it’s marked in red.
How to apply changes
With the help of the Data Compare feature, you have found the difference between the two tables. Now it is time to apply the changes from the testing database to the production one. How can you do this quickly?
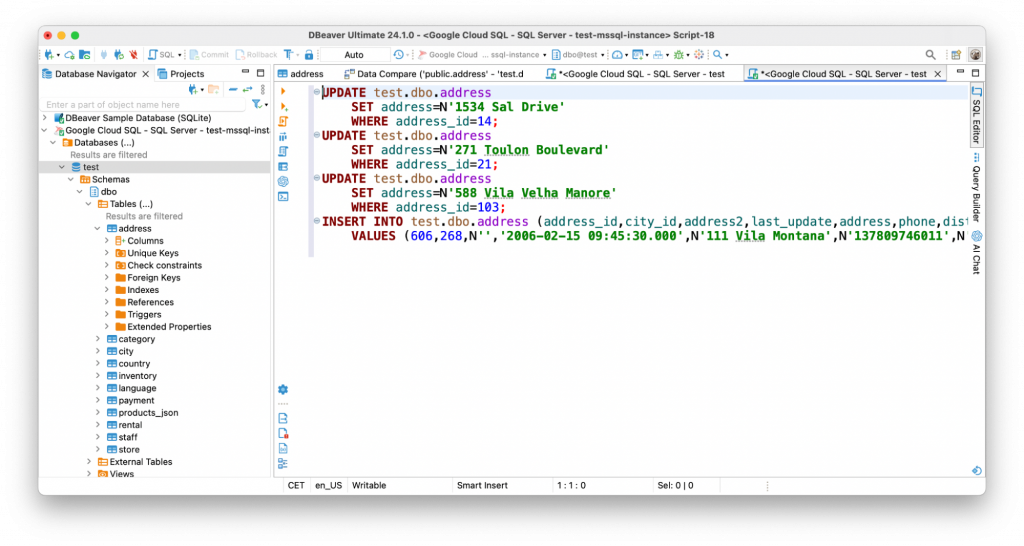
Click the Export Changes button to get the complete DDL. You can then execute it in the SQL Editor or save it in a file for later if needed.
Click the Execute SQL Script button on the SQL Editor’s left toolbar. After execution, your table will be updated and become identical to the table in the testing database.
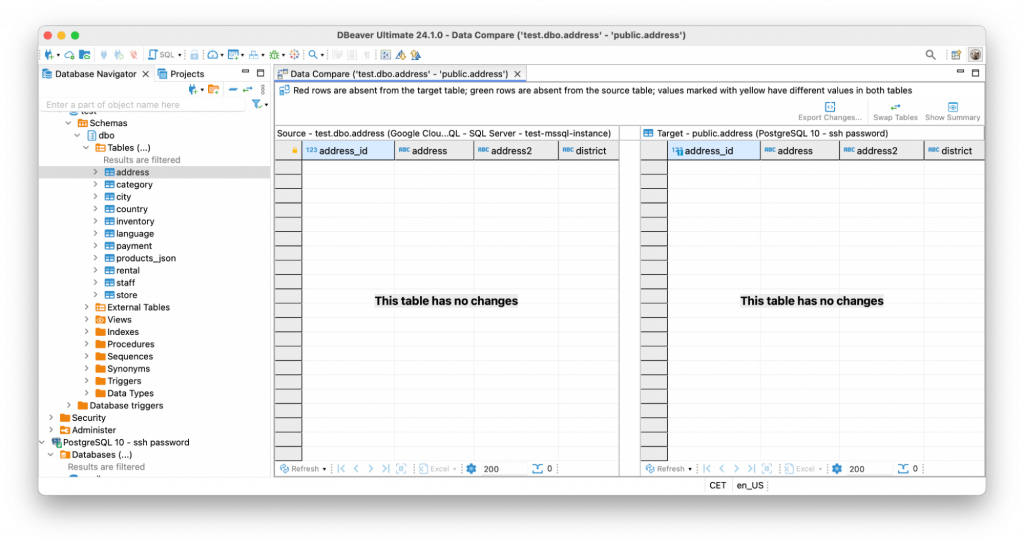
You can now perform Data Compare again to ensure that all the data in your tables are the same.
The scenario described in this article is one of many data comparison possibilities. Whether it’s post-migration validation, ongoing synchronization, troubleshooting, or auditing, Data Compare empowers you to quickly pinpoint discrepancies and generate actionable scripts to fix them. This tool is your ally in maintaining data integrity and ensuring a smooth, error-free data management experience.
If you want to give Data Compare a try and see how it can solve your own tasks, it’s available in DBeaver Enterprise, DBeaver Ultimate, and the desktop version of DBeaver Team Edition.


