Users
Table of contents
Overview
This article gives you an overview of how to create user in CloudBeaver and Team Edition.
Creating user
There are two types of users:
- Local users: Created by the Administrator.
- AWS and Federated users: These users are managed externally through AWS or federated identity providers and are
authorized to access the system via Single Sign-On (SSO).

For more information on Identity providers, see Authentication methods.
Local users
To create a new local user, follow these steps:
- As an administrator, go to Settings -> Administration -> Users and Teams -> Teams.
- Click on the + Create button.
Fill in the necessary details in the provided fields.
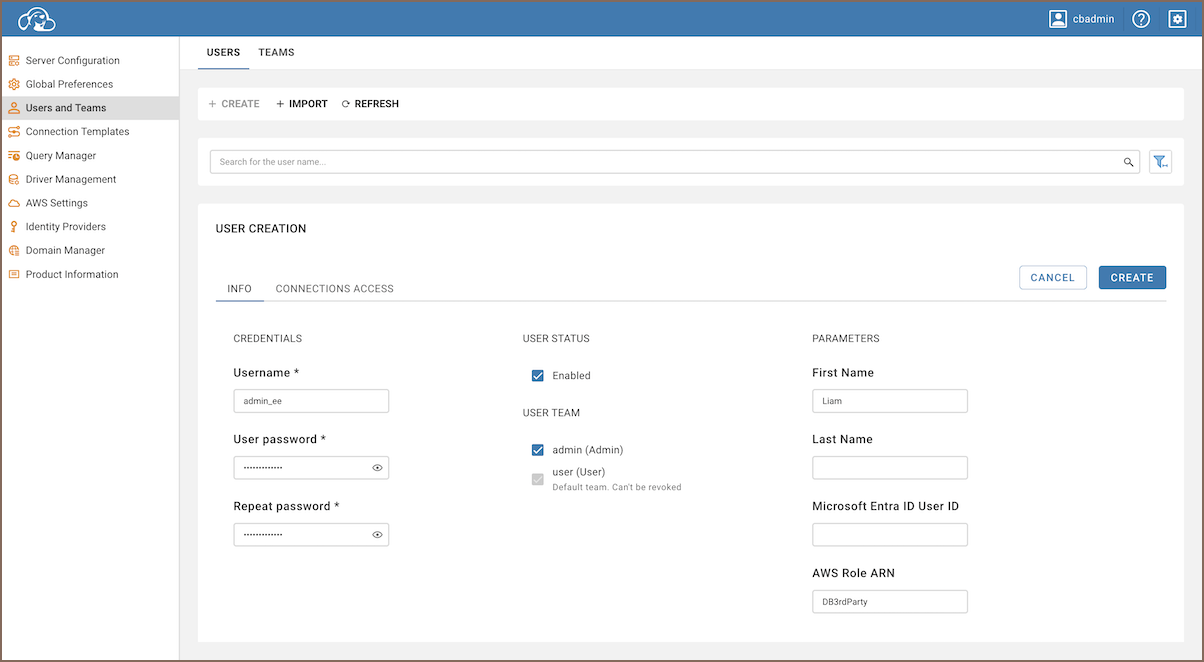
Field Name Description Additional Info Username Enter the desired username for the account. User password Set a password for the account. The user can change their password after initial setup. Repeat password Re-enter the password for verification. Role (only in Team Edition) Select the user's role from the dropdown. For more information about roles, see Roles in Team Edition. User Status Toggle to enable or disable the user. Default status is Enabled. User Team (Optional) Assign the user to one or more teams. A team defines the permissions a user has within the system. For more information on teams, see Teams and Teams in Team Edition .First Name (Optional) Provide the user's first name. Last Name (Optional) Provide the user's last name. AWS Role ARN (Optional) Enter the AWS Role ARN. For more information about AWS roles, see AWS Settings. Microsoft Entra ID User ID (Optional) Enter the Microsoft Entra ID. For more information, see Azure AD authentication. To complete the process, click on the Create button.
Once created, the user can be authenticated using local authentication methods. The user's permissions will be determined by their assigned profile.
Connection access
If necessary, you can provide the user with connection access. This setting can be found and adjusted within the Connection Access tab.
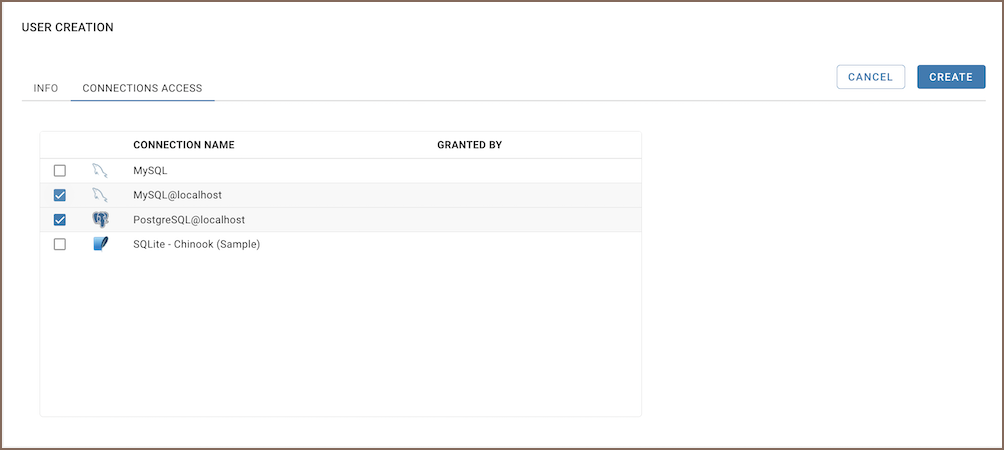
See the additional information on Connection management.
Remember, user management is an important aspect of maintaining system security. Always ensure that users are granted only the access and permissions necessary for their tasks.
Project access
If necessary, you can provide the user with access to specific projects. This setting can be adjusted within the Project tab.
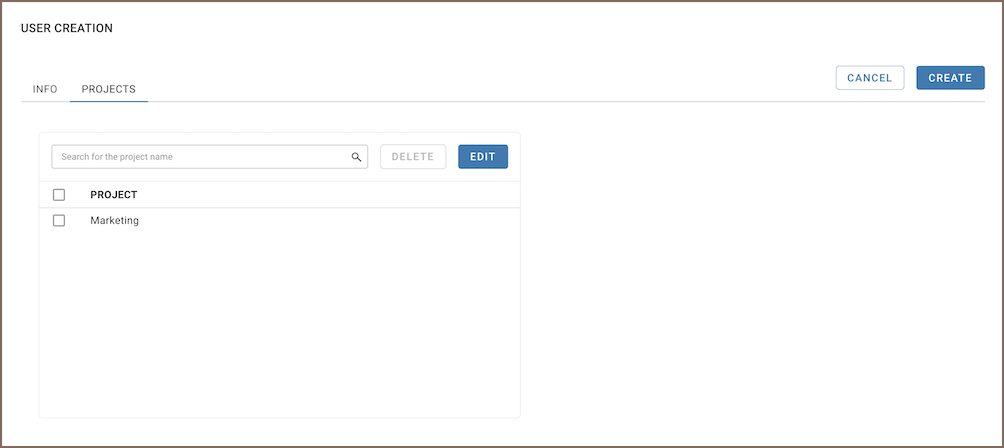
For additional information on managing projects, see Project Management.
Remember, user management is an important aspect of maintaining system security. Always ensure that users are granted only the access and permissions necessary for their tasks.
Enabling Federated authentication for local users
To allow a local user to authenticate through AWS/Federated auth methods, the local user's username must match the user's email address, which will connect via SSO (Single Sign-On). This alignment is necessary for the federated authentication process to succeed.
Note: This step is crucial during user creation as the username cannot be changed later.
AWS and Federated users
When a user logs in using AWS or Federated authentication for the first time, CloudBeaver and Team Edition automatically creates a user profile assigned to the default team. Administrators can later change this team assignment as necessary.
Note: Administrators cannot create AWS or Federated users directly in the application. CloudBeaver and Team Edition only works with existing AWS and Federated users. For more information on Identity providers, see Authentication methods.
Managing users in CloudBeaver AWS Edition
CloudBeaver AWS Edition is designed to support only AWS and Federated users, excluding local user access. Therefore, it is not possible to create local users within this environment. Users must be imported into the system.
For more information, refer to Administration Users Provisioning.
Editing user
The process of editing a user is similar to creating one, except you need to access an existing user.
When editing an existing user, you also have additional options:
Auth methods
In the Auth Methods tab, administrators can see and remove the authentication methods associated with a user.
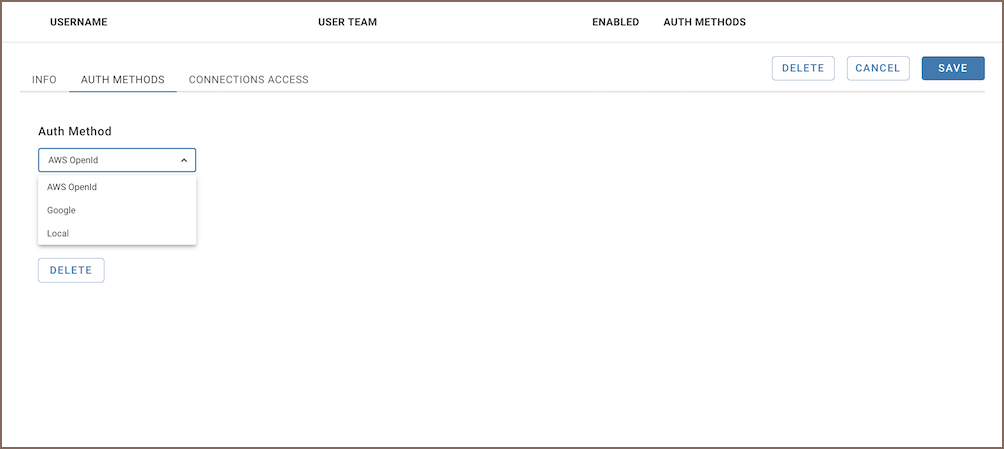
You can remove an existing authentication method:
- Select the desired method from the dropdown menu.
- Click the DELETE button.
Tip: If you need to restore local authentication for the user, navigate to the Info tab and assign a new password to the user. This action will re-enable local authentication.
Deleting a user
If you need to permanently remove a user from the system, you can do so through the Delete user option. When you attempt to delete a user, a confirmation dialog will appear to ensure that this action is intentional.
- To delete a user, select the Delete option.
Follow the prompts in the dialog to confirm the deletion.
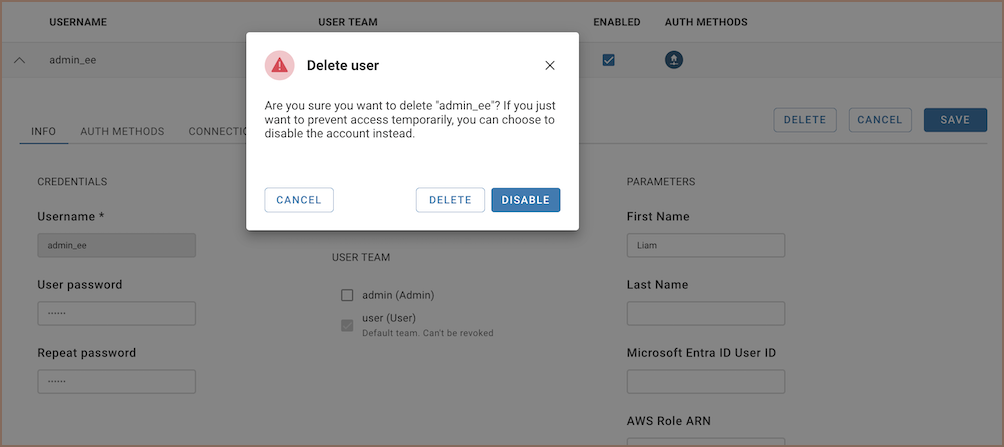
Tip: If you prefer to keep the user but prevent their access, consider using the Disable option in the dialog. Alternatively, you can disable a user by selecting the checkbox in the Info section of the user profile.
Team Edition desktop interface
In the Team Edition desktop, the functionality remains similar but the user interface (UI) differs. To access the user management section navigate as an administrator to Window -> Show View -> Administration -> Users.
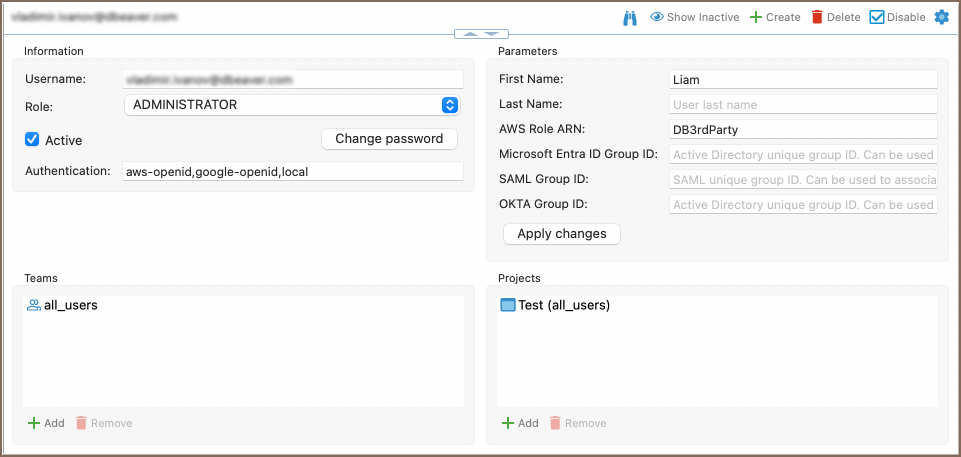
In desktop interface, administrator have access to several management options:
| Button | Description |
|---|---|
| Context Search | Search for users within the system. |
| Show Inactive | Toggle to display or hide inactive users. |
| Create | Create a new user. |
| Delete | Remove selected user from the system. |
| Disable | Temporarily disable access for selected user. |
| Configure Columns | Customize which columns are visible in the user list. |
Tip: Administrators have the ability to assign users to Teams and Projects.
- Teams: Administrators can add or remove users from teams to manage group-based permissions. For more information about team management, see Teams.
- Projects: Administrators can include users in different projects, which allows for controlled access to various resources. For more details on project management, see Projects.