AWS Settings
Note: This feature is available in Enterprise, AWS, Team editions only.
Table of contents
Overview
This article guides you through the initial steps to configure AWS integration in CloudBeaver.
Once AWS integration is configured, you can access Cloud Explorer, and Cloud Storage.
Steps to configure AWS services
Access AWS configuration
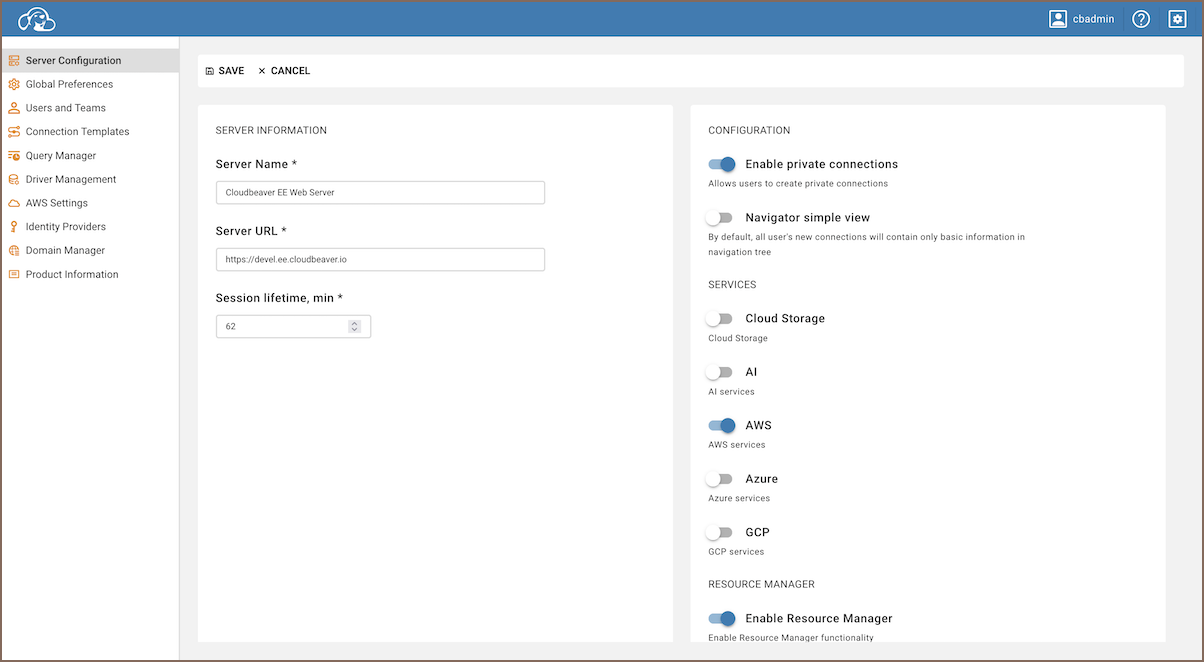
- As an administrator, go to Settings -> Administration -> Server Configuration -> Configuration.
- Find the Cloud (AWS) checkbox and activate it.
Tip: For users of the AWS Edition, activating Cloud (AWS) is not required as it comes pre-enabled.

Configure an Identity Provider
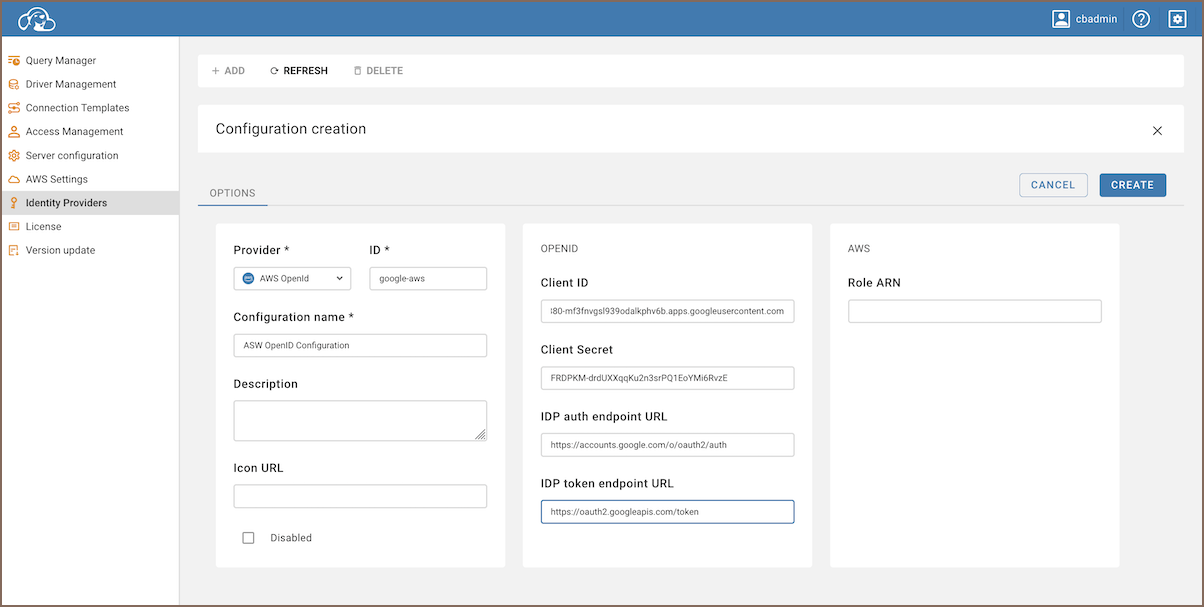
Configuring an Identity Provider is essential for authenticating and authorizing user access to AWS resources.
For a list of available Identity Providers and detailed configuration instructions, see Authentication Methods.

AWS settings for default instance credentials
You can configure how AWS credentials are applied for authentication in Cloud Explorer, and Cloud Storage.
| Setting | Description |
|---|---|
| Use default instance credentials | Enable to use AWS instance credentials for authentication. |
| Shared Access Role | Specify an IAM role that will be assumed for user access. Requires Use default instance credentials to be enabled. |
Tips:
- Enable Use default machine credentials to simplify authentication by automatically using credentials from your AWS instance.
Configure AWS partitions and regions
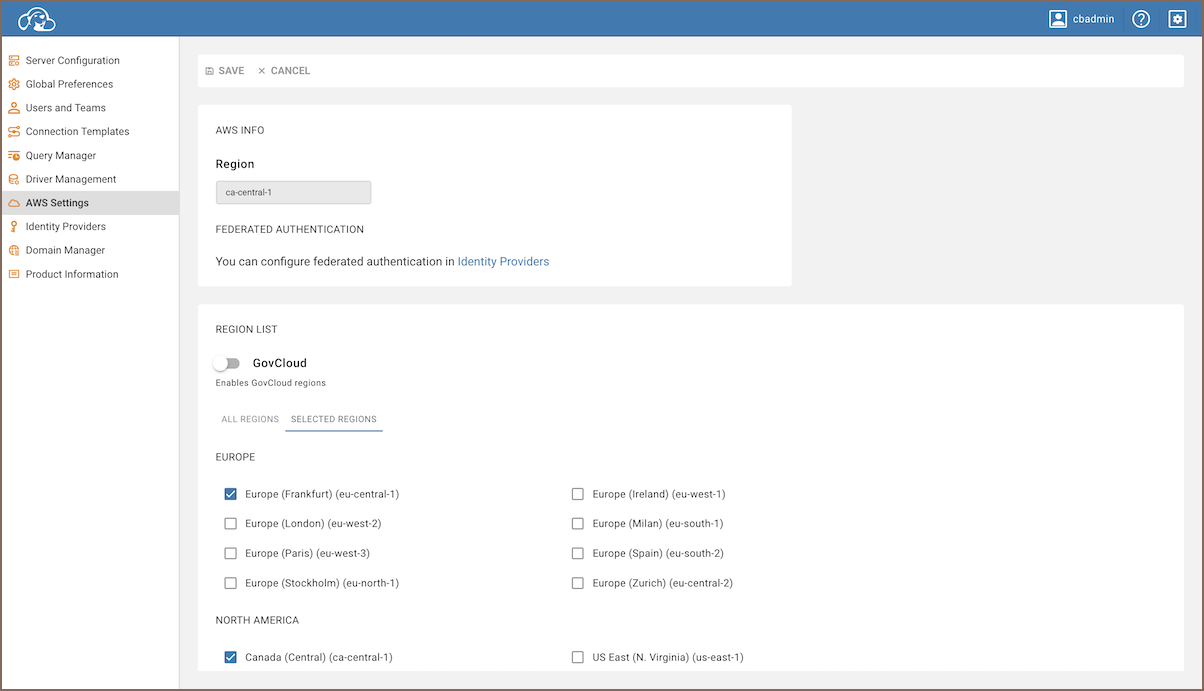
You can configure the AWS partitions and regions where your resources are located. This ensures the system connects to the correct environment based on your selection.
- Go to Settings -> Administration -> AWS Settings.
- In the Partition dropdown, select the partition where your resources are located:
- AWS Standard: Standard AWS regions.
- AWS China: Regions compliant with Chinese regulations.
- AWS GovCloud (US): Regions for sensitive or regulated U.S. government workloads.
- After selecting a partition, choose one or more AWS regions from the Region List.
- Click Save to confirm and apply your settings.

