Projects
Table of contents
Overview
Projects in DBeaver offer a flexible way to organize and manage your database connections, scripts, diagrams, and other resources.
Projects benefits
Projects help you organize connections, resources, and workflows. Here are some scenarios where you might want to use them:
- Separate different environments, like production, staging, and development, to avoid making accidental changes.
- Streamline collaboration by organizing shared resources when using version control systems like Git.
- Manage different credentials for the same database, such as switching between read-only and admin access easily.
Group multiple connections, scripts, and diagrams by context, making your workspace simpler to navigate.
Creating a project
- To create a project, go to the Projects view, and click Create Project
button
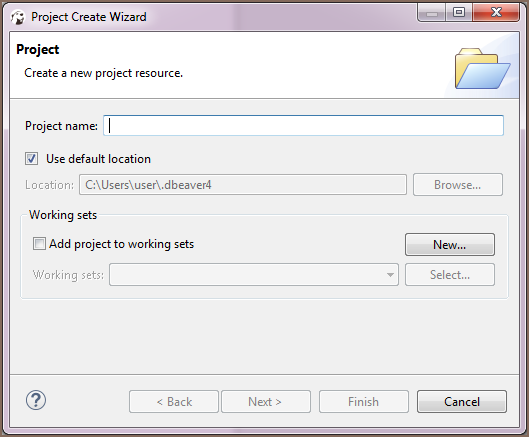
 in the toolbar. This opens the Project Create Wizard.

- Enter a name for your project in the Project name field.
- To use the default storage location, keep Use default location selected. To choose a different directory, uncheck the box, enter a new path, or click Browse to select a folder.
- Click Finish. The new project appears in the Projects tree.
Note: You can’t rename or delete an active project.
Deleting Project
To delete a project, in the Projects view, right-click its name in the tree and click Delete on the context menu. Two confirmation dialog boxes will appear one after another:
- Delete object dialog box is to confirm the deletion of the project itself. Click Yes if you are sure you want to delete it. Otherwise, click No.
To delete a project, right-click its name in the Projects view and select Delete from the context menu. You’ll see a confirmation dialog:
- Confirm the deletion by clicking Yes or cancel by clicking Cancel.
- To delete the project’s files (e.g., configurations, scripts) from disk, check the Delete project contents on disk box before confirming.
Note: If you have deleted a project and then re-create it with the same name, the new project picks up all the database connections of the deleted project.
Exporting and importing projects
To transfer projects between environments, you can use export and import functionality.
Export
- Go to File -> Export -> DBeaver.
- Select the Projects.
- Follow the steps in the export wizard to save the Project.
Import
- On the target machine, go to File -> Import -> DBeaver.
- Choose the Projects.
- Follow the steps in the import wizard.
Tip: Exporting and importing items is helpful for sharing or backing up configurations without migrating the entire workspace.
