Many of our users complete repetitive tasks such as importing and exporting data, database dumping and restoring, comparing data, etc. on a regular basis while working on our app. DBeaver Enterprise and DBeaver Ultimate allow you to automate these routine processes to make them faster and more convenient.

This is a series of articles about tasks in DBeaver. Here you can read the following parts:
Working with tasks: how to get started (now you are here)
Database Tasks View
Composite tasks and how to create them
How to use Scheduler for your tasks
What types of tasks can you create
You can automate the following common tasks:
- Data Compare. This task can be useful for regular comparison of data in the same tables in the test and production database.
- Data Import. This feature allows you to speed up the loading of data from a file into your table when you do it regularly.
- Data Export. Automating this task can be useful if you regularly import data from certain tables to create reports.
- SQL script execution. Scripts can be used to create database backups that do not have native tools for this purpose.
- Shell command execution. Usually used in conjunction with other commands, including the preparation for creating backups.
For PostgreSQL and MySQL, native tool automation is also available. For example, for PostgreSQL database you can create tasks for dumping and restore, enabling and disabling triggers, database or table analyzing etc.

Ways to create tasks
There are several ways to create a new task. Let’s look at each of them separately.
Create a task based on a configuration
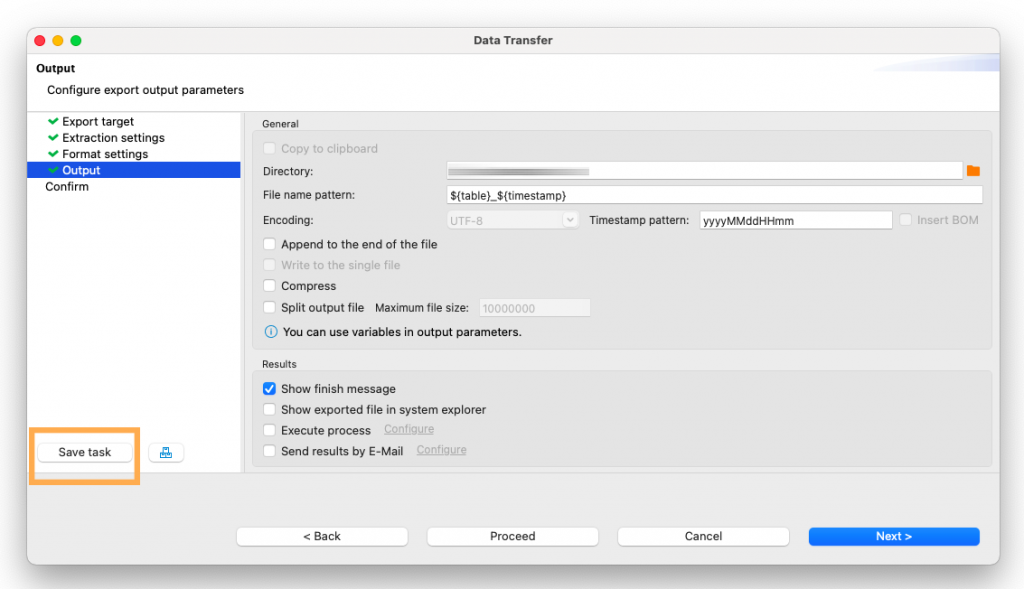
You can save a task during its configuration via the wizard. Let’s look at this method using the example of data export. To get started, select a table that you want to export data from on a regular basis. Right-click on it and choose Export Data from the context menu.
In the window that opens, select the file format that suits you, set the desired settings and choose the directory to save the file. Pay attention to the “Save task” button in the lower left part of the window. At the last step of the configuration it will become active and you can click on it.
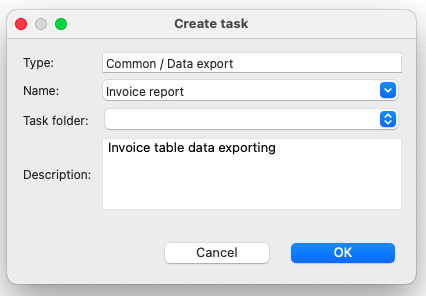
Enter a name and description for your task. If necessary, you can select a folder from the dropdown list.
You can now proceed with your data export if you need it, or click on the Cancel button. Your task is already added to the Database Tasks view where you can run it, schedule it or make edits in the future.
Please note that when you click the “Save task” button, it will not be launched.
Create a task with the main menu
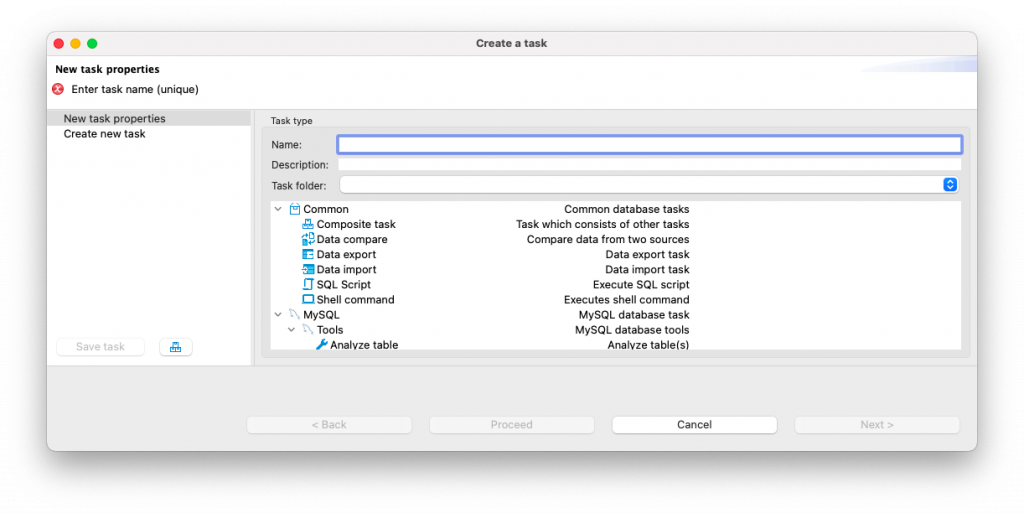
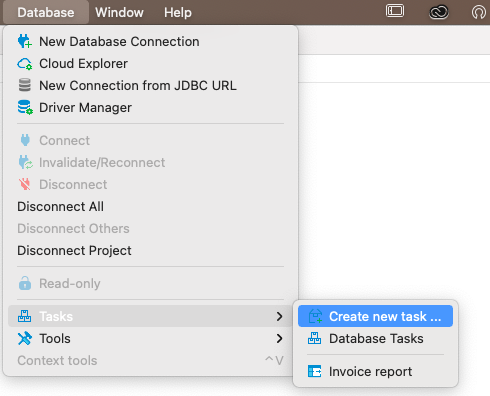
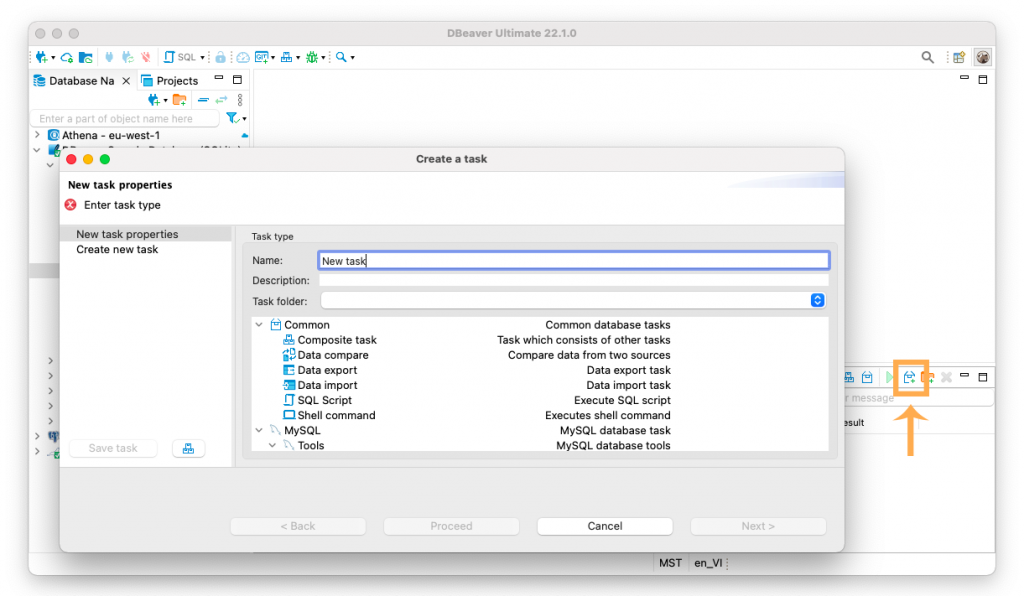
If you work in one of the editors and do not want to open additional views, you can create a task through the main menu. Go to Database -> Tasks -> “Create new task…”.
Now select a task type from the list, enter a name and description, and click on the Next button. In the next step, you need to select the table from which you want to export data. All subsequent steps are the same as with a one-time table export.
Create a task with the context menu
You can also create a task with the context menu in the Database Navigator. This can be useful if you want to organize your tasks ahead of time but do not plan on running them right away. Open the context menu and go to Tools -> Create new task. The window for creating and configuring your task will open.
Create a task with Database Tasks view
Database Tasks view provides you a lot of options for working with tasks including creating new ones. To open this view go to the Main Menu -> Window -> Database Tasks.
Next, you can configure and save your task. This is the most convenient way for users who constantly add new tasks and use already created ones.
How to run your task
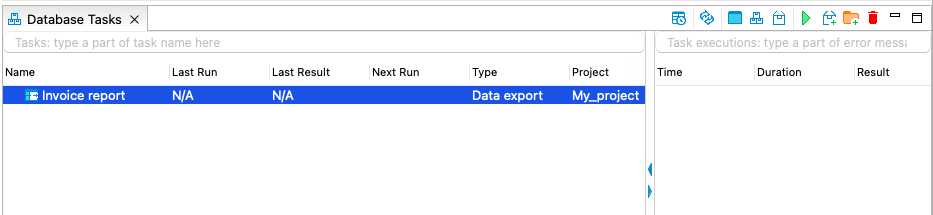
After creating a new task, the Database Tasks View will automatically open. But you can also open it using the main menu. You will see your task in it with its type and the project to which it belongs.
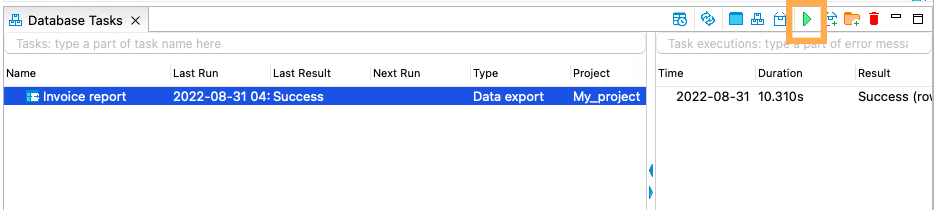
To execute the task, click on the Run button in the top toolbar of this view. If everything is done correctly, the status “Success” and the time of the last run will appear next to the task name.
You can run the latest created tasks directly from the main menu.
To do this, go to Database -> Tasks and choose a task from a list.
Database Tasks view provides a large number of options for working with tasks. Therefore, we will tell you about them in more detail in the next part of our series of articles.