DBeaver users are constantly coming to our team with requests on how to personalise their data experience. For example, some of them would like to customize their toolbars in SQL and Data editors. What if we told you that this is now possible?

As an application with many menus, DBeaver allows users to customize some significant parts. To start exploring how to change different controls, let’s work together to remove some buttons from a few toolbars in the SQL Editor and the Data Editor.
These toolbars already have a few buttons that are not available by default, but you can add them if necessary.
Where to find Toolbar Customization setting
Suppose you run only simple queries and scripts in the SQL editor and never even look at the server output and excitation logs. Customization will help you to clean the toolbar from all unnecessary stuff and leave only the buttons you use: Execute the SQL query and Execute SQL script.
First way to access the toolbars settings menu is to select Preferences from the Window list in the main menu and then open Toolbar Customization in the User Interface.
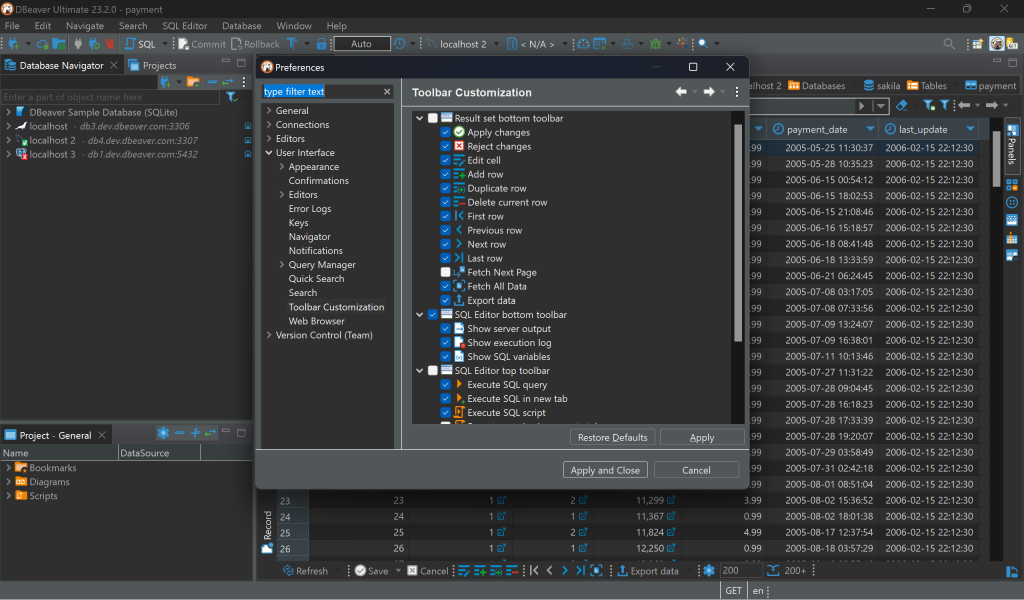
In it, you can notice the options to select buttons in three toolbars: the Result set bottom toolbar, SQL Editor top and bottom toolbars. By selecting or unchecking the box next to the name of each of these items, you can add or remove all the buttons of a particular toolbar.
As you can see, the main advantage of customization with preferences in the main menu is that everything is in one place. You can adjust it quickly, and you do not have to switch between editors. However, if you are still unsure about which controls you want to remove and which you want to keep, it is better to use customization within features.
How to open Toolbar Customization directly from SQL Editor
You can choose buttons by opening Toolbar Customization directly in SQL Editor or any Result set, including the Data Editor.
If you edit the list of buttons in the Result set bottom toolbar, an identical list will be displayed in the Data Editor.
This way of setting up is suitable if you want to see the result of your changes all at once. For example, if you are editing the SQL Editor toolbar, it can be helpful to check that the buttons you need are the ones that remain and that anything unnecessary has been removed.
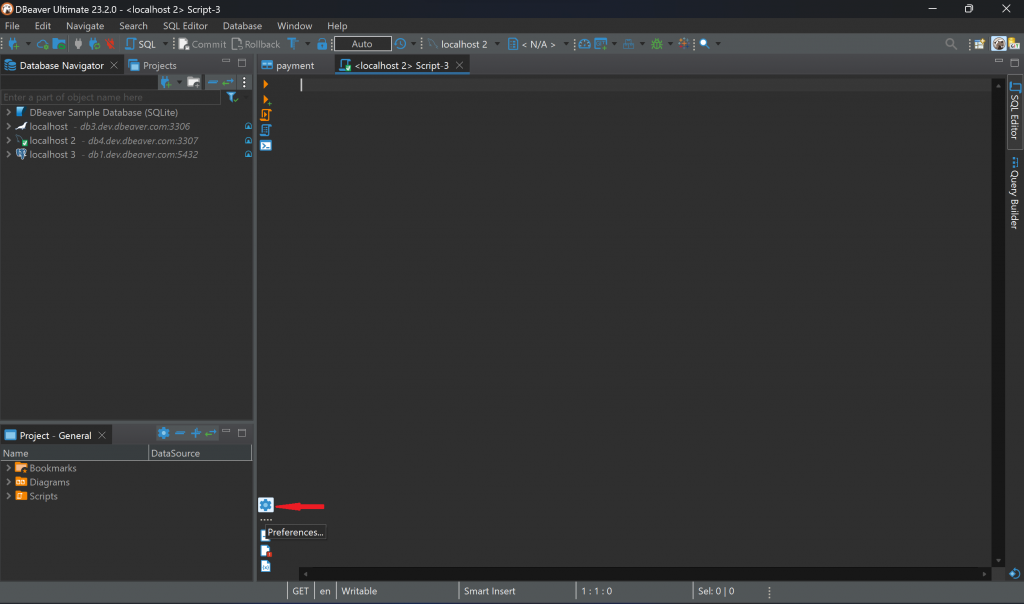
To open the Toolbar Customization menu, you need to click on the gear icon in the side toolbar. After opening Preferences, select the required item.
As we recall, you work with data, but you rarely take on the role of an administrator. So, you do not need buttons from the bottom toolbar like ‘Show server output,’ ‘Show execution log,’ and ‘Show SQL variables’. Now, you can remove them with one click.
Of course, if you need to restore any buttons in the future, you can do that at any moment. You should return to the toolbar settings menu and select “Restore Defaults.”
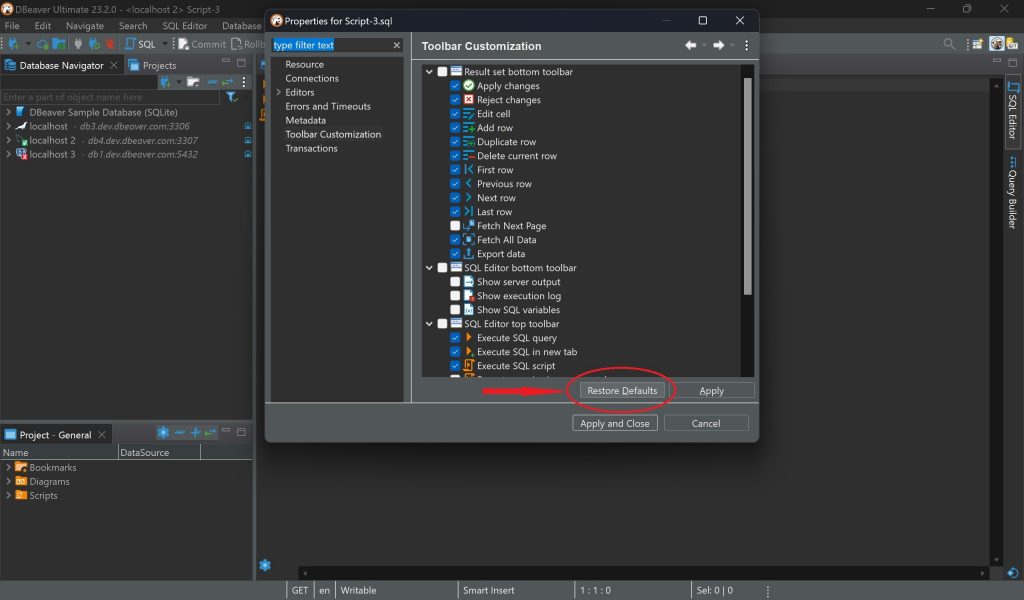
If you primarily use simple join queries, you may also want to remove most buttons on the top SQL Editor toolbar. You can leave only ‘Execute SQL query’, ‘Execute SQL query in new tab’ and ‘Execute SQL script’.
How to open Toolbar Customization from Data Editor
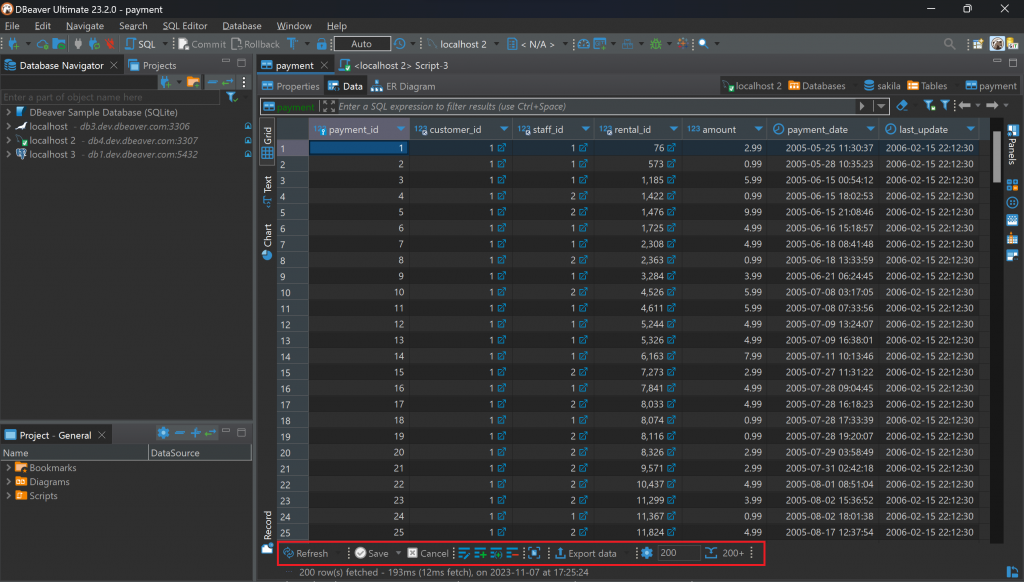
Now, let’s move on to changing the buttons list in the Data Editor. In the table editing feature you need to click on the Gear icon in the bottom toolbar for customization.
If you use the keyboard and mouse to navigate the table, you can remove buttons like ‘Previous row,’ ‘Next row,’ and ‘First row,’ then click ‘Apply and Close.’ Or you can save all the buttons in the ‘Result set bottom toolbar’ list to use any of them when necessary.
As you can see, you can remove everything unnecessary from any toolbar, making it simpler and easier to understand for yourself. By leaving only the necessary interface elements, you can increase productivity without resorting them to external resources. That is why you can change almost any control in our tools in this way.
Now you know more about how to add and remove buttons from different menus in our desktop tool. In future articles we will continue to tell you about customization options. Follow our blog updates to get all new materials about DBeaver features.