If you want to manage MySQL in the Azure cloud, there are two ways you can create a connection to it in CloudBeaver.
The first is the standard creation and configuration of a new connection in the main menu. The second is through Cloud Explorer. Let’s look at the first one.
Connect with a Create New connection feature
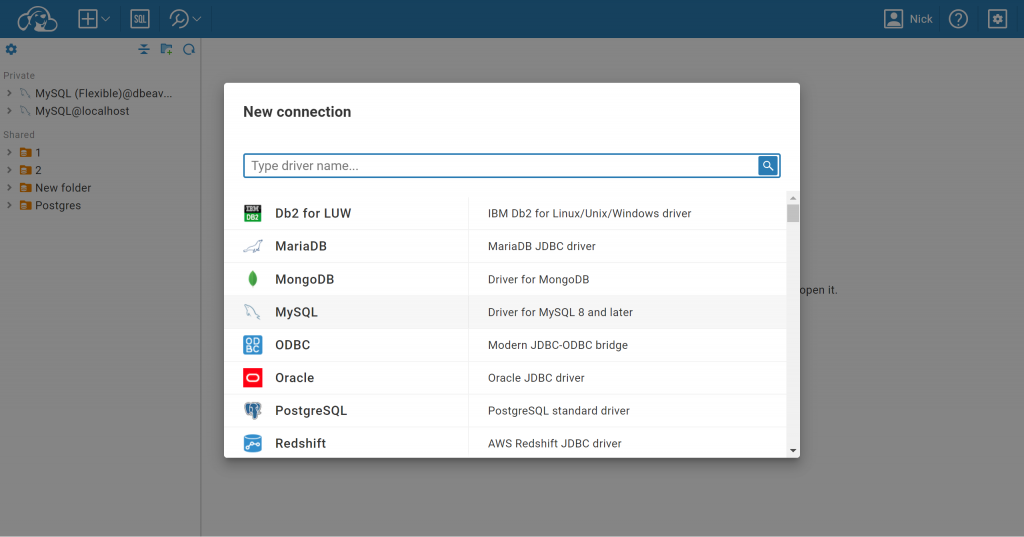
1. To get started, open CloudBeaver and log in to your account. Then, click on New Database Connection at the top of the application toolbar, choose MySQL from the list of database drivers, and then select Next.
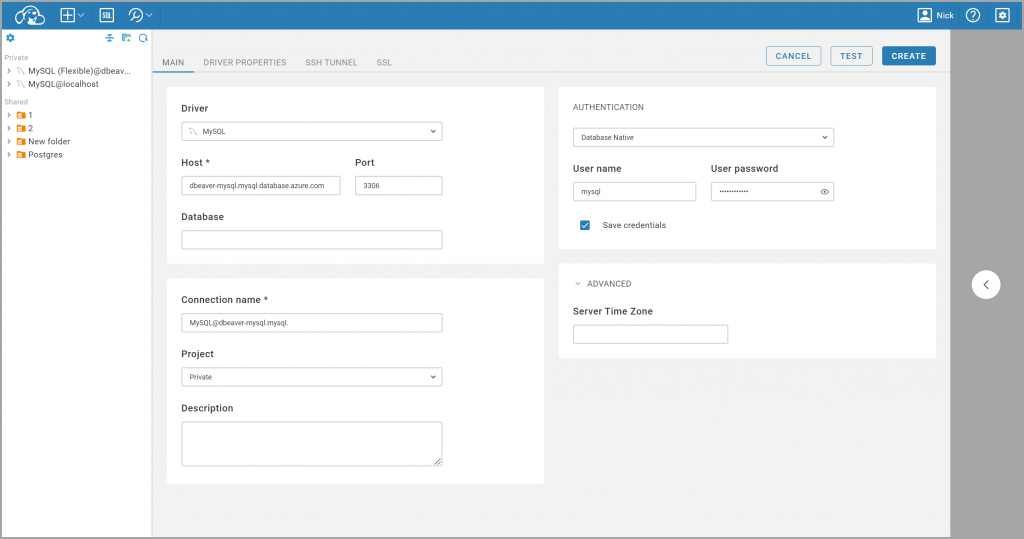
2. In the next step, fill in the Server Host, Port, Username, and Password fields.
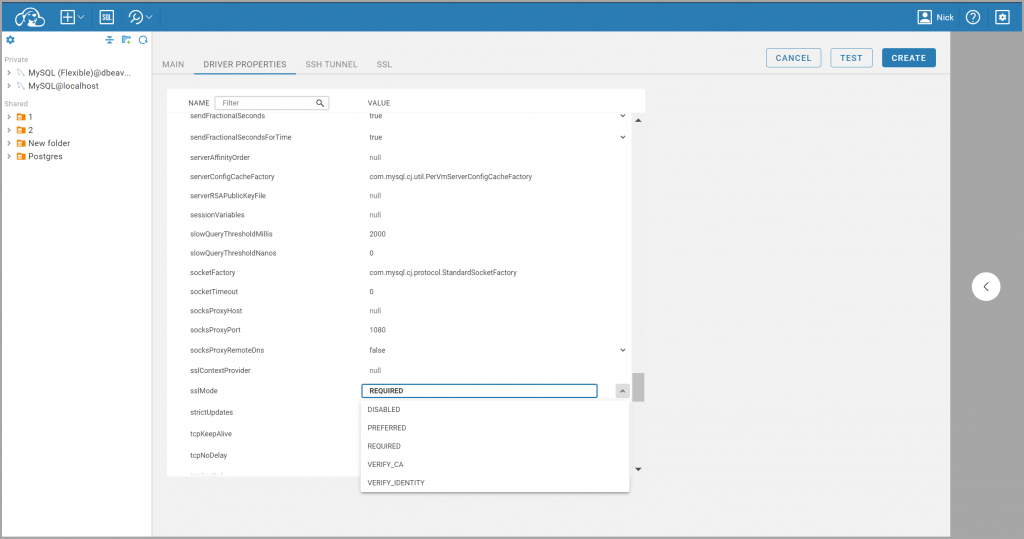
3. If a configuration requires utilizing an SSL certificate, go to the SSL tab, check the Use SSL box, and fill in all necessary fields. Please notice that Microsoft recommends enabling the Enforce SSL connection setting whenever possible for enhanced security. For this, go to the Driver Properties tab and change the sslMode to “Required”.
4. After completing all settings, you can click the Test button to check if everything is correct. A pop-up with the successful result and driver data will be shown in the bottom left corner.
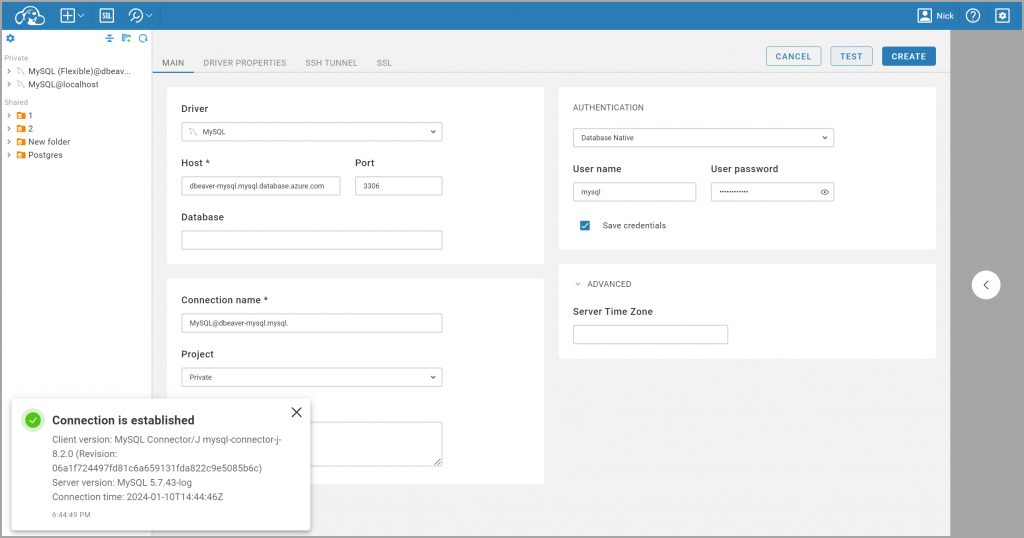
5. Finally, click the Create button. The new connection will be added to the navigation tree.

Now you can connect to the database and start working with it.
Connect using Cloud Explorer
In addition to creating a connection using a standard wizard, you can use Cloud Explorer, which provides an entry point for all cloud databases.
With this feature, setting up cloud configuration once. Afterwards, it allows you to work with the tool to create connections, edit configurations, and add as many new ones as needed.
To create a connection to an Azure Database for MySQL – Flexible Server database, perform the following steps:
1. Start by clicking the Cloud Explorer on the left side of the CloudBeaver top toolbar.
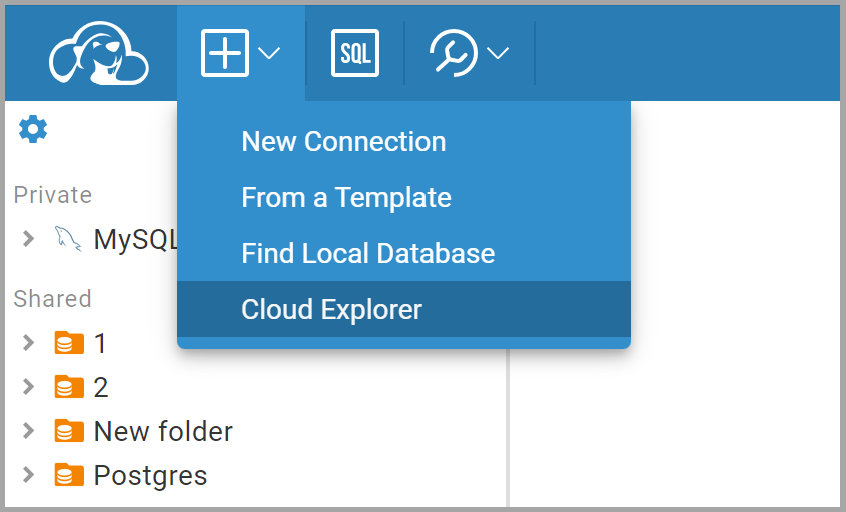
2. In the pop-up that shows, go to the “Microsoft Azure” tab. Here, you need to fill in the Client ID field. This can be found in the Azure AD account’s App enrollments area.

3. After typing in the ID, click the Apply and Close button. The completed configuration and available databases will appear in the list.
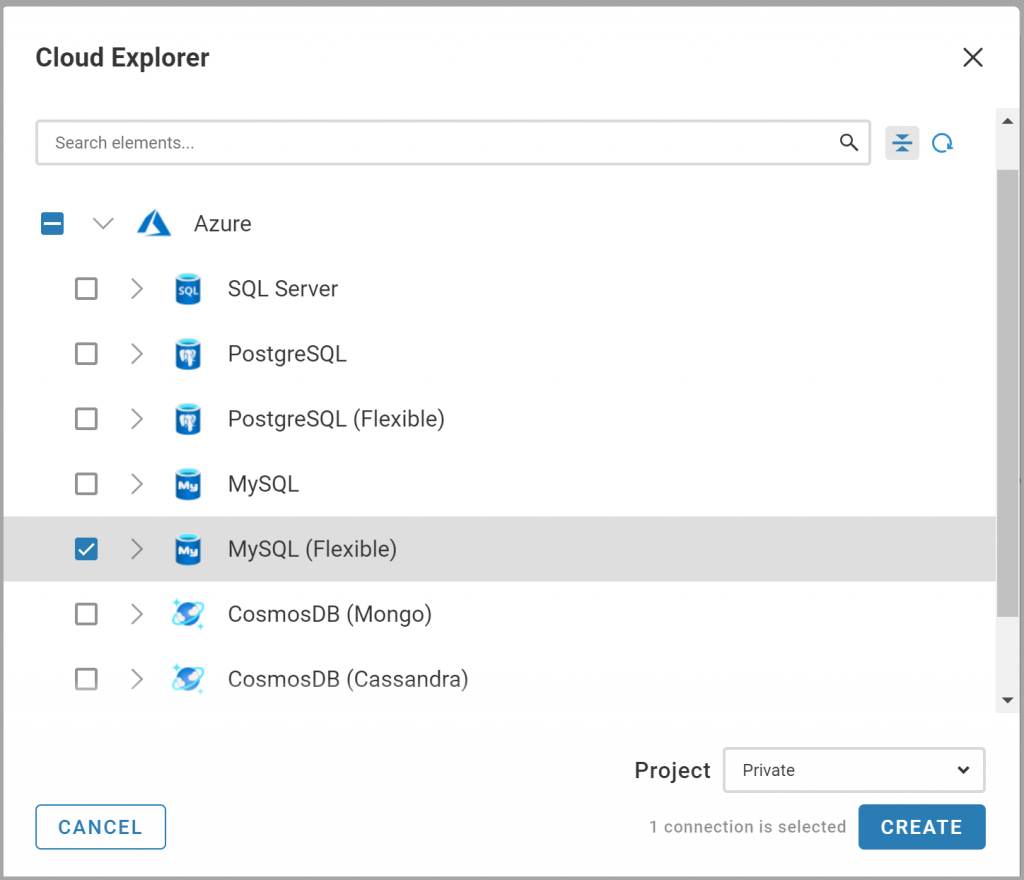
4. If necessary, the administrators can create as many configurations as required, which will be shown. This connection creation option allows you to choose between all the databases in the cloud.
To add, edit or remove the Microsoft Azure configuration click the Plus, Pencil, or Trash button accordingly.
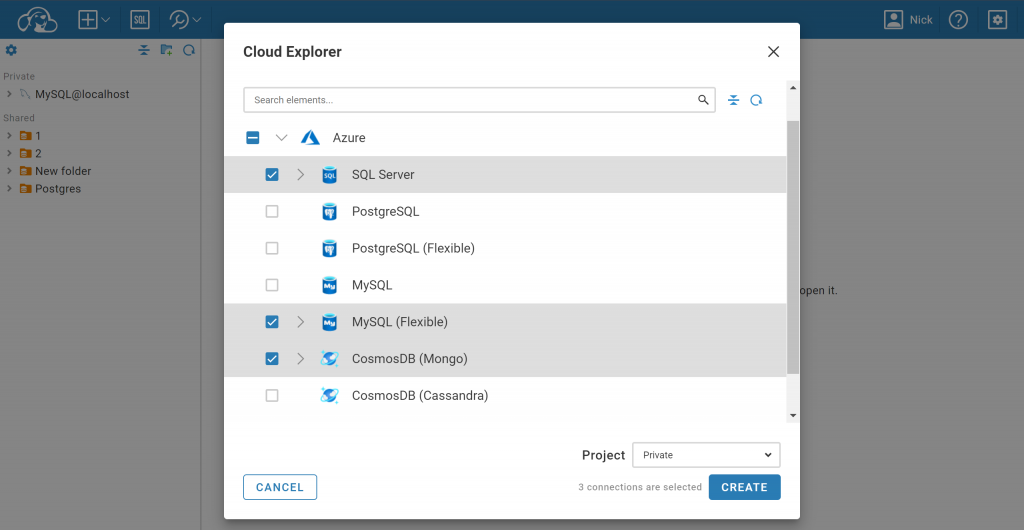
5. When you click the Expand button corresponding to the MySQL database, you will be redirected to the account login confirmation through Microsoft Azure in an authentication popup.
After confirmation, the connection will appear in the Database Navigator.
Earlier we told you about connecting to MySQL in Azure via DBeaver PRO.
Conclusion
Using the instructions above, you can easily connect to your MySQL database on Microsoft Azure with CloudBeaver.
Configuring the connector to MySQL in the cloud can be done in the same manner as for any on-premises database. However, using Cloud Explorer is recommended for its ease and reliability. While connecting to cloud databases using the standard method might be more familiar to regular users, Cloud Explorer offers the advantage of not having to fill in numerous fields and the convenience of simultaneously managing multiple configurations. This makes it particularly beneficial for those who primarily handle data in the cloud, as it saves significant time.