The ability to extract and share data in various formats is essential for effective data management. When you’re archiving, analyzing, or collaborating, you need the right tools to get your data where it needs to be.
This guide will show you how to easily download data from whole tables and specific result sets into DBeaver, allowing you to keep working. With support for 10 different file formats and detailed control over the extraction process, you can tailor your exports to suit your every need.

Whether you’re a data analyst creating reports, a developer archiving database tables, or a manager sharing information with your team, migrating or offloading data is essential. We’ll take a look at the export options available in DBeaver and provide practical examples to help you achieve your goals.
Export the entire table from DBeaver to a CSV file
There are three places where you can start the export process of all of the database table data to a file:
– The context menu in the Database Navigator
– The bottom toolbar of the Data Editor
– The context menu of the Data Editor
Any of these options will open the same Data Transfer wizard.
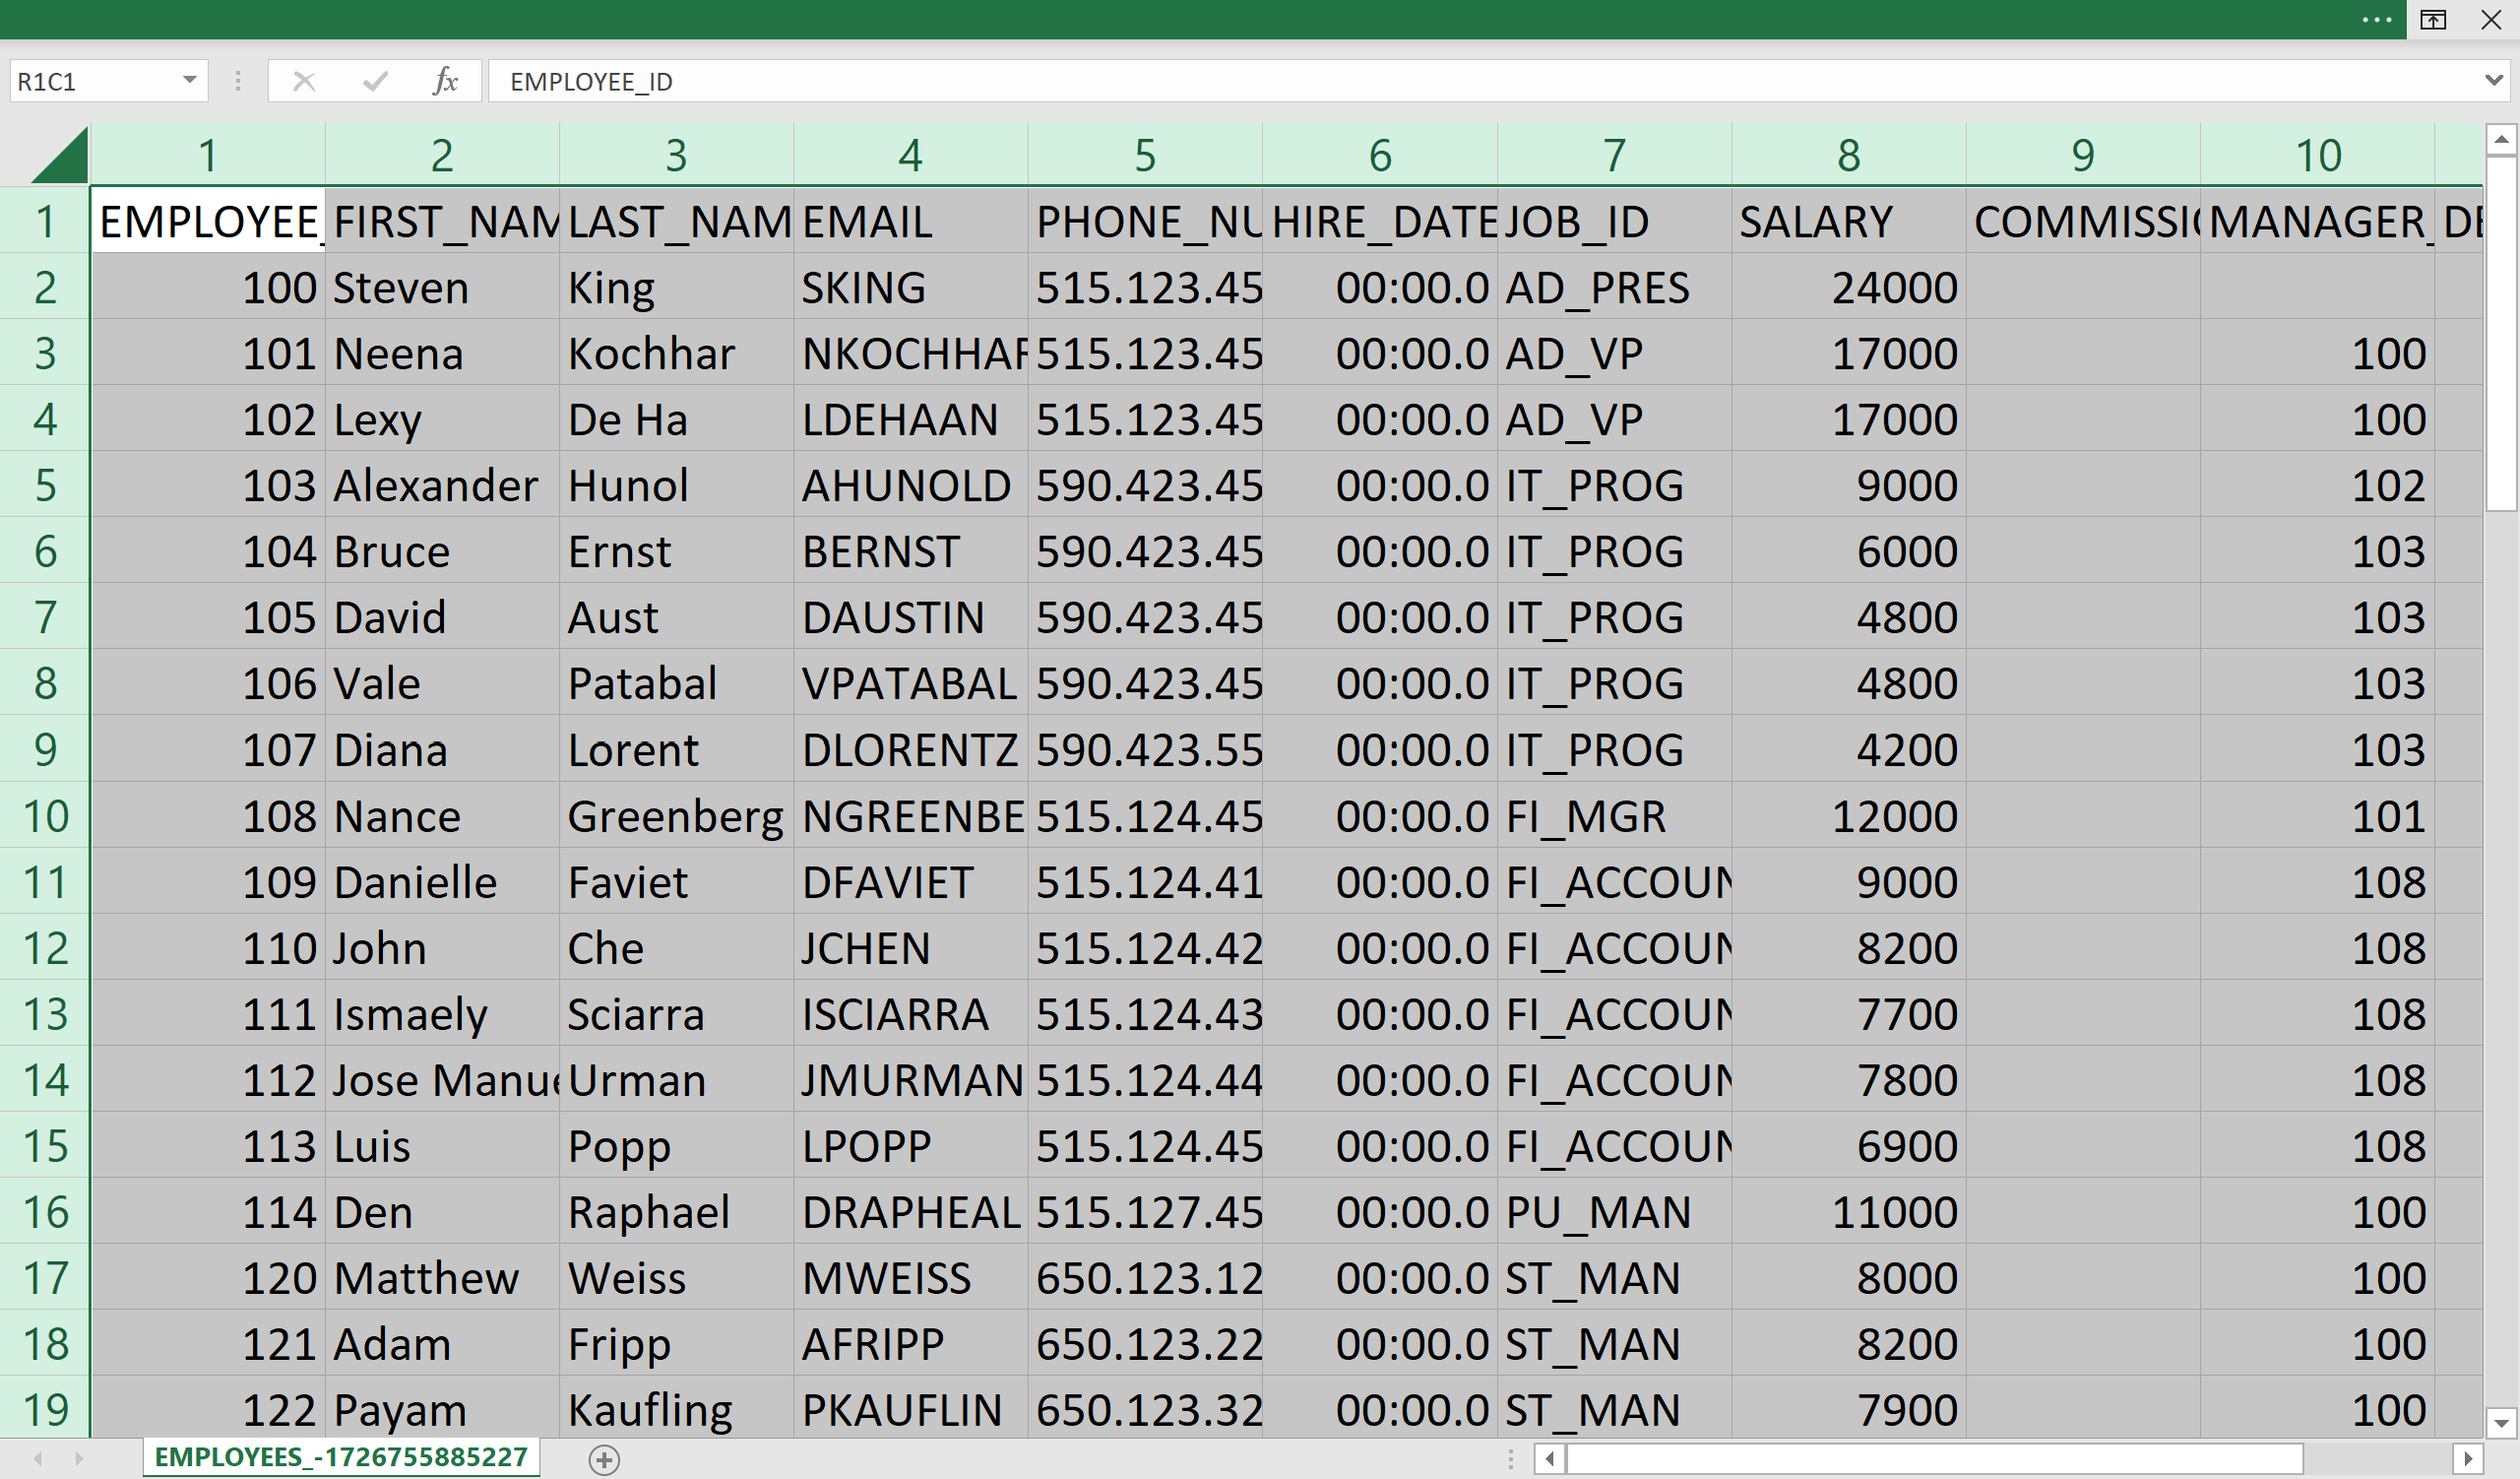
To illustrate the steps of exporting data, we’ll use a table from an Oracle database as an example. However, this process is the same for all other relational databases supported by DBeaver.
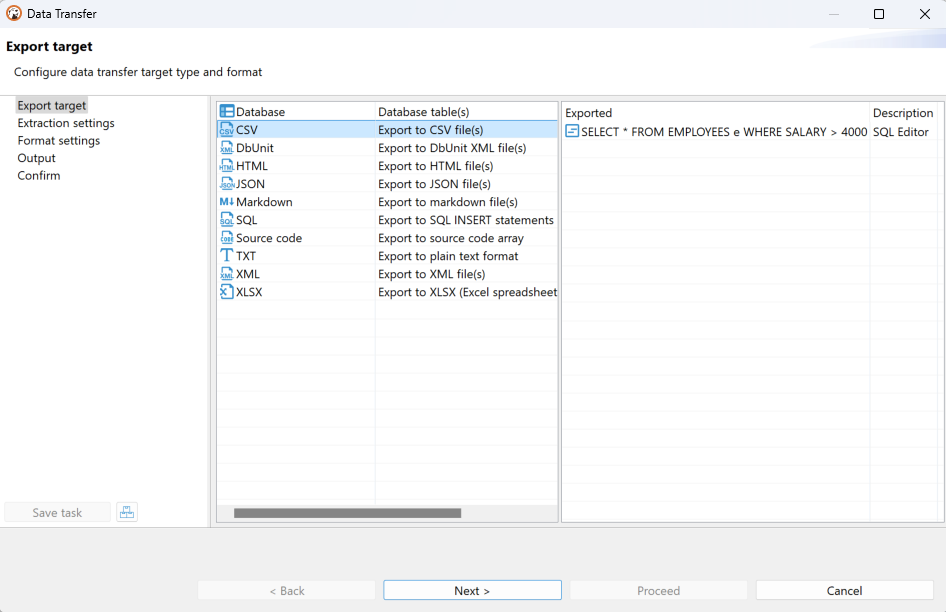
1. Right-click the table in the navigation tree and then go to the Export Data option. The Data Transfer wizard will open and you will see the list of supported file formats. Here, you will notice that the ability to export data into an XLSX format is only available in DBeaver PRO.
Let’s export our table into CSV, one of the most popular formats for storing data.

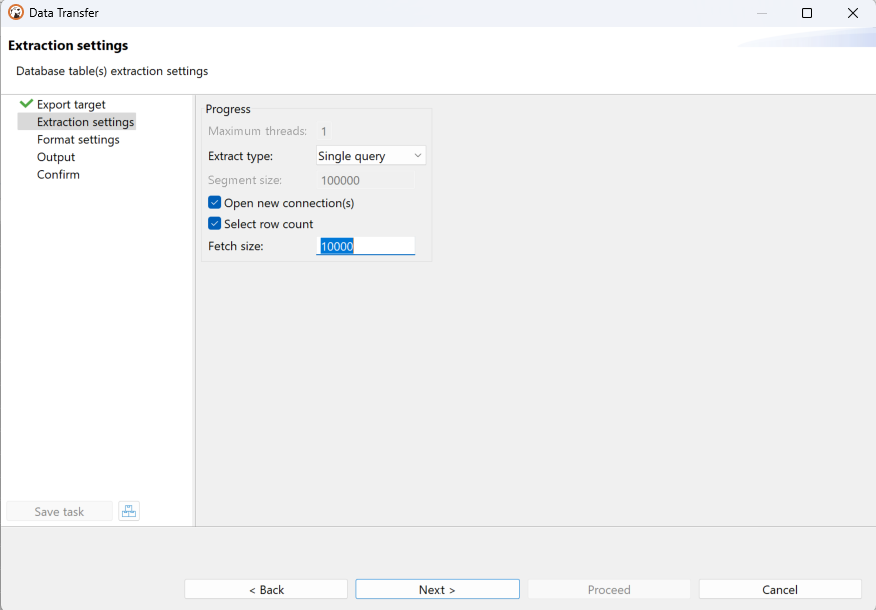
2. Keep the Extraction settings as default since this table doesn’t contain many rows. However, if you export huge tables, you need to adjust the Extract type and the Fetch size. To learn more about all the settings, please read our Wiki.
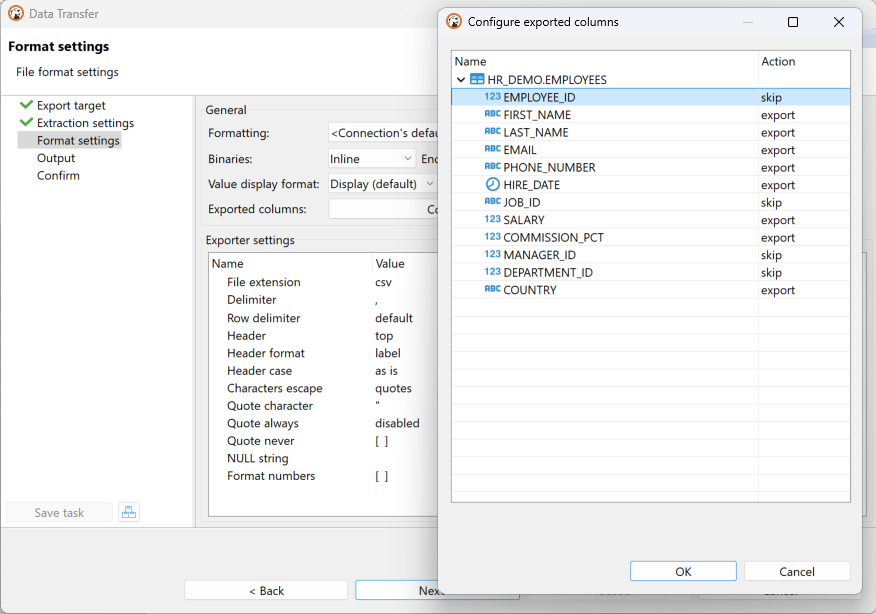
3. Adjust the Format settings if needed. Suppose we want to skip a couple of unnecessary columns. We can do this by clicking the Configure button.
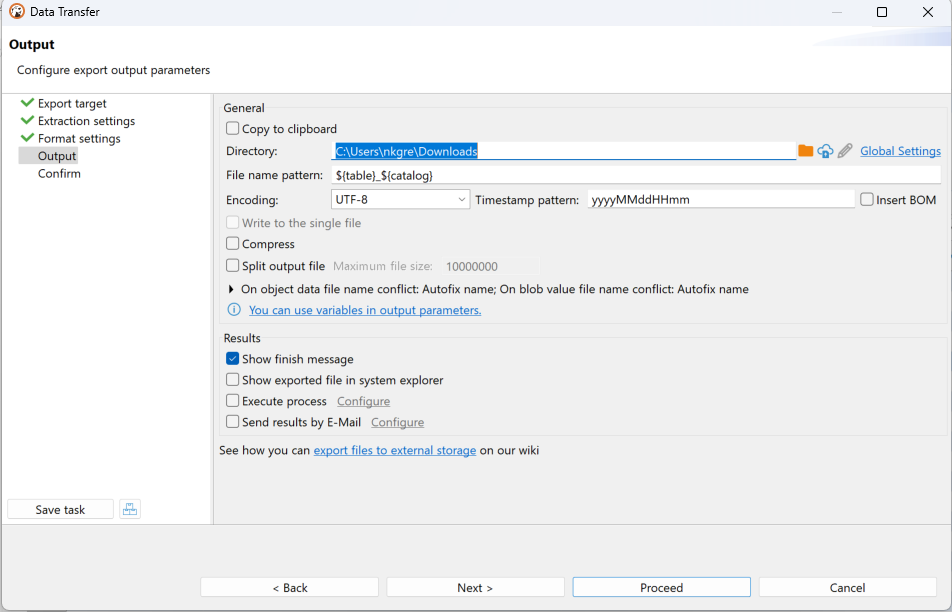
4. Define the output directory and set the filename pattern in the Output step. To see a list of supported variables, click the hint or start typing a variable with the $ sign.
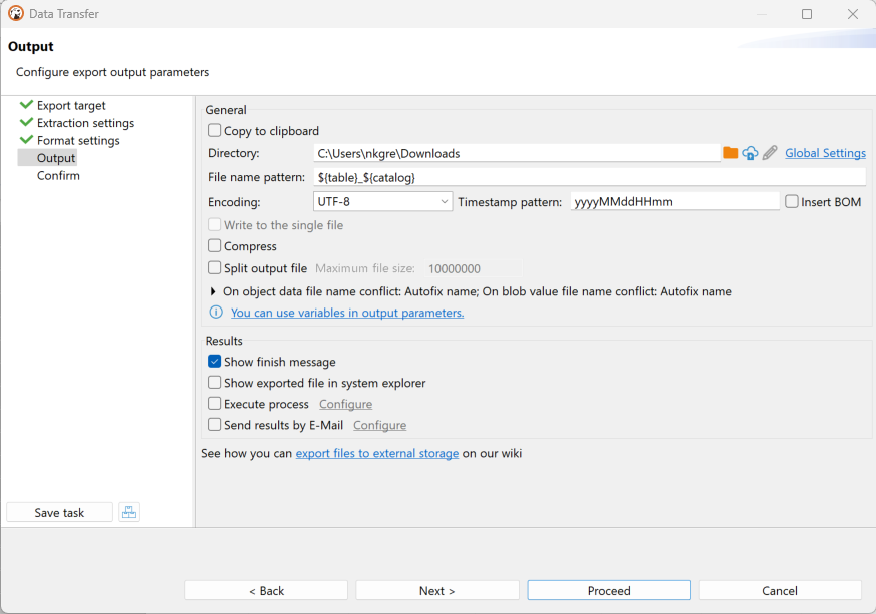
That’s all we need to set up. Click the Proceed button and wait for the export to complete.
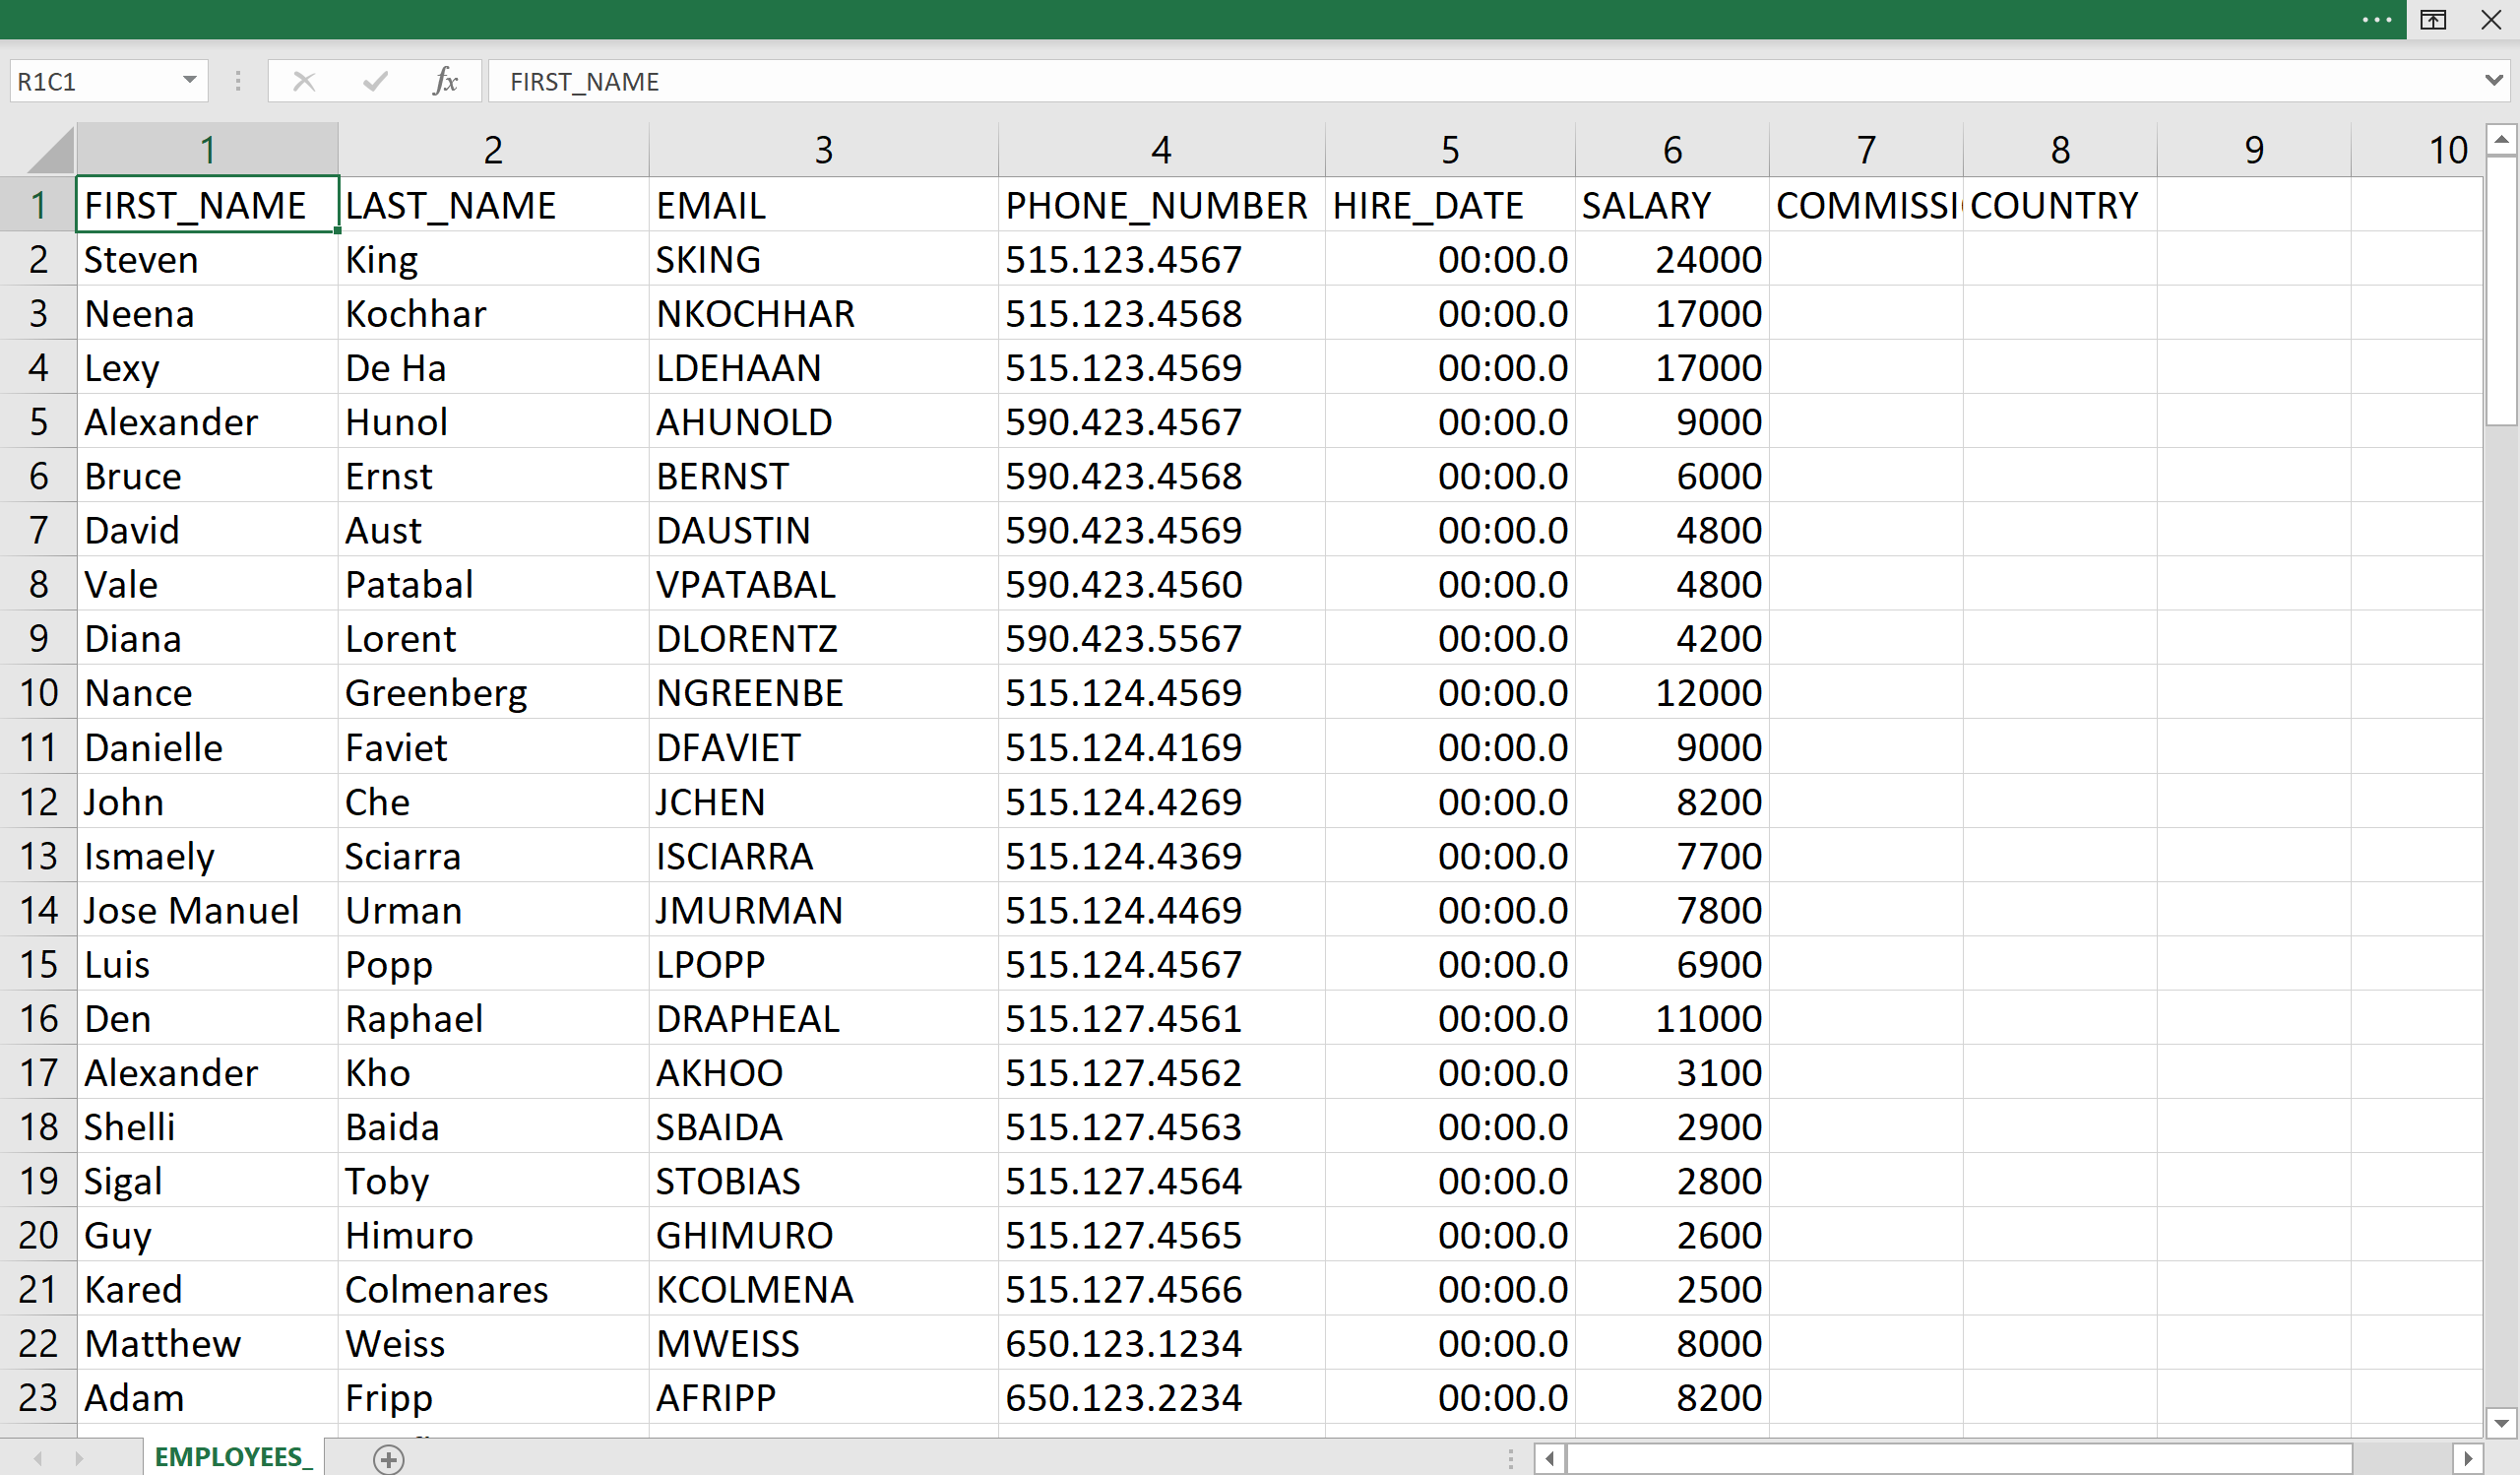
The new file will appear in the specified folder. You can open it to verify that everything is correct.
Export the result set to a file
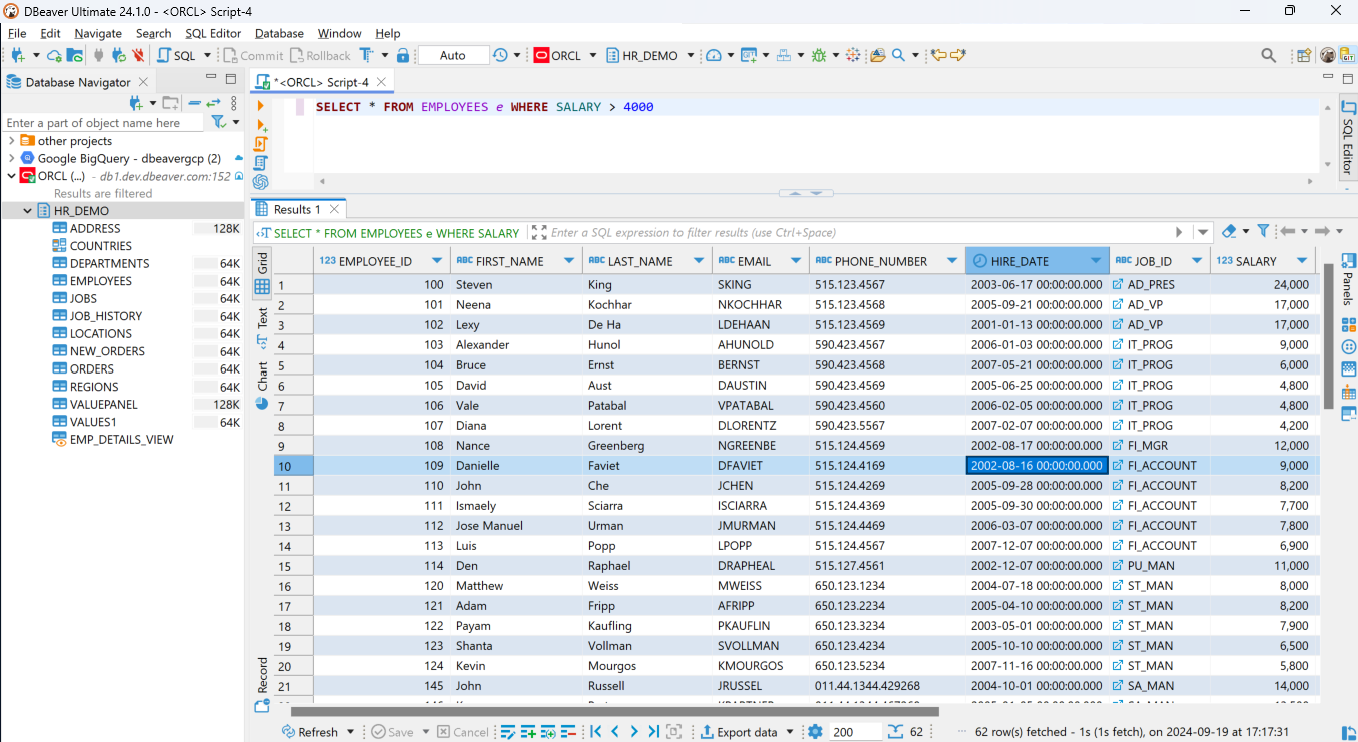
Suppose we want to export specific data instead of the entire table. For example, a financial analyst needs to review employees with salaries over $4,000 to analyze compensation trends or prepare a budget report. We can achieve this by executing an SQL query with the necessary conditions or by using the filter field at the top of the table.
In our example, we’ll focus on exporting only the employees with a salary over 4000.
1. Execute the SQL query to retrieve the desired data. After execution, you’ll get a result set in a grid format. It looks and functions the same as a database table in the Data Editor, so we can export this result directly to a file.
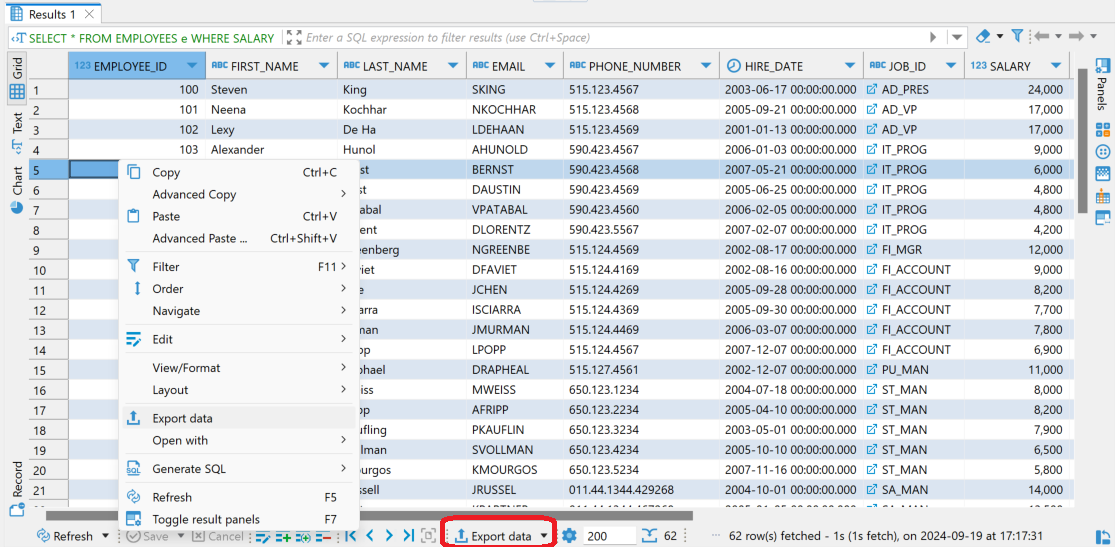
2. Initiate the export process. Click the corresponding Export button on the bottom toolbar or use the context menu in the grid. You can assign a different default command to this button by clicking the small arrow icon on its right side.
3. Review your query in the Data Transfer wizard. During the first step of export configuration, you’ll see your query displayed, ensuring you’re exporting the correct data set.
4. Keep the preferences as default and confirm that the Output settings remain the same as your previous export.
5. Click the Proceed button to execute the export. A new file will be created. Opening it will show that only the data matching your SQL condition has been exported.
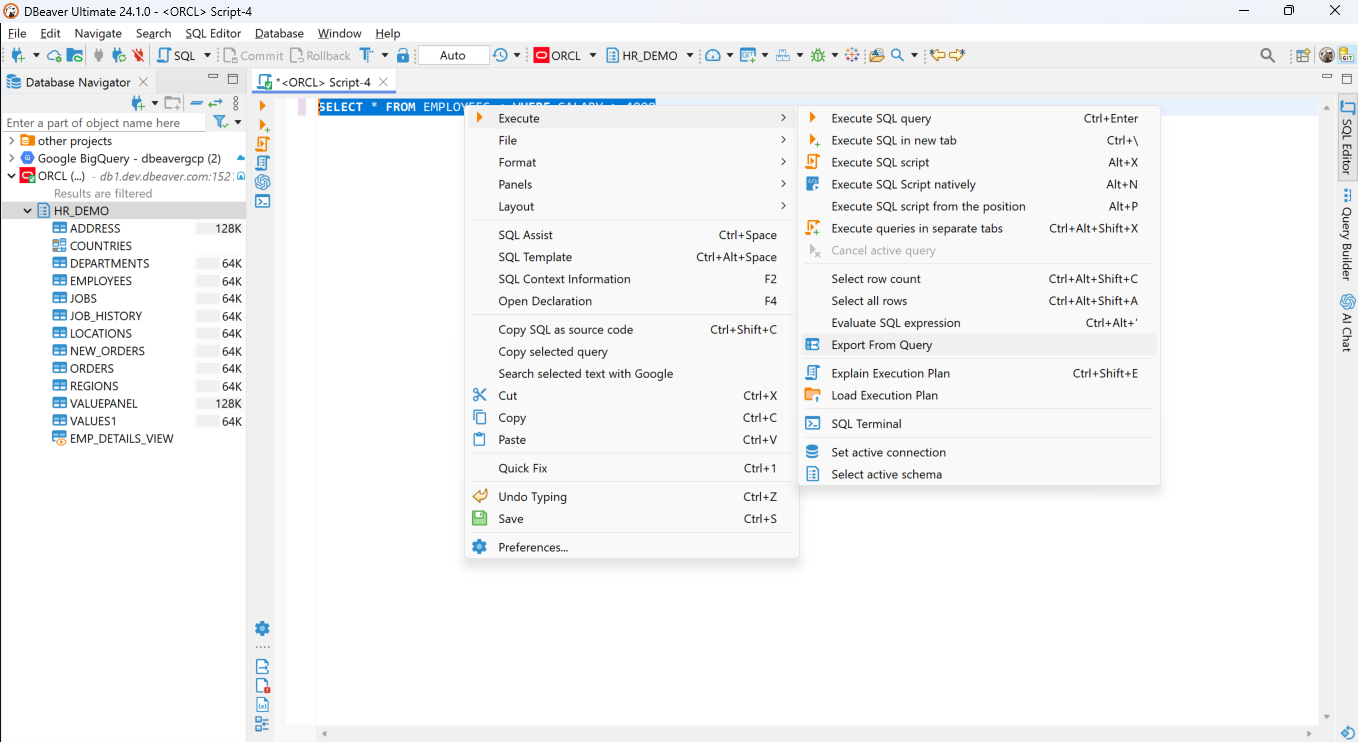
6. But what if your query is quite complex and you don’t want to overload your server or the app’s UI? In this case, you can skip the execution step and proceed directly to data extraction. Select your query in the SQL Editor, open the context menu, and choose the Export From Query option.
Now you know how to export either an entire table or specific data after SQL query execution into a file with DBeaver. This functionality is invaluable for tasks like sharing result sets with colleagues, analyzing data, creating reports, or preparing presentations. The Data Export feature is designed to assist you in all these scenarios.
Data Export is available in all our desktop and web applications and can help you transfer your data using a convenient UI. To learn more about all the advanced settings you can apply for your exporting process, please read our Wiki page.
In the upcoming articles, you can learn how to export data from non-relational databases and how you can use this feature with documents.