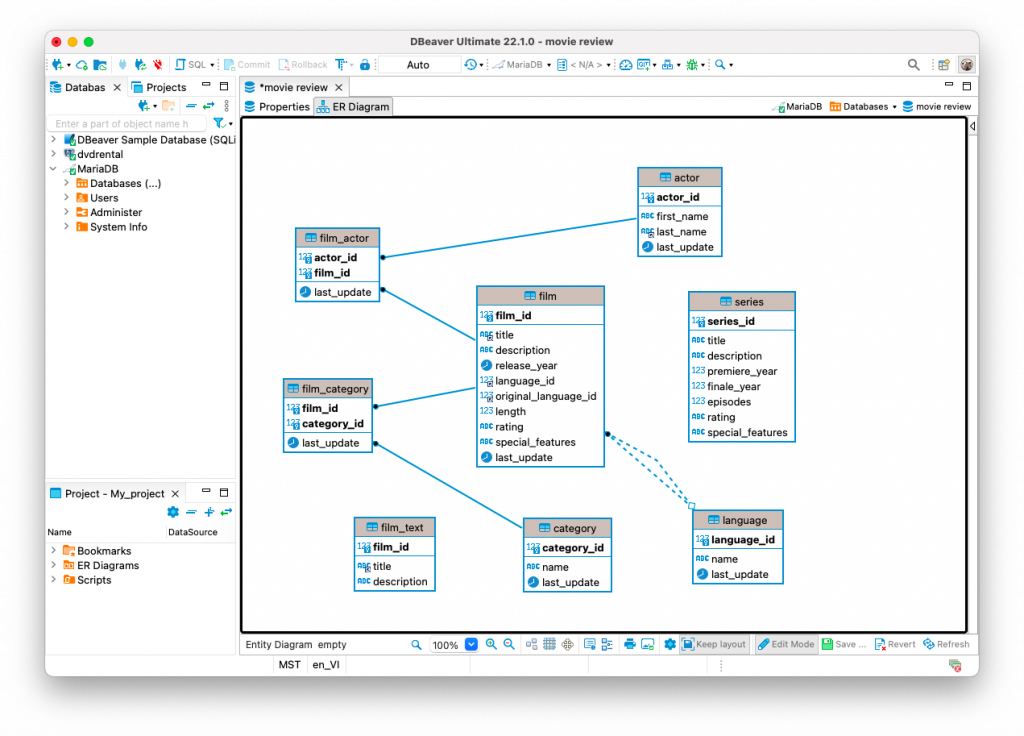
In our previous article, we talked about two ways how to use diagrams with DBeaver. But ERD can be used not only to view and navigate through data but also to directly make changes to the database.
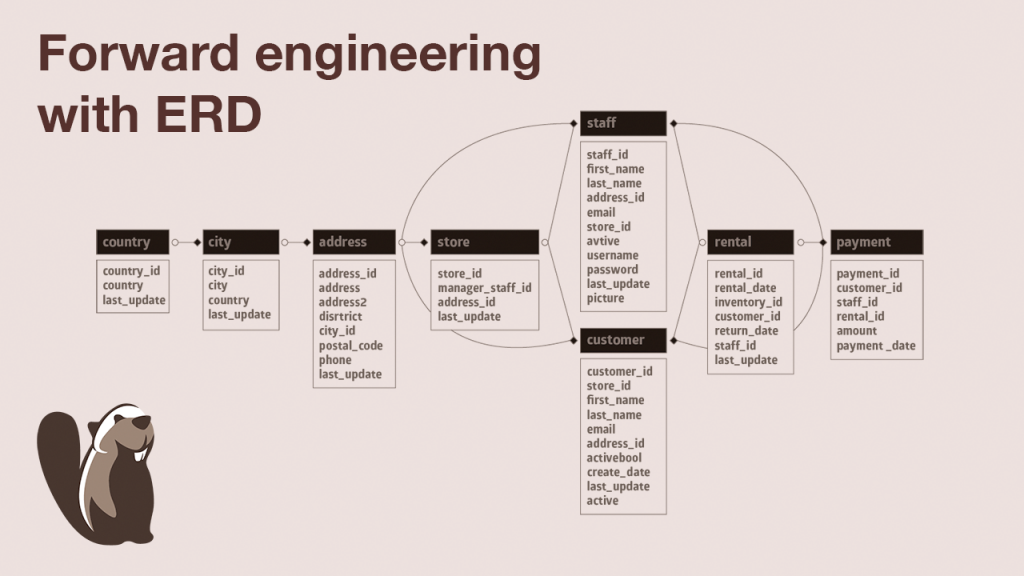
We call the process of creating a database based on a pre-designed schema forward engineering. In our app, there are two ways to do it:
- Through Properties in the Data Editor;
- Through ERD (only for DBeaver Enterprise and Ultimate Editions).
Today we want to tell you about doing it through ERD. When you design a database schema using a diagram, you immediately see the impact of your changes on the tables and the relationships between them. In addition, you can quickly alter some metadata or even create new tables without opening the Properties tab.
How to get started
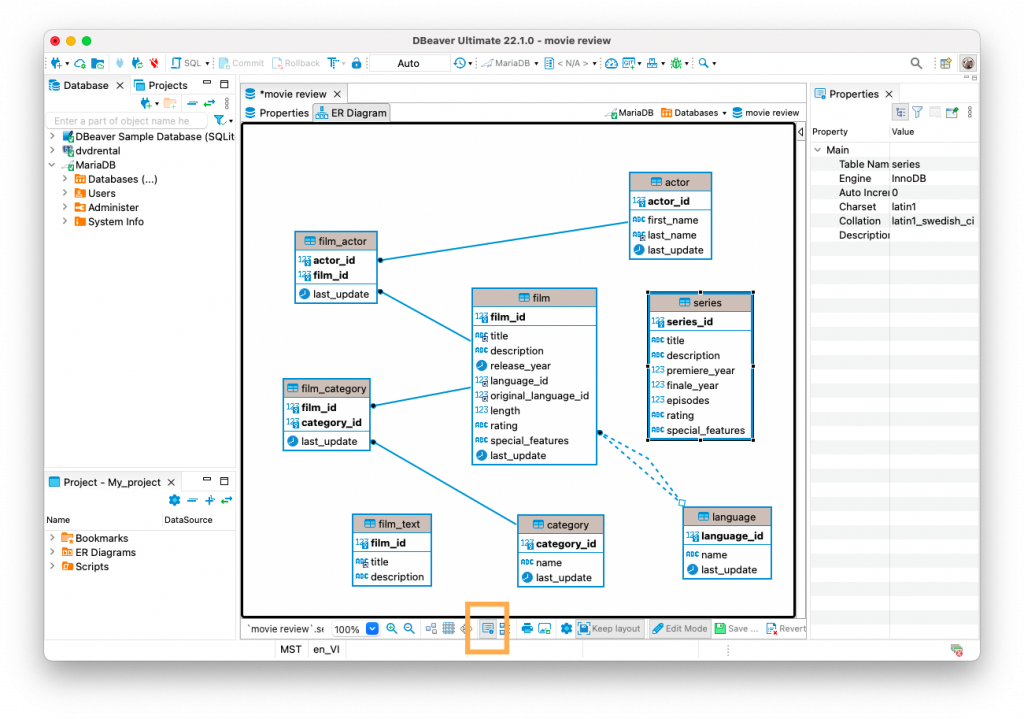
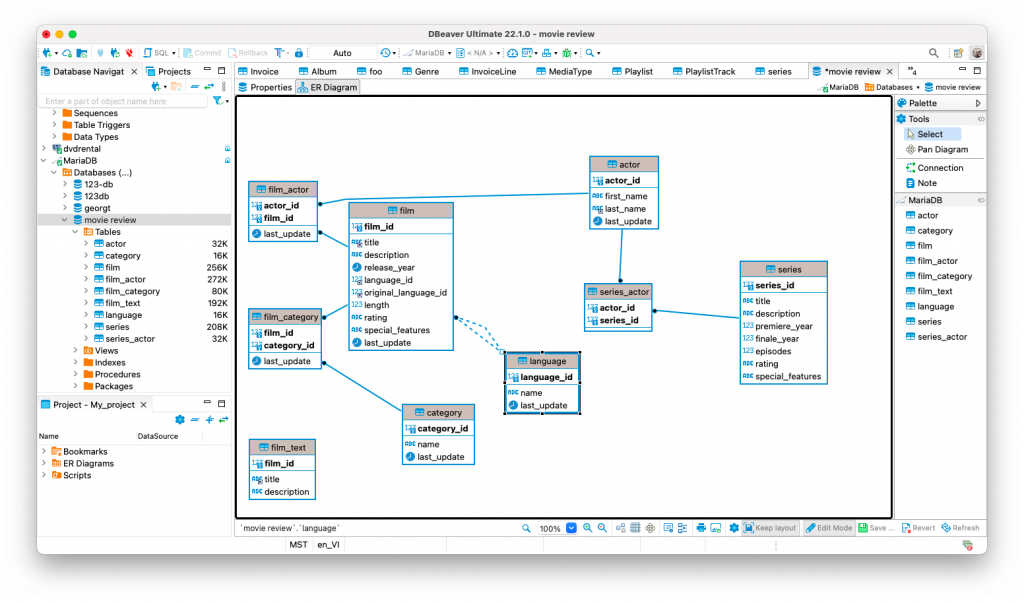
Open the diagram and click the Edit Mode button on the bottom toolbar. When you switch to this mode, you will see a black border around your diagram.
If you want to edit some metadata in your table, you will need to choose the desired column. In the Properties tab on the right side of the diagram window, you can change data types and other parameters. For your convenience, you can close this tab and then open it again using the corresponding button on the bottom toolbar.
To change the column’s name, select it with one left click and then click on it again (just like you do with folders on your hard drive). Enter a new text and press Enter or click anywhere else in the diagram window to apply the changes.
Add new objects
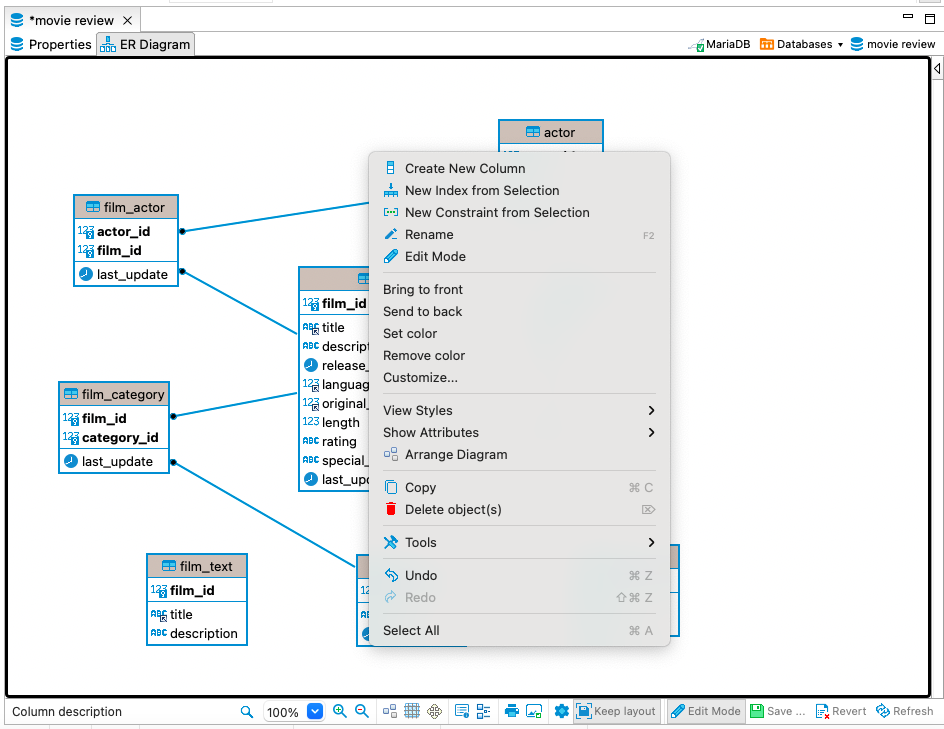
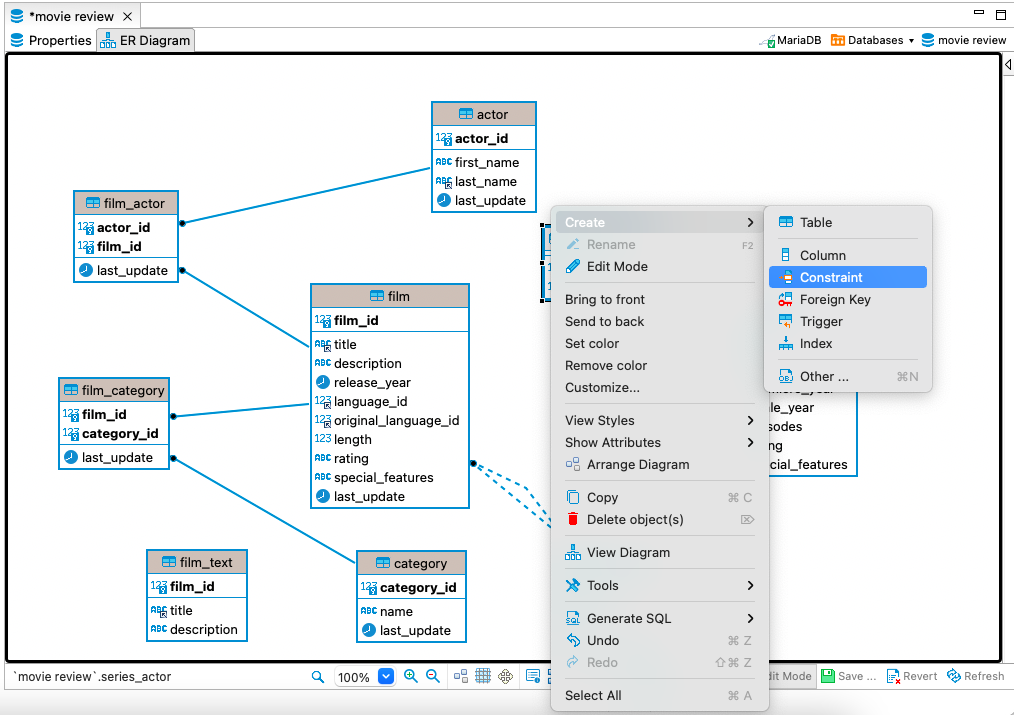
The context menu provides great opportunities for editing your scheme. Using it you can add or change metadata in the existing table or create a new table with the necessary parameters.
Let’s take a look at adding new elements to a diagram using our old friend Louis’ problem as an example.
In one of our previous articles, we talked about how he was able to add a new table to his database using the Data Transfer feature. Now he wants to link the loaded table containing information about the TV series with the already existing table with the actors’ names.
Since all the relationships in his database are created through dictionary tables, he needs to add another table like this and create the keys. After that, he will be able to link the Actor and Series tables. Let’s see how he can do it step by step.
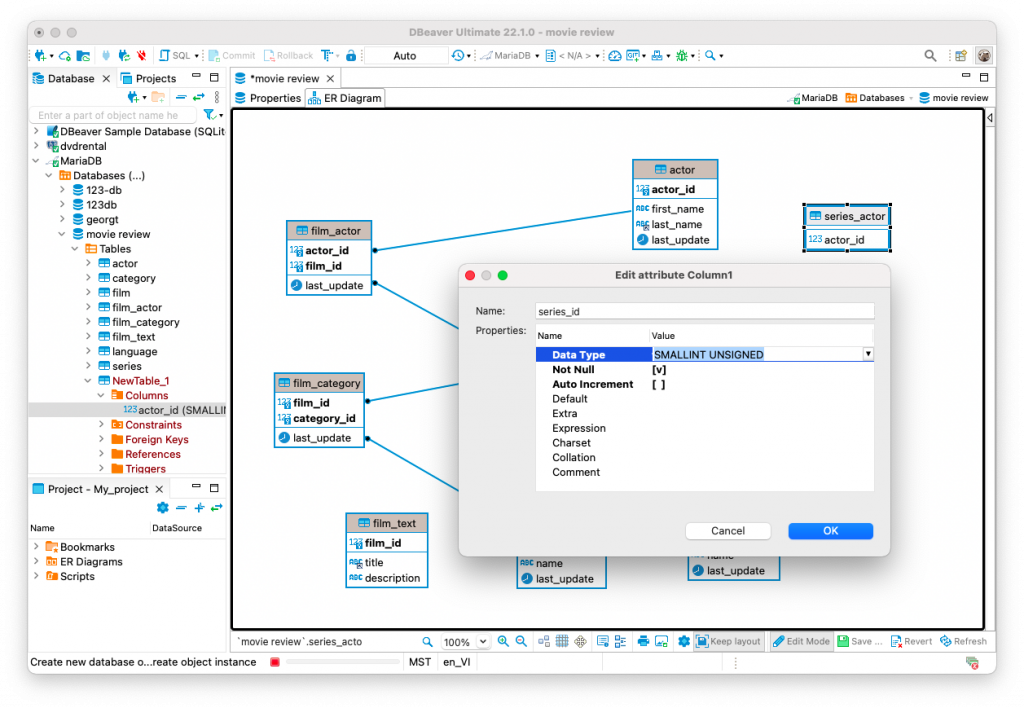
Louis must first right-click on any free area of the diagram window and choose “Create new table”. By selecting the table name and clicking on it, Louis can enter the text he wants. Next, he needs to create two columns: actor_id and series_id. To do this, he right-clicks on the new table and goes to Create -> Column. In the window that opens, he can set the name of the column, select the data type and configure the necessary parameters.
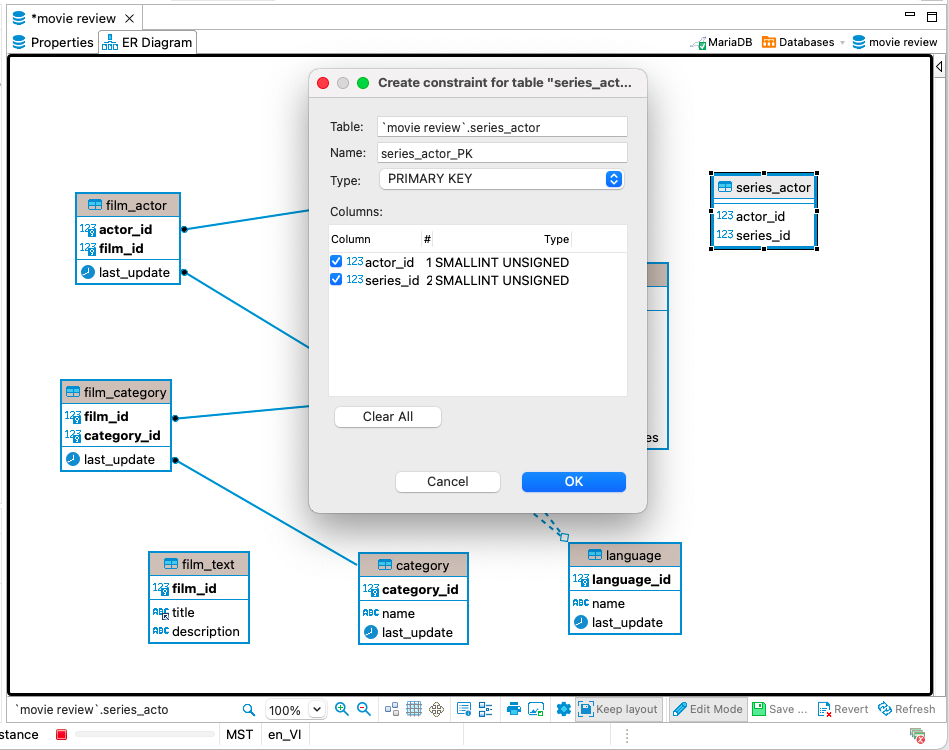
Now Louis will make the added columns a key by going to Create -> Constraint.
The only thing left to do is to link the new table with the Actor and Series tables. To create a connection Louis needs to select a column in the Actor table, drag and drop it to the particular column in the new dictionary table, and confirm the foreign key creation in the window that opens. By repeating this action for the serial table, Luis will successfully create a relationship between his entities.
Please note that you can create a new database only based on the existing one.
It can’t be done from scratch.
Save the result
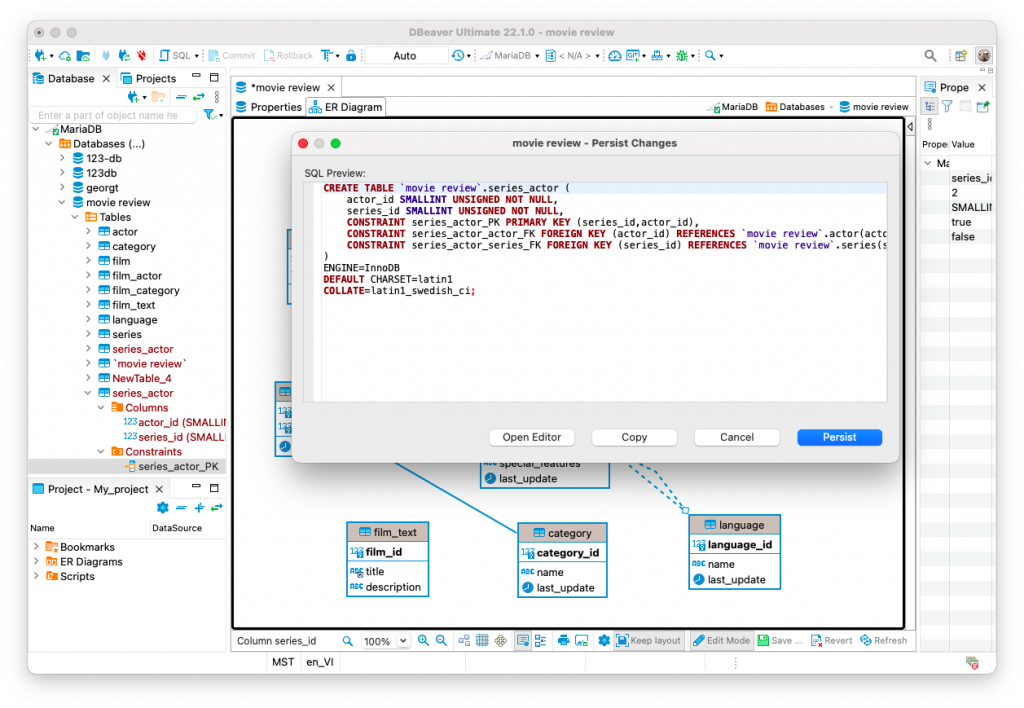
After making all the necessary changes, you and our hero Louis can apply them to the database by clicking on the Save button. You will see a window displaying a preview of the SQL script. After making sure that all changes are made correctly, click the Persist button.
The transaction mode you have chosen also works for the diagram editing mode. Therefore, if you have manual commit enabled, don’t forget to apply your changes by clicking on the Commit button on the top toolbar.
Please note that any changes you make using Edit Mode will not be automatically applied to the metadata of tables opened in other tabs. You can use the Refresh button to update the changes. If you edited the metadata in the Properties tab of the Data Editor and in the diagram Edit Mode mode in parallel, the last saved changes will be applied to the database.
Our hero Louis has successfully added the necessary elements to his scheme. We will tell you about other Dbeaver features that come in handy for Louis in our new blog posts.

