If your company has an enterprise account in CloudBeaver, it doesn’t mean you will find the right database inside. Sometimes this happens because of confusion in Data Navigator, and in other cases because there is no connection to it. So you can create this connection yourself.
That is precisely what marketers will do today with their guide to the world of databases, Louis. Research on their company’s coverage in various media has been requested. It needs to be accessed in a table with data like the titles of the publications, the journalists’ contacts, and the number of articles about the company. All of this is needed because information about the new latest product will be sent to them.
As the connection has not yet been created, they need to configure a path to the right database in order to access the table. With the IT department busy with the technical side of the new product launch, Louis suggests that the heroes create their own connection.
How to get started
Credentials to create the connection are already known – marketers only need to find where to enter it. After logging in, they will be taken to the CloudBeaver main page.
They need to click the “Plus” button on the main menu bar to access the Connection Manager.
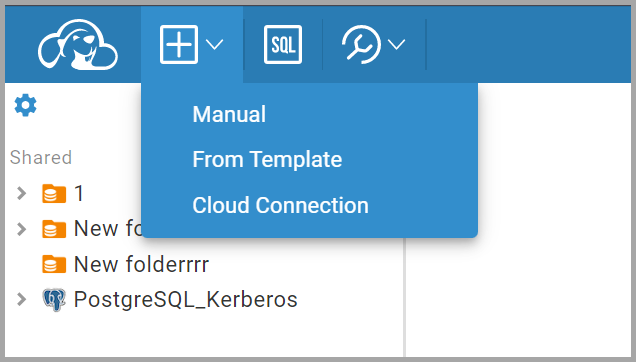
Then, when they select Manual, the New connection window will open a list of available database types. Choose MariaDB because that is where the data they need is located. A new connection configuration window will now appear.
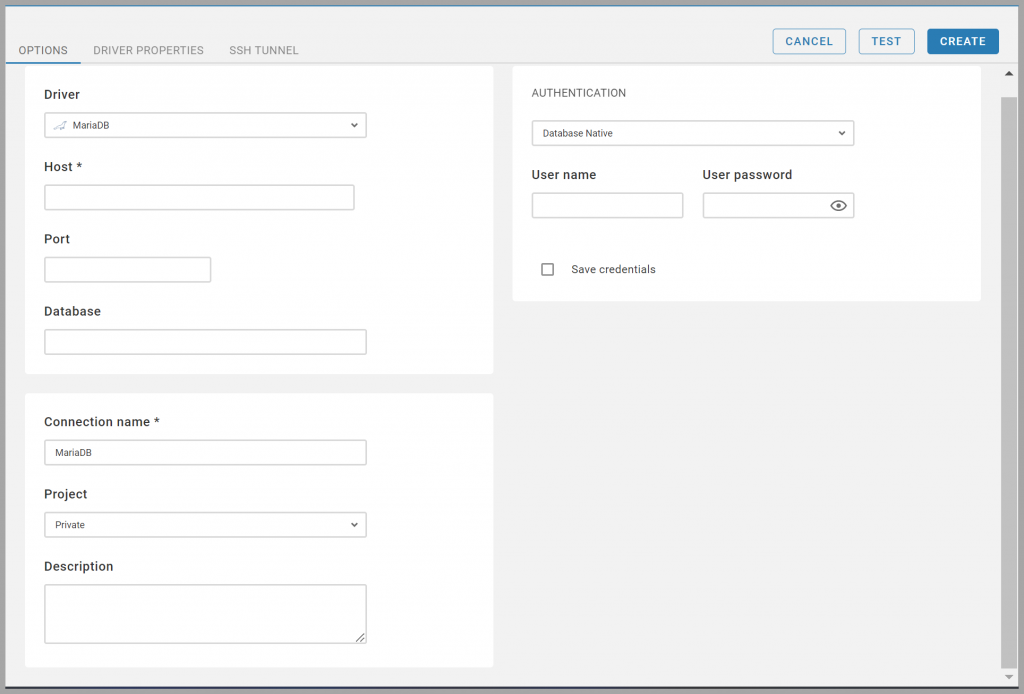
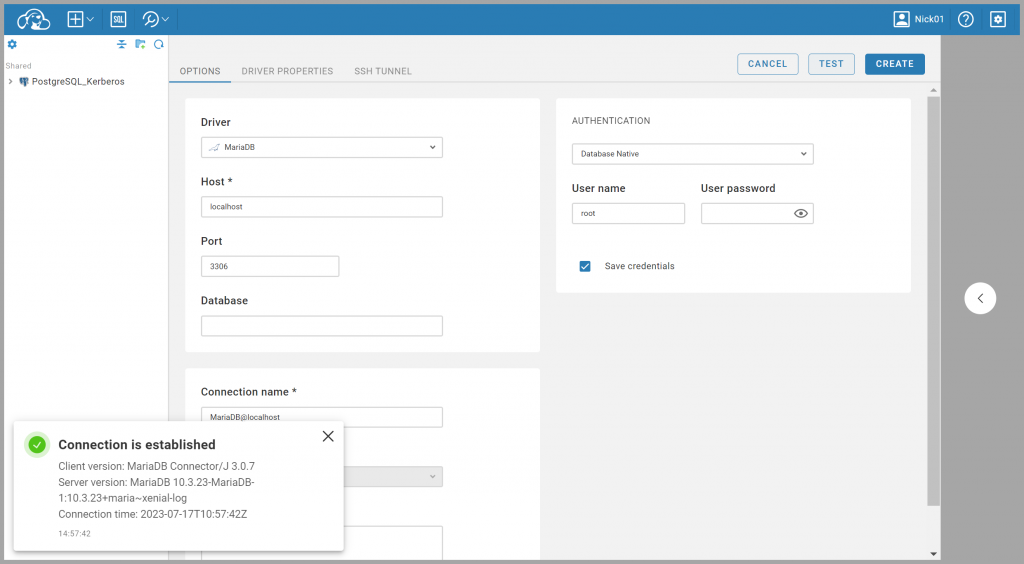
To create a connection to MariaDB, heroes will need data to fill in the fields “host,” “port,” “User name,” and “User password” from the database.
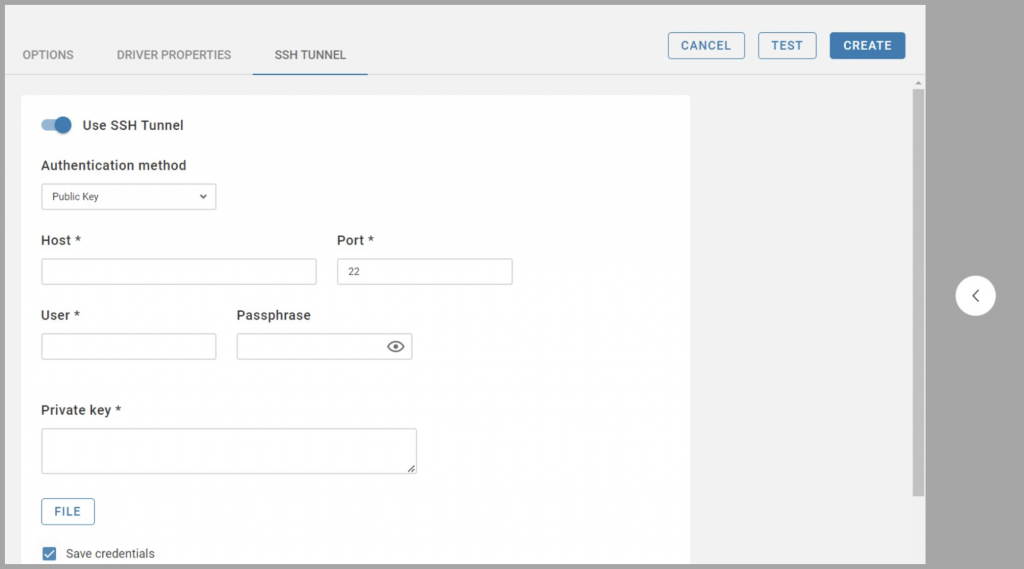
The database is only accessible via SSH, because the colleagues who made the report are concerned about data security. As marketers with Louis were prepared for this, they already had both the key file and the data to fill out the fields in the SSH TUNNEL window.
Now, they need to enable the ‘Use SSH Tunnel’ toggle, select the Authentication method ‘Public Key’ because by default this Tab has a password login, fill in the fields, and download the file with the key by clicking ‘FILE’.
For more details about connecting via SSH, read the official CloudBeaver docs at our portal.
How to check if everything is correct
Then they test the SSH Tunnel connection using the Test button. A notification will appear in the bottom right corner saying that the test was successful because the credentials are correct and the database server is running.
Now they need to check the same thing in the Options window. It looks like Louis and his students have everything ready to make a connection. They click the Test button. The test is successful and a message appears on the screen confirming the connection.
Both in the Options window and in the SSH Tunnel window, the heroes check the Save Credentials checkbox so that they do not enter them again in the future.
If the test fails, the users can recheck the connection settings and try again. A failed attempt can also occur due to an error on the host server side.
After successfully testing the connection, marketers confidently click the “Create” button to save the configuration. The created connection appears in the object tree – just what they needed.
The heroes could quietly celebrate their success and newfound independence, but first they have to find the right table in MariaDB.
The MariaDB connection contains all the information to send press releases to the media. They copy the emails of journalists to send out a press release and prepare for the number of publications sufficient to make the whole world aware of the company’s new product.
Now Louis’ students don’t need third party help to connect to databases using CloudBeaver. Please keep an eye on our blog for updates – in future articles, we’ll let you know what other tasks our browser-based solution can help you with.