Basic operations with DBeaver
Table of contents
Overview
This guide outlines the essential steps to quickly get started with DBeaver.
To begin working with this guide, it is essential that you install the appropriate version of DBeaver for your operating system. Please download it from the official DBeaver website.
First launch
When you launch DBeaver for the first time, you will encounter several initial setup windows designed to enhance your experience. This section will guide you through what to expect and how to interact with these prompts.
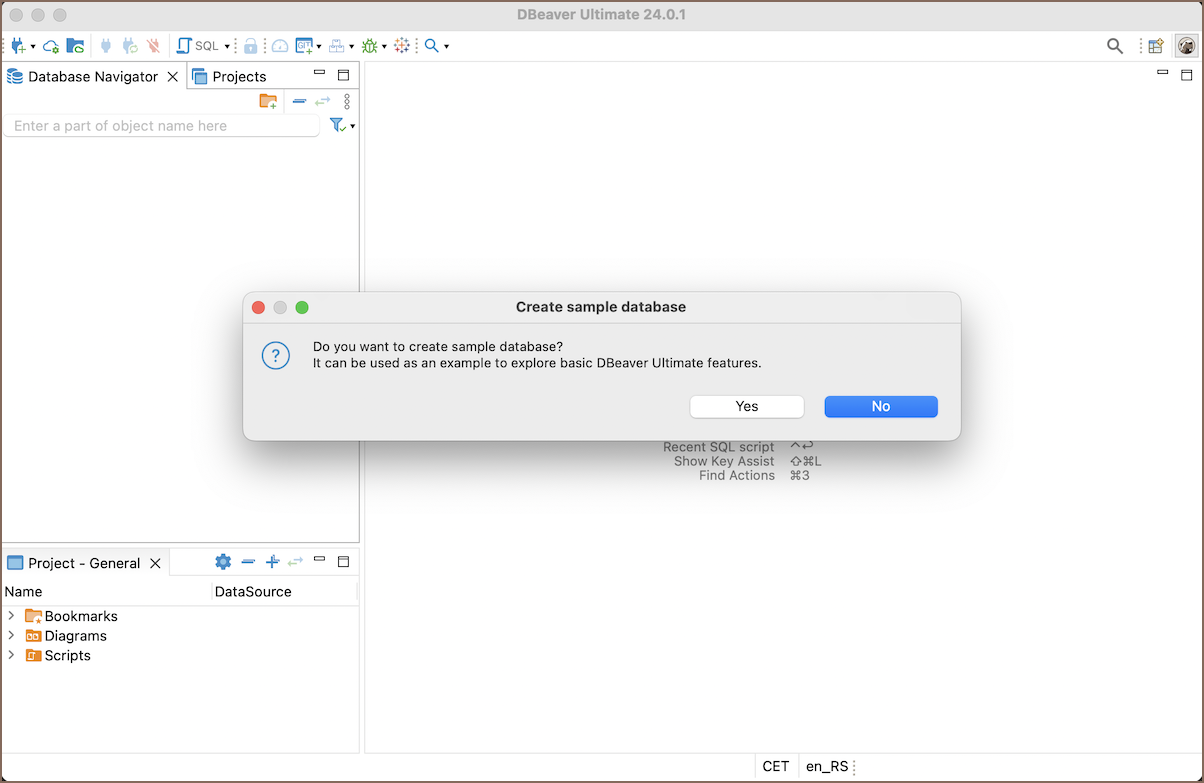
Create Sample Database: The first window you may see is the Create Sample Database prompt. For those new to database management, or if you simply want to explore DBeaver's functionalities without starting from zero, this option is beneficial. It provides a pre-populated database with various data and objects, allowing you to practice and experiment without the need to populate a new database from scratch. For more detailed information, refer to our article on Sample Database.
Tip of the Day: Another feature you will come across is the Tip of the Day. This is a helpful tool for learning new tips and tricks about using DBeaver. If you prefer not to see these tips at startup, you can disable this feature by unchecking the Show tips on startup checkbox.
Statistics Collection window: Lastly, you may see a window related to Statistics Collection. This feature helps you understand how you use DBeaver, which can enhance your user experience. For a more detailed exploration of this feature, please see our article on Statistics Collection.
Tip: For a detailed understanding of DBeaver interface, refer to the Application Window Overview article.
Database navigator
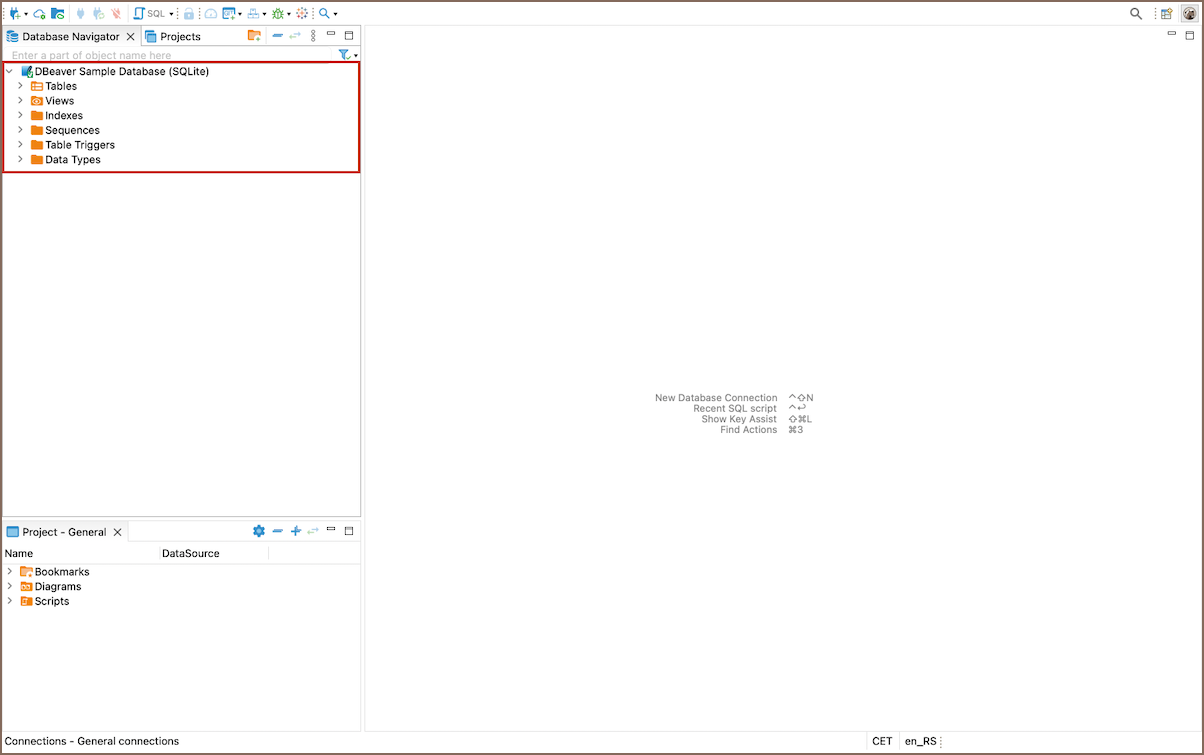
If you opt to create a sample database, you will see it listed in the Database Navigator.
The Database Navigator is the central hub for accessing and managing your databases within DBeaver. It allows you to view and interact with the metadata objects of your databases.
To explore these objects, click on the arrow located next to the database you have created. This action will expand the list of metadata objects available in your database instance.
Tip: For an extensive understanding of the Database Navigator's capabilities, refer to the Database Navigator article.
Object editor
From the Database Navigator, you can access the Object Editor, where you have the capability to examine database objects in detail. To view the contents of a table, or to delve into any database object, simply double-click on the desired item. This action will open the Object Editor, providing a comprehensive view and interaction options for the selected object.

Tip: You can also access the Editor using the shortcut (F4). For a comprehensive list of shortcuts and their functions, see the article on Shortcuts.
The Object Editor presents a structured environment where you can access different aspects of your database objects through specialized tabs:
| Tab | Description | Reference Article |
|---|---|---|
| Properties | Displays the properties of the database object and its sub-entities. | Properties Editor |
| Data | Opens the Data Editor for tables and views, facilitating data management. | Data Editor |
| ER Diagram | Shows Entity-Relationship Diagrams for tables and schemas, visualizing object relationships. | ER Diagrams |
Basic operations
Now, let's explore how to work with data. This section will guide you through the essential processes for working with database objects.
Object creation
Creating new objects within your database is a fundamental skill in database management. This process allows you to add structures like tables, views, or schemas, which are essential for storing and organizing your data effectively.
In the Database Navigator, locate your database.
Create new object: Depending on the type of object you wish to create, you might need to navigate to different levels within your database connection.

First, in the Database Navigator, navigate to the level where your new object should be created. This could be at the connection level (for databases and schemas), within a specific database or schema (for tables, views, etc.), or within a table (for columns, foreign keys, indexes, etc.).
Right-click on the node (such as a database, schema, table, etc.) where the new object belongs, and select Create. A submenu will appear, listing the types of objects you can create at this level.
From the submenu, choose the type of object you want to create (e.g., Database, Schema, Table, Column, View, Foreign Key, Index, etc.). If necessary, a dialog will appear, prompting you to enter the details for the new object, such as name, data type, constraints, and other relevant properties.
Fill in the details: Follow the on-screen instructions to complete the creation of the new object. Some objects may require additional steps or information, such as defining columns for a new table or specifying the reference table and columns for a foreign key.
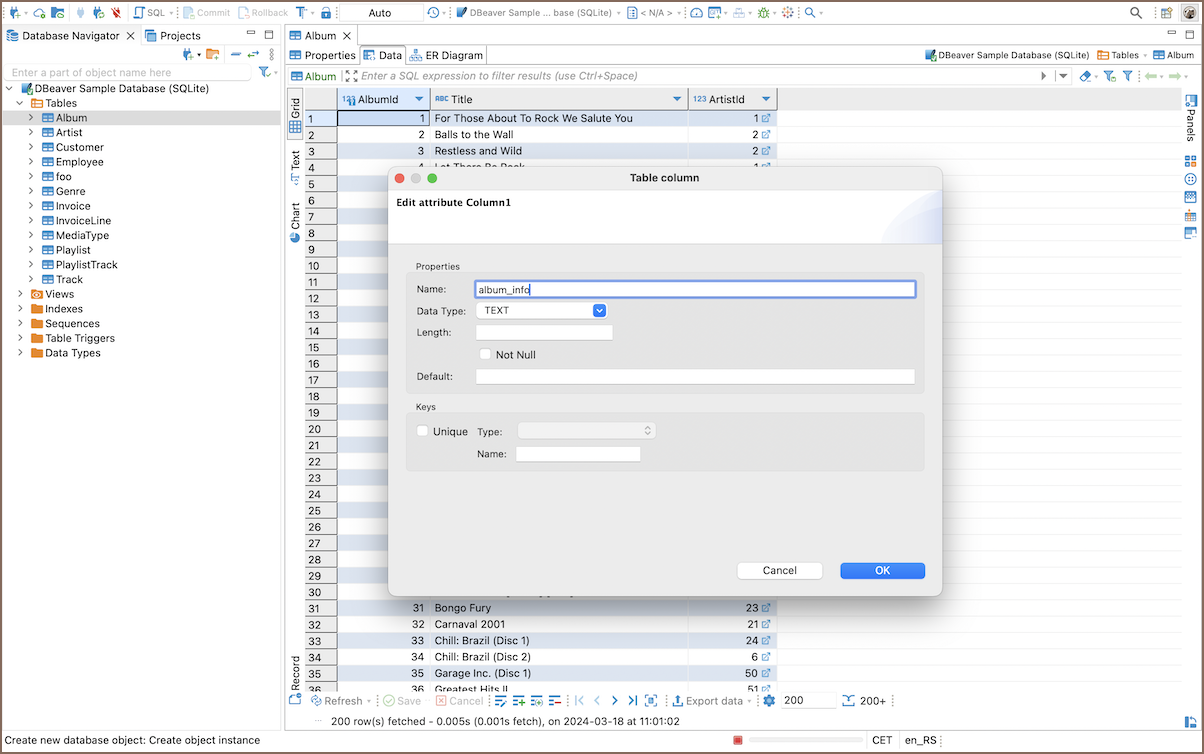
Save: To complete the creation of the object, click the Save button
 .
.
Working with data in DBeaver UI
View and Edit Data: Navigate to your table in the Database Navigator, right-click, and select View Table -> Data to see the table's contents. Here, you can directly edit the data by typing in new values into the cells, and then save your changes.

Inserting new data: Use the Add Row button
 in the table data view to add new records. Fill out the new row
with your data and click Save.
in the table data view to add new records. Fill out the new row
with your data and click Save.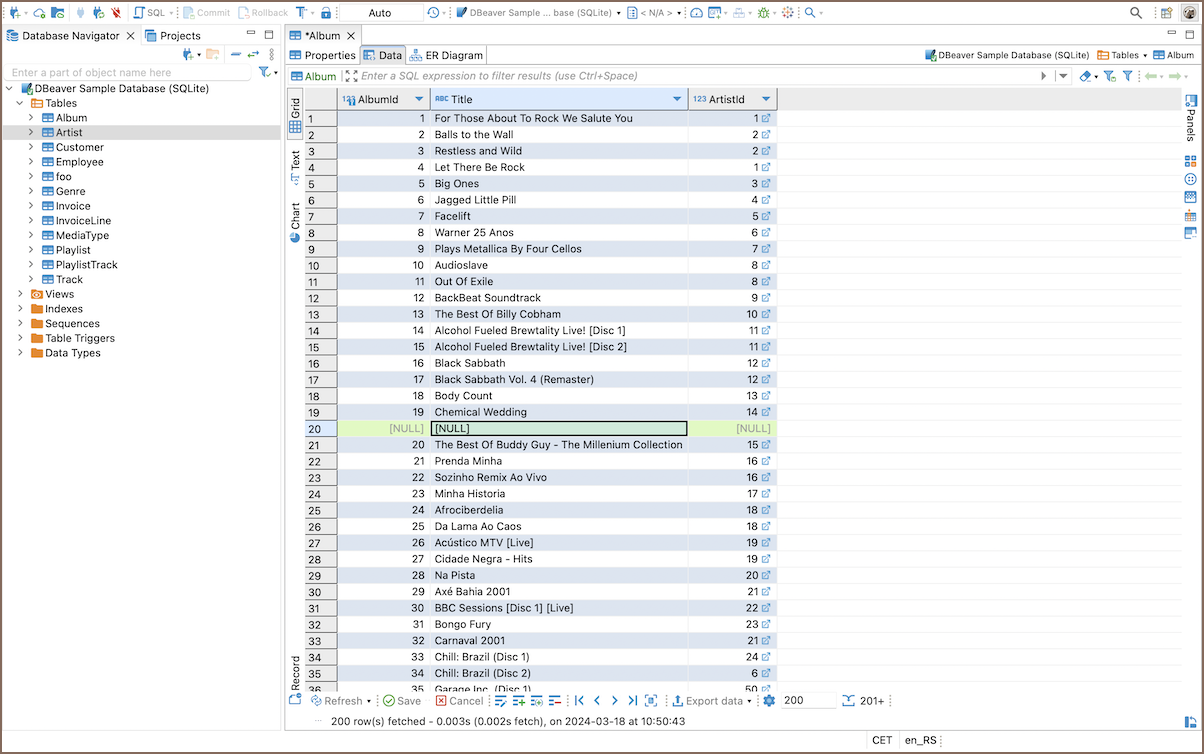
Deleting data: Select the rows you want to remove and click the Delete current row button
 . Confirm the deletion and save your changes.
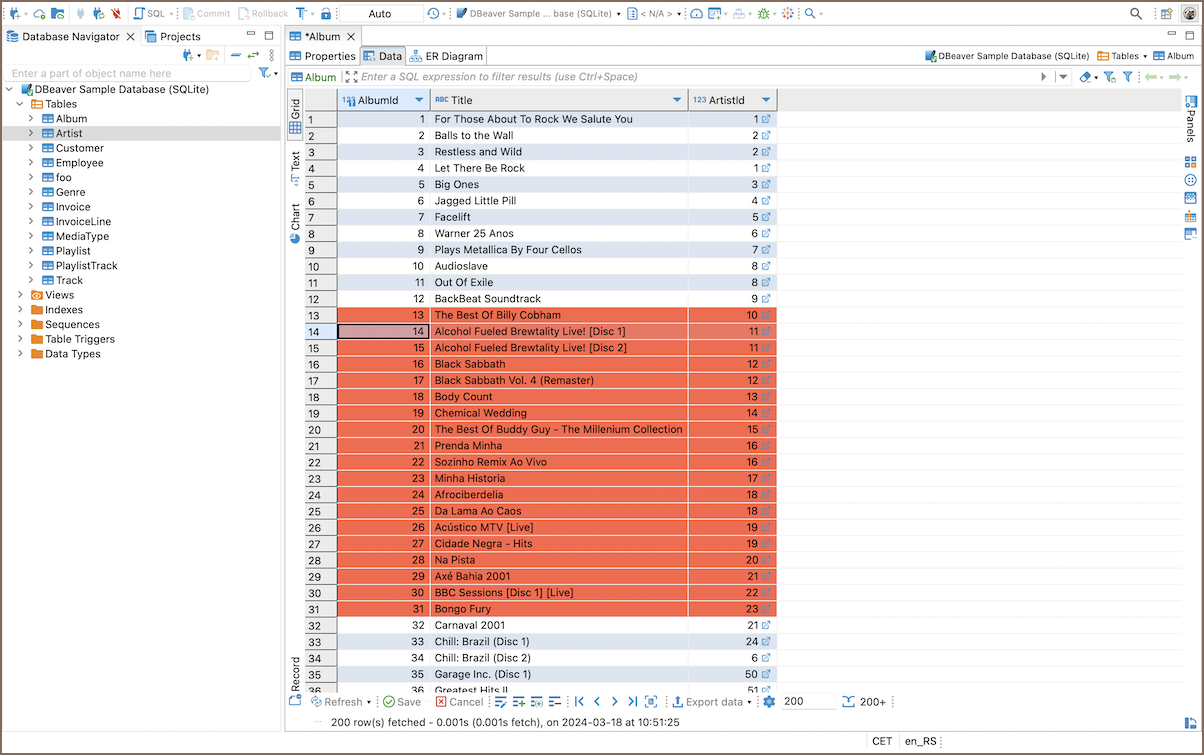
Additional Resources
Dive deeper into specific data management topics with these detailed guides:
- New Table Creation
- Creating Columns
- Implementing Constraints
- Utilizing Foreign Keys
- Creating Indexes
- Incorporating Triggers
For more on data management, view our tutorials on YouTube.
Executing SQL queries
Open SQL Editor: Navigate to the database or schema in the Database Navigator, right-click, and select SQL Editor -> Open SQL Script.

Write your query: In the SQL Editor, write your SQL query. For example,
SELECT * FROM your_table;.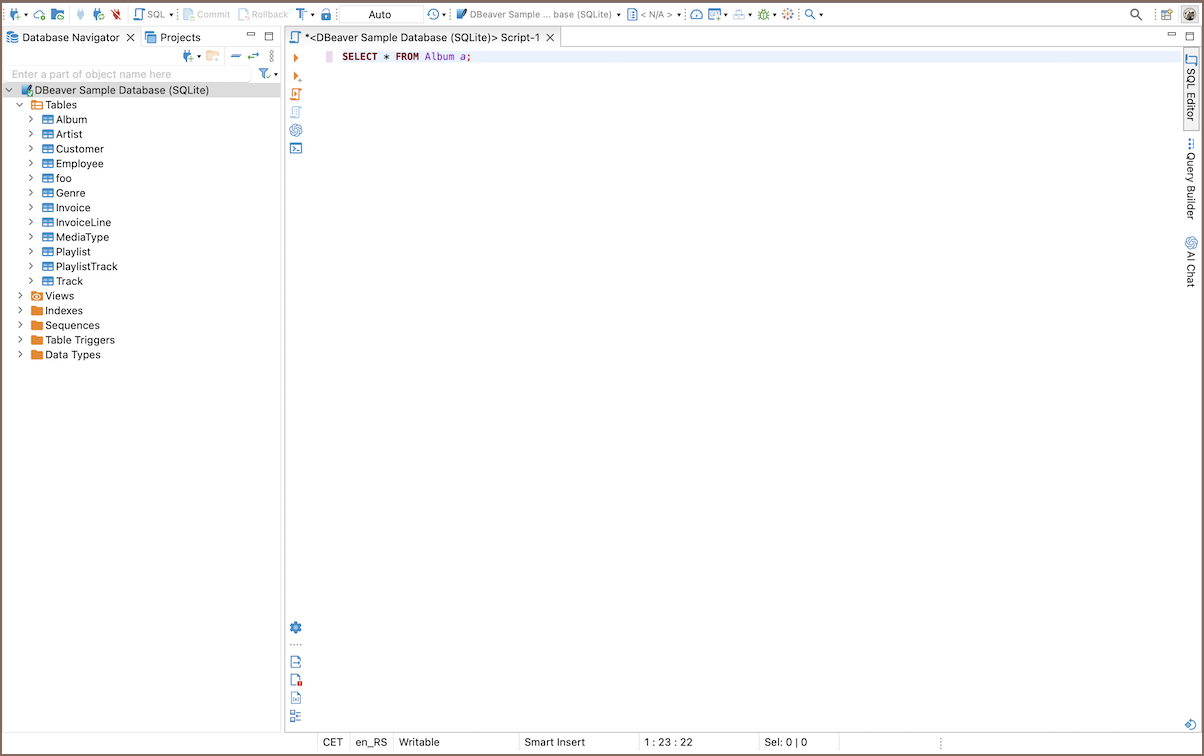
Enhance your query writing with these powerful features:
- AI SQL Assistance: Utilize AI to suggest optimizations and best practices for your SQL queries.
- SQL Code Editor: Enhance the behavior of the Script panel, focusing on features like displaying problem markers, automatic closing of quotes and brackets, semantic analysis, and more.
- Spelling: Improve the accuracy of your SQL scripts with integrated spelling correction.
Execute query: To execute a query, press Ctrl+Enter or right-click the query and click Execute -> Execute SQL Statement on the context menu.
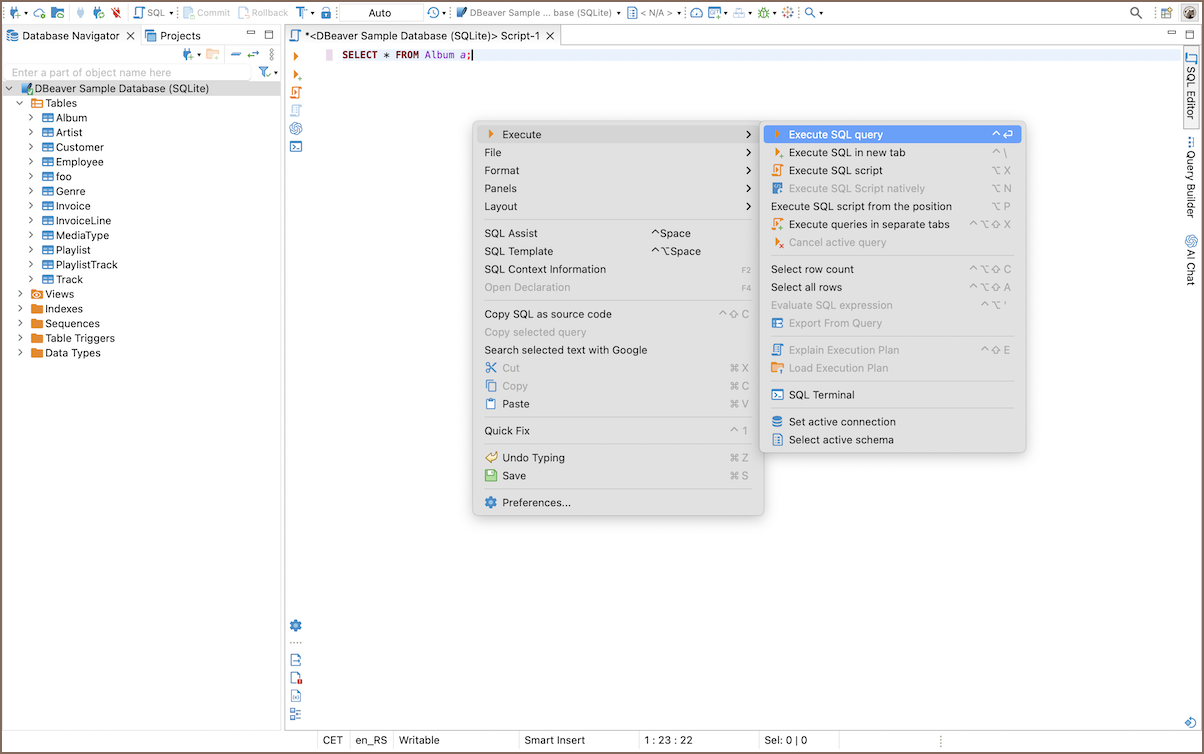
Tip: You can access various execution option, depending on your requirements. For a comprehensive guide on query execution, refer to SQL Execution.
View results: The results will be displayed in the bottom panel of the SQL Editor.

For those who prefer visual learning or seek further instruction on using SQL with DBeaver, we recommend our YouTube playlist. These video guides complement the written documentation and provide practical examples to enhance your understanding and skills in managing databases with DBeaver.