In addition to working with data in the form of editing and research, CloudBeaver allows you to export entire tables or parts of tables in ten different formats. If users have a specific task, they have three ways to offload the necessary data at once.

Louis and his colleagues continue to explore CloudBeaver’s features in practice – and their next lesson is about exporting data. As part of one of their work projects, the team needs to contact customers and get feedback from the people on the list. They will take their customer data from the lead table. Then they will use the resulting file in Excel or Google Sheets.
There are several ways to export tables from CloudBeaver. This time the heroes will try an option from the Data Navigator, another one from the Data Editor, and a final one from SQL Editor.
How to export data from Data Navigator
Today, their goal is the access their Croatian customers’ information, which is in a table with all their clients’ IDs, names, emails, countries, and addresses. These clients will offer feedback in the future.
Marketers log into their company’s corporate account. Then they find a MariaDB database in a tree of objects and open it. Louis gives them a little space to explore on their own and just explains that the new_leads table is in the Projects schema.
Without his supervision, they decided to export the whole table so that they can filter it later in Excel and continue working with Croatian customers’ data. To do this, they need to select Export from the context menu next to the object name.
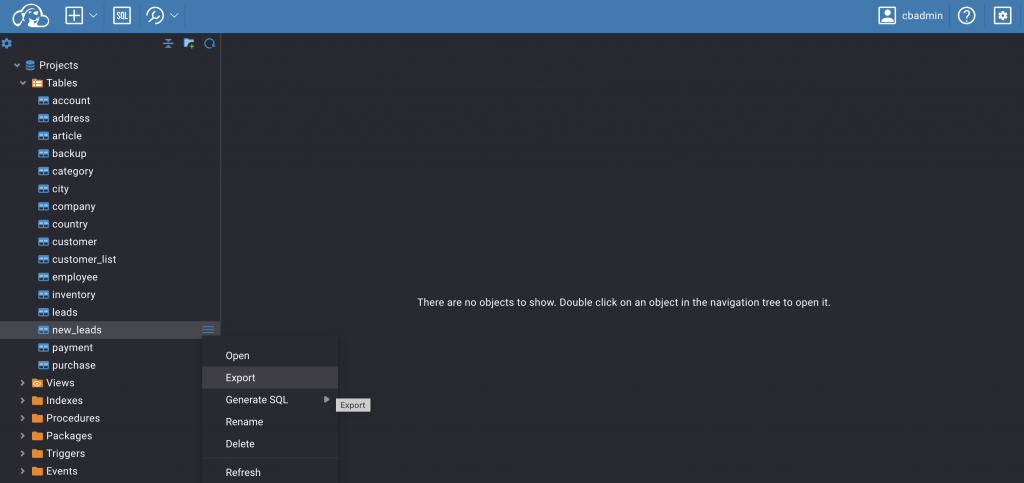
From the list of suggested export formats, they choose XLSX. After that, the Export configuration opens. It depends on the selected data format.
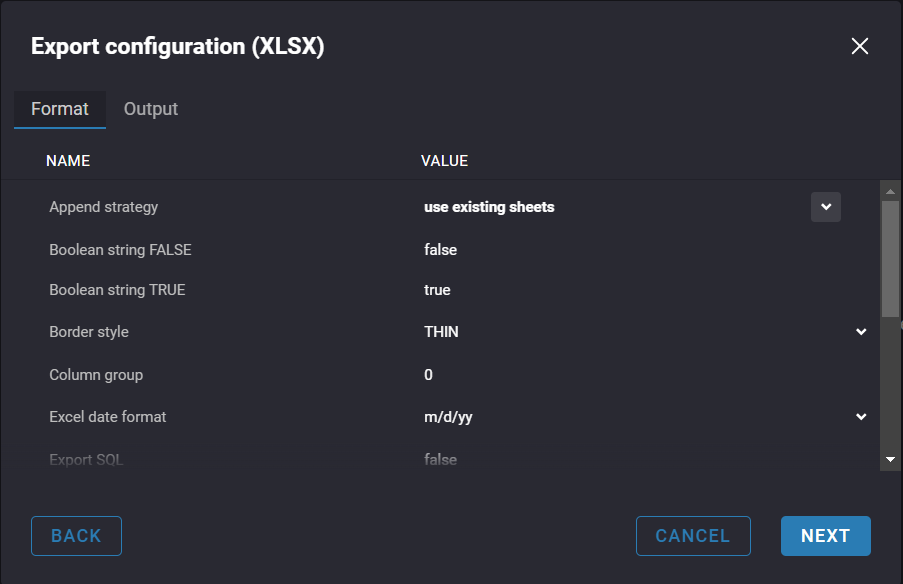
After clicking the Next button, they select Export. Then they click Download in the pop-up dialog. The file will immediately start downloading.
The advantage of this exporting method is that it’s quick and simple. And marketers don’t even have to look at the data in detail. All they have to do is choose the right connection in a tree of objects.
Already in the process heroes discovered disadvantages. First, it is not recommended to change the data in the tables selected for export during the process. Second, the file with the table is huge, which means that the upload itself takes a long time. In addition, it is difficult for Excel to process and filter such large data sets.
How to export data using Data Editor
The marketers are rescued from their difficulties by Louis. He returns and explains that the table can be facilitated directly in CloudBeaver. This can be done through the filter field in the Data Editor.
Louis’ colleagues open the new_leads table. From their experience using the Data Editor, the heroes remember how to enter the necessary information into the filter field at the top of the table/screen. This time they filter it by the Country and Total columns since they are interested in orders of 1200 units or more.
Data Editor also allows users to edit data. Read how it makes any task easier.
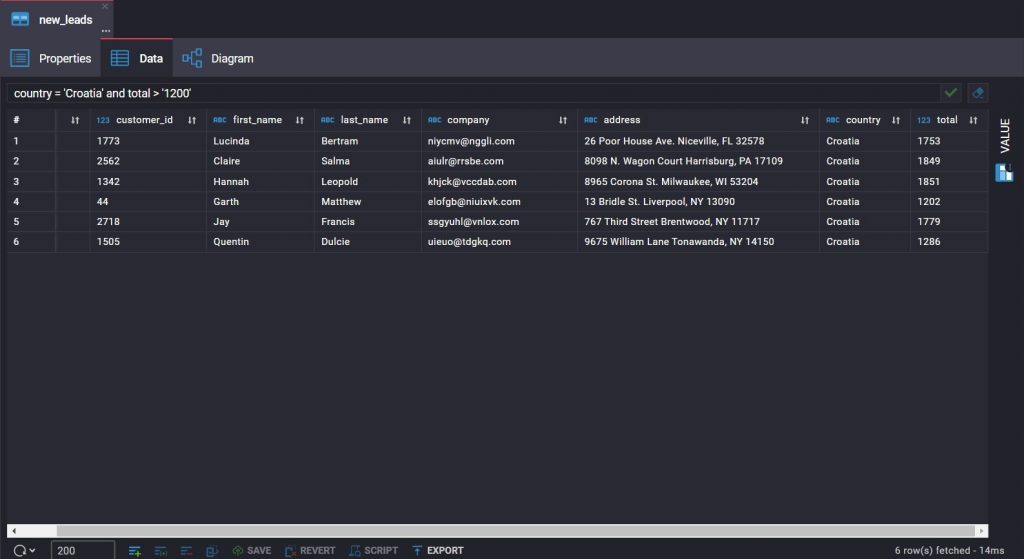
In the lower toolbar of the Data Editor, they click Export and go through the same sequence of actions as when exporting from Data Navigator. The filtered table as a file is loaded much faster and Excel is not slowed down by the amount of data.
How to export a filtered table through queries in SQL Editor
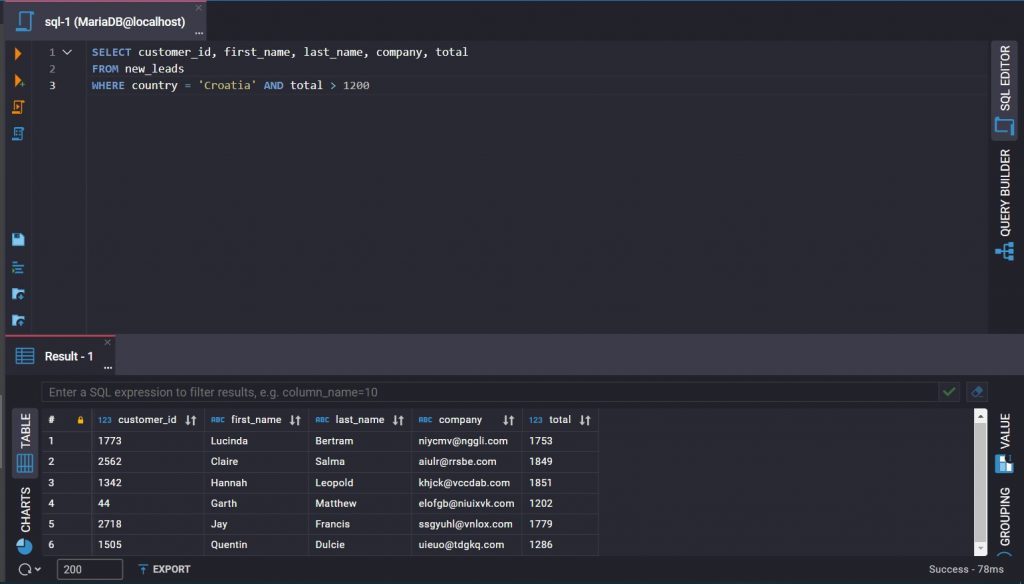
However, marketers only need some of the columns to get customer feedback. Is it possible to cut off everything superfluous to go straight to contacting people after exporting data from CloudBeaver? Yes, and they know how. They can already make queries in the SQL Editor. According to Louis’ observation, they must write the correct SELECT statement and run it.
Read our blog article on how to write and run your first simple queries in CloudBeaver’s SQL editor, as well as save and open existing scripts.
And after running the query, the new_leads result is set.
The table can be exported using the EXPORT button in the bottom toolbar because the Result set looks and works exactly like the Data Editor. As in the previous cases, they select the XLSX format and click Download in the pop-up dialog.
With the third exporting approach, data for feedback from Croatia customers is filtered for the marketing team. This means it is ready to use.
The necessary and required data was exported through three different CloudBeaver features. By trial and error and with the help of Louis, heroes found out that if the tasks are specific enough, they could write queries in SQL Editor right away. In addition, most importantly: they exported everything they needed to get customer feedback from Croatia.