There are several ways to create a connection in CloudBeaver. If you frequently need to connect to the databases of a specific driver, you could have used the “New Connection from Template” feature. But first, you need to make a proper one. Let’s learn how to do that.
What are Templates
Templates in CloudBeaver serve as a blueprint for creating connections to databases. After selecting a certain driver, the specialist needs only to fill in the required field – the host of this driver. This way is useful in environments where multiple users need to connect to different databases on the same driver because it standardizes connection parameters and reduces configuration errors.
Suppose you are an administrator whose task is to create a template to connect to your company’s working PostgreSQL databases so that all your colleagues will use it in the future. Users will be able to create private rather than connect to shared ones by selecting this option. For the administrator, this is convenient because this is how permissions to access databases can be separated. Everyone gets their credentials for logging in to a particular database.
There are no templates in the DBeaver Team Edition because permissions are only given to project and team members, whereas users can just connect without additional credentials.
If you have access to the Admin panel, you can make, edit, or delete these blueprints. To start, you have to navigate to the CloudBeaver administration section. This area houses the ‘Connection Templates’ section.
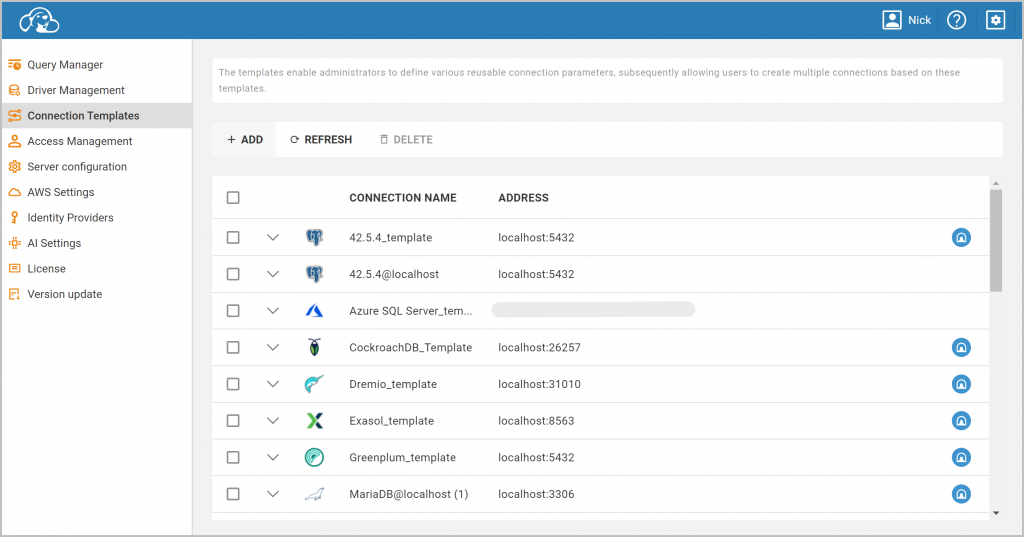
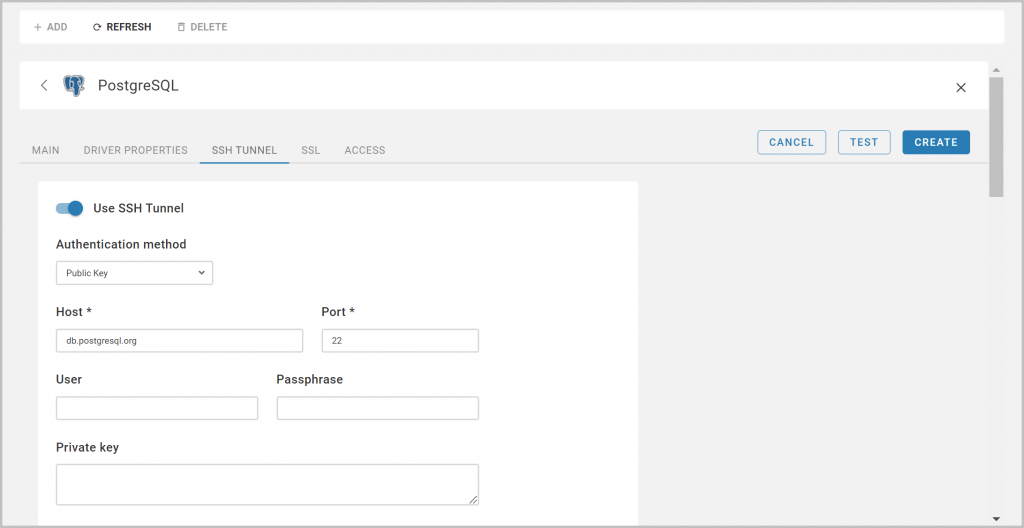
Creating a template involves filling out a form with the basic connection parameters, including the mandatory Host and optional Port, and Database. So, let’s start by clicking the “Add” button in the Connection Templates area. Specify the database driver, authentication methods and optional parameters such as SSH tunnel configuration. In our case, the Host field in the SSH panel is also required. Fill it in and also select the public key format. This way, in the future you can give your colleagues a single tunnel key, but each of them will log in to the required database under their account.
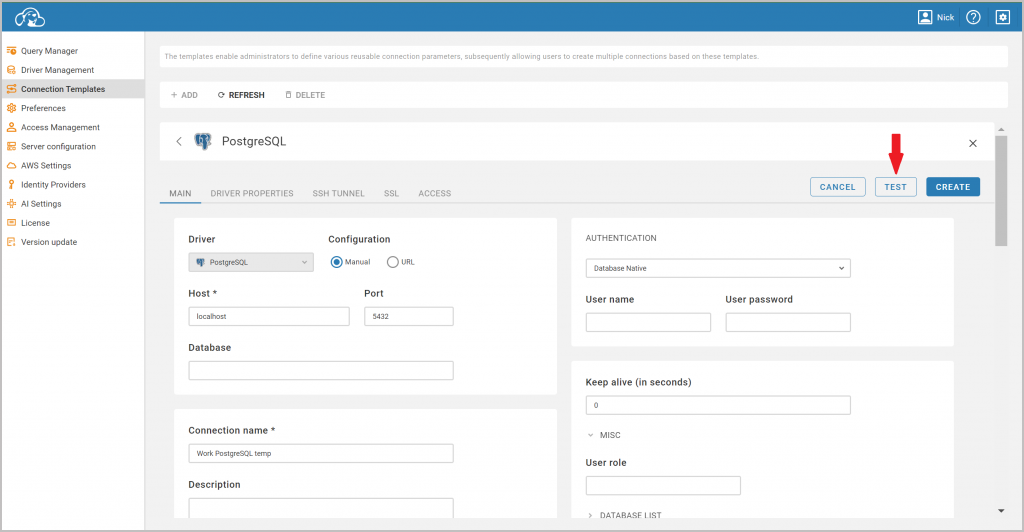
To avoid connectivity issues later, it is very important that you ensure this data is accurate. To do this, you will need to test the template using the Test button or return to this menu in the future if any additional data is incorrect.
Each template can be designed for different use cases. For example, in your case, colleagues connect to the required databases via the SSH tunnel.
How to give access to templates
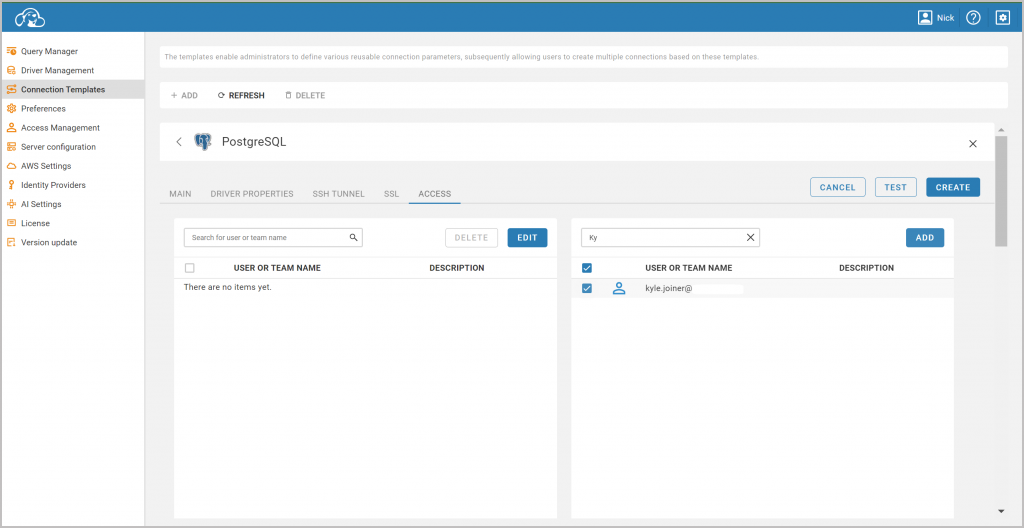
Now you know how to create the template. It is time to grant access to your colleagues to this. You can add users in the “Access” tab in the Connection Templates menu. Once you do, they don’t need admin rights to create private connections.
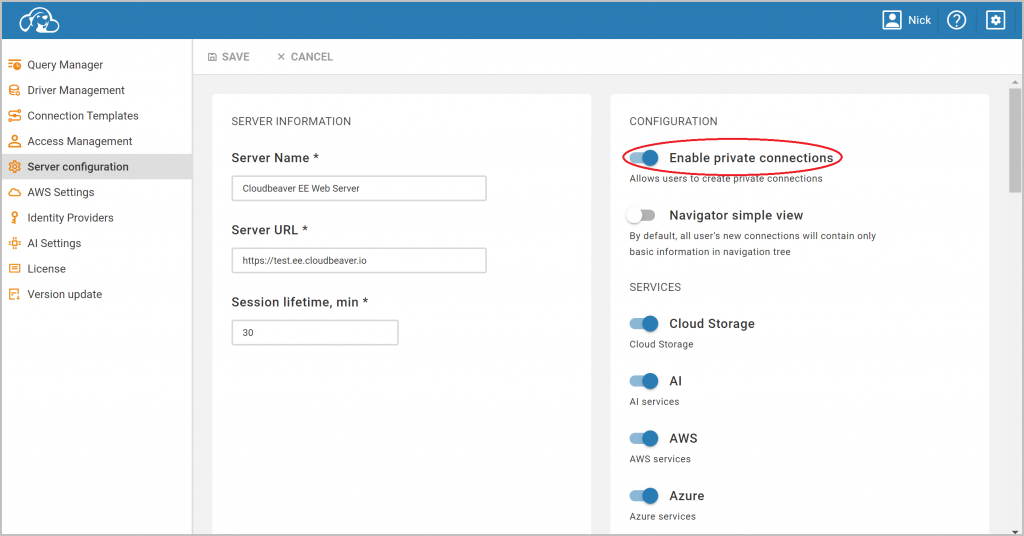
Also, select “Enable Private Connections” under “Server Configuration” in the admin panel so that the “From a template” option appears on the main menu for you and those you have granted access to the template.
Establishing a New Connection
Now, let’s look at establishing connections from the newly created template.
Start by clicking on the “From a Template” option in the top menu of CloudBeaver. Then select the PostgreSQL one from the drop-down list.

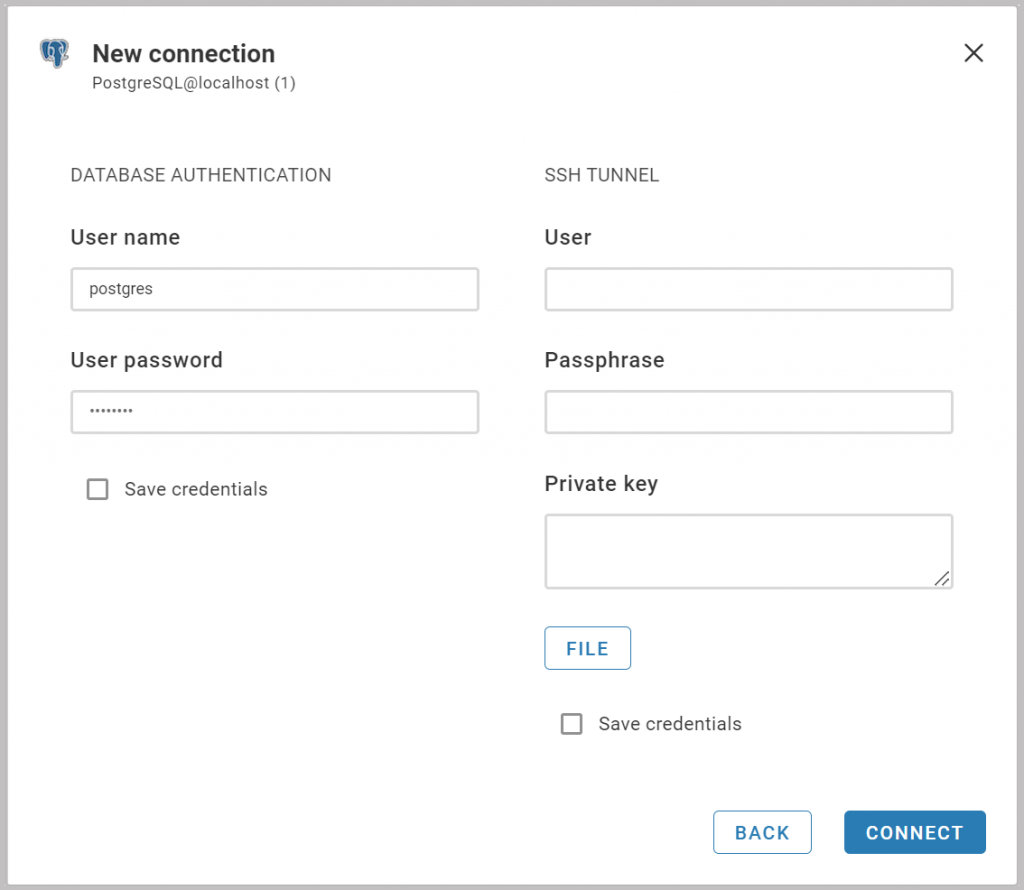
This pop-up will have predefined settings such as the database driver, Host, Port, and SSH tunneling method. Fill in the required authorization details.
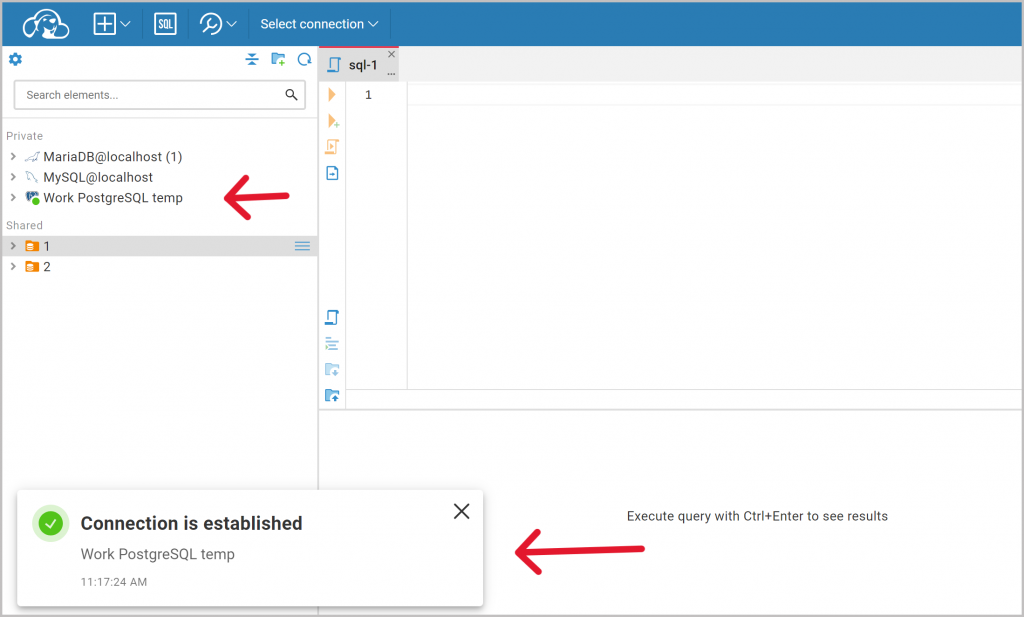
If all parameters are set correctly, the connection will be established successfully.
When creating templates, consider how they might be used in your organization. Today we looked at an example that allows you to connect to different working databases on a single driver. Any specialist has the option to set up a private connection based on the host. It turns out that with this feature, the administrator is confident that the user will access the right database. It is enough to give your colleagues access, database credentials and a single SSH tunnel key. Follow our blog to not miss new articles about Cloudbeaver features.