Drivers Management
Note: This feature is available in Enterprise, AWS, Team editions only.
Overview
This guide provides step-by-step instructions for managing drivers, including creating, editing, and deleting drivers.
Important
Only users with administrator rights can perform these actions.
Managing a new driver through user interface
Creating a custom driver
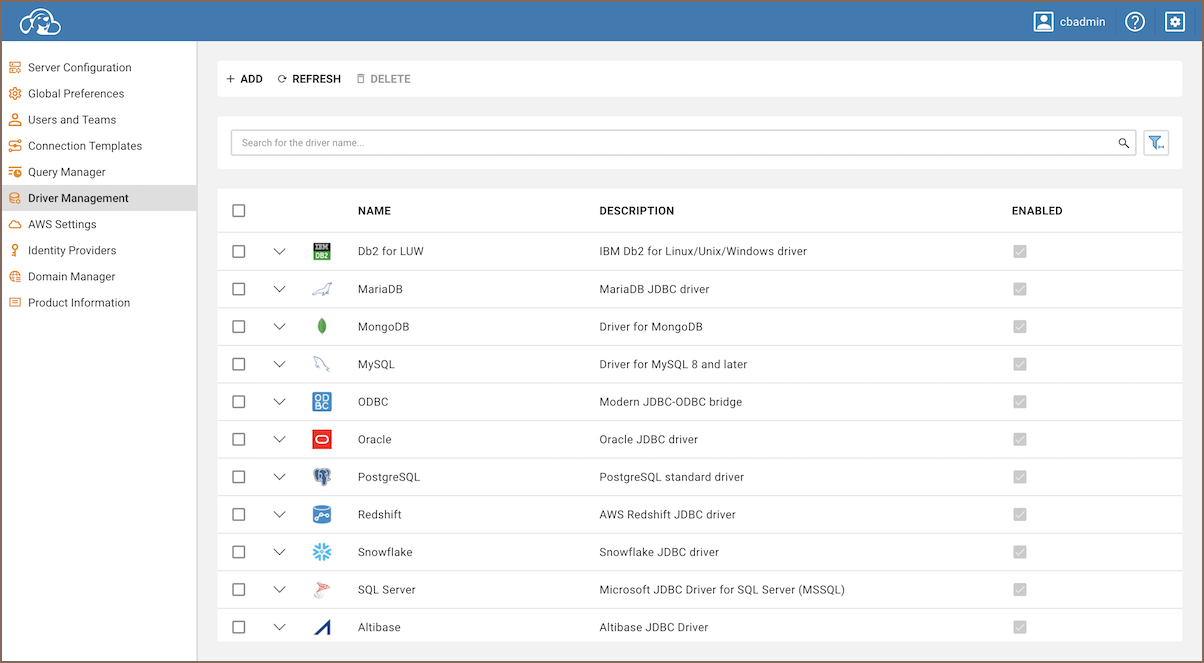
Follow the steps below to create a new custom driver:
- Navigate to the Administration page of the interface.
- Select the Driver Management tab.
- Click on the Add button.
- A form will appear in which you will have to fill in the necessary fields with the appropriate information.
- Once completed, click Create.
Uploading binary files
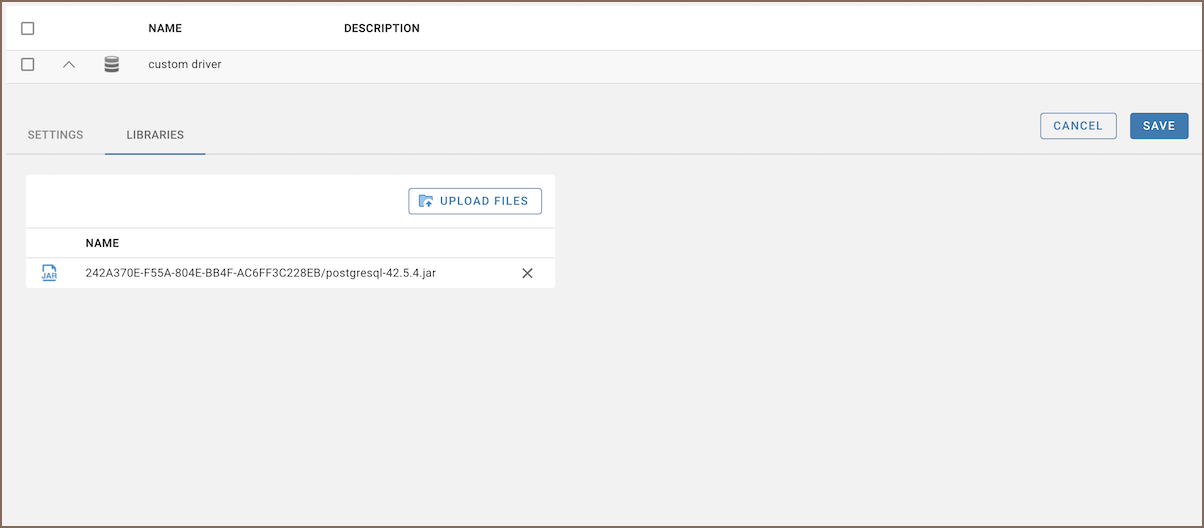
To make your new custom driver functional, you need to upload the .jar binary files. Follow these steps:
- Locate your newly created driver in the Driver Management tab.
- Click on your custom driver to open it.
- Navigate to the Libraries tab.
- Click Upload Files and select your
.jarfiles. - Confirm that your files have appeared in the table.
- Click Save.
Once the binary files are uploaded, your custom driver will be ready to use.
Tip
For detailed instructions on creating a connection for your custom driver, see Create Connection.
Editing an existing driver
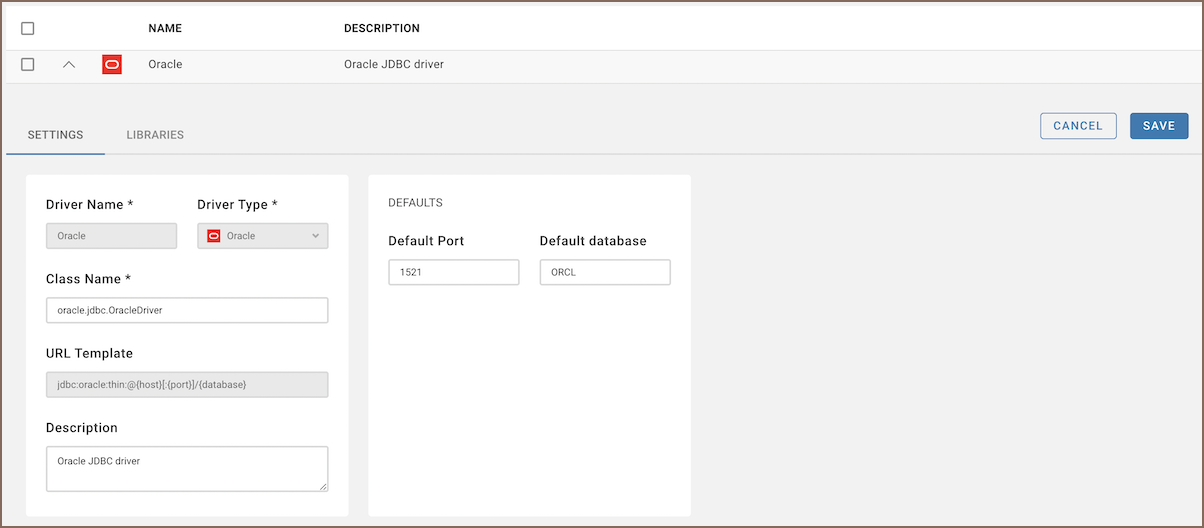
You can edit any existing driver by following these steps:
- Open the desired driver from the Driver Management tab.
- Modify the fields as required.
- Click Save to preserve your changes.
Note
Ensure you have the appropriate permissions and understand the potential impact before proceeding with these modifications.
Deleting an existing driver
To delete an existing driver, follow these steps:
- Open the Driver Management tab.
- Locate the driver you want to delete in the list.
- Check the checkbox next to the driver's name.
- Click the Delete button to remove the driver.
Filtering drivers
You can filter drivers using three options:
- Search
- Custom/Default drivers
- Driver State (
Enabled/Disabled/All)
To access all filter options, click the filter button:

Note
Drivers can be disabled in the Server configuration tab. For more information, see Server configuration administration.
Adding a new driver through server configuration
This section provides detailed instructions on how to add a new database driver through server configuration.
Note
These operations require server access and should be performed by users with appropriate permissions.
Tip: To add a custom driver to the CloudBeaver Docker image, you must build from the source. Modify the source code to include your driver, rebuild the project, and then create a new Docker image using the Docker packager. Changes cannot be made directly in the Docker container.
Driver dependencies
Driver dependencies are managed within the server configuration. To add a new driver:
- Navigate to the
server/driversdirectory. - Create a new folder for the driver you wish to add.
- Copy the POM (Project Object Model) file from an existing driver configuration into the new folder.
- Modify the POM file to reflect the new driver’s module name and dependencies.
PostgreSQL driver configuration example:
<project xmlns="http://maven.apache.org/POM/4.0.0" xmlns:xsi="http://www.w3.org/2001/XMLSchema-instance"
    xsi:schemaLocation="http://maven.apache.org/POM/4.0.0 http://maven.apache.org/xsd/maven-4.0.0.xsd">
    <modelVersion>4.0.0</modelVersion>
    <artifactId>drivers.postgresql</artifactId>
    <version>1.0.0</version>
    <parent>
        <groupId>io.cloudbeaver</groupId>
        <artifactId>drivers</artifactId>
        <version>1.0.0</version>
        <relativePath>../</relativePath>
    </parent>

    <properties>
        <deps.output.dir>postgresql</deps.output.dir>
    </properties>

    <dependencies>
        <dependency>
            <groupId>org.postgresql</groupId>
            <artifactId>postgresql</artifactId>
            <version>42.2.20</version>
        </dependency>
        <dependency>
            <groupId>net.postgis</groupId>
            <artifactId>postgis-jdbc</artifactId>
            <version>2.5.0</version>
        </dependency>
    </dependencies>

</project>
Registering the new driver in the server
To make the new driver available within the CloudBeaver platform, perform the following steps:
- Open the file
server/bundles/io.cloudbeaver.resources.drivers.base/plugin.xml. - Copy an existing driver configuration and adjust it for the new driver.
Configuration lines
-
Resource Definition:
This line specifies that the folderdrivers/driver-namecontains the necessary JAR files for the driver. -
Bundle ID:
This line is required for enabling the driver configuration within the DBeaver platform. -
Driver ID:
This line enables the DBeaver driver in CloudBeaver. The driver ID should match the one specified in the database-specificplugin.xmlfiles on the DBeaver platform.