Data filters
DBeaver lets you filter data in the Data editor to quickly find what you need. You can filter using SQL expressions, preset filters, specific cell values, or advanced filter settings.
Filtering and sorting data
Filter using SQL expressions
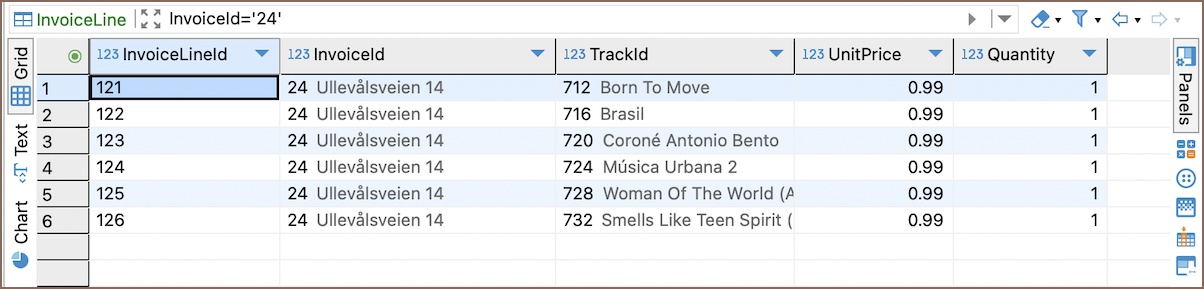
Filter data directly using custom SQL criteria:
- Enter an SQL expression in the filter field above the table.
- Click Apply filter criteria (
 ) or press Enter.
To revert or switch between previously used filters:
- Delete the SQL expression and press Enter to clear the current filter.
- Use the arrow buttons (
 ) to navigate back and forward
through your filter history. For more details, see Navigation.
) to navigate back and forward
through your filter history. For more details, see Navigation.
Filter by cell value
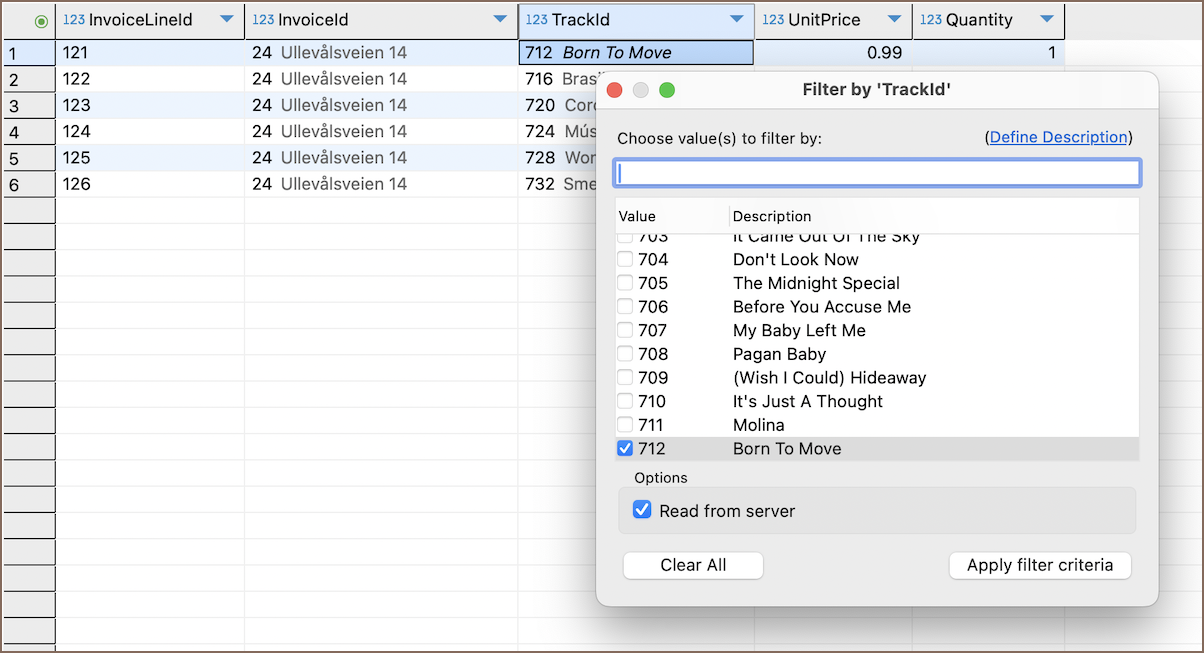
Quickly filter data based on specific values in your columns:
- Do one of these:
- Click the filter icon in the column header.
- Right-click a cell.
-
Select Filter by value, then choose a specific value and Apply filter criteria.
Apply preset SQL filters or templates
Use built-in filter expressions or templates to quickly apply common criteria:
- Do one of these:
- Press Ctrl+F11 (⌃F11 on macOS), or right-click a cell and select Order or Filter.
- Click the arrow in the column header.
-
Select a filter expression or template from the menu.
Menu section Option Description Order Order by [column name] ASCSort rows by ascending values. Order by [column name] DESCSort rows by descending values. Filter by value [column name] = valueShow rows equal to the selected value. [column name] <> valueShow rows not equal to the selected value. [column name] > valueShow rows greater than the selected value. [column name] < valueShow rows less than the selected value. Custom [column name] = .. Specify a custom equality filter. [column name] <> .. Specify a custom inequality filter. [column name] > .. Specify a custom "greater than" filter. [column name] < .. Specify a custom "less than" filter. Clipboard [column name] = clipboard contentFilter rows equal to clipboard content. [column name] <> clipboard contentFilter rows not equal to clipboard content. [column name] > clipboard contentFilter rows greater than clipboard content. [column name] < clipboard contentFilter rows less than clipboard content. [column name] IS NULLShow rows with null values. [column name] IS NOT NULLShow rows with non-null values. Other options Save filter settings Save current filter configuration for reuse Remove all filters/orderings Clear all active filters and sorting Customize filters Define advanced filter criteria or manage saved filters 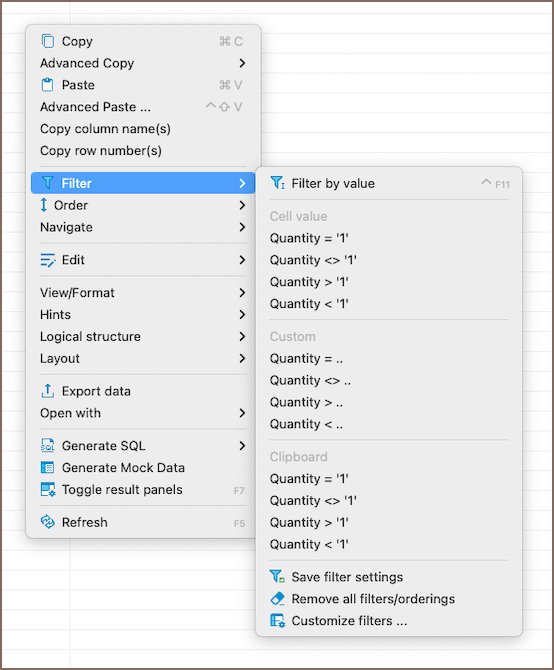
Clear filters
To remove all active filters and sorting at once, click Remove All Filters/Orderings ( ).
).
Save filter settings
To save your current filter settings for future use:
-
Click the arrow next to Customize filters (
 ).
).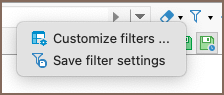
-
Select Save filter settings for current object (
 ).
).
Saved settings reapply automatically when you reopen the table or query results.
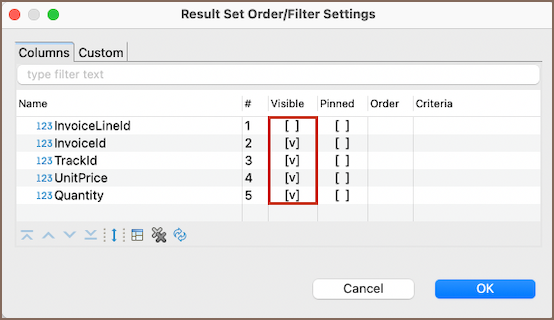
Result set settings
The main way to customize your data table’s appearance is with the Result Set Order/filter Settings window.

To open this window:
- Click the Custom Filters button () in the editor's top toolbar.
- Click the Show attribute filters button () in the column header, then select
Customize filters from the dropdown menu.
- Right-click on the table and select Filters -> Customize filters from the context menu.
The Result Set Order/filter Settings window provides the following options:
| Feature | Description |
|---|---|
| Visible | Set column visibility. For details, see Managing display of columns in data table. |
| Pinned | Pin columns in position. |
| Order | Sort data within columns. For details, see Ordering data in columns. |
| Criteria | Filter using SQL expressions. You can also enter criteria directly in the filter field. For details, see Filter field syntax. |
Tip
You can also adjust the table directly from column headers. For details, see Ordering data in columns.
Managing display of columns in data table
-
Open the Result Set Order/filter Settings window
-
To show or hide specific columns:
- Select checkboxes for columns you want to show
-
Clear checkboxes for columns you want to hide
-
Click OK to apply the changes.
You can also quickly manage columns using these toolbar buttons:
| Button | Action |
|---|---|
 |
Show all columns. |
 |
Hide all columns. |
 |
Reset to default. |
Ordering data in columns
You can order data in columns three ways:
-
From column headers:
-
Click the arrow next to Customize filters (
 ).
). -
Choose ordering options from the dropdown menu.
Menu section Option Description Order Order by [column name] ASCSort rows by ascending values. Order by [column name] DESCSort rows by descending values. Note
After selecting an ordering option, an arrow appears in the column header. If ascending (
ASC), clicking the arrow switches it to descending (DESC).To remove ordering, click the order icon in the column header.
Tip
To sort by multiple columns, set sorting column-by-column, starting with the primary column.
-
From context menu:
Right-click on the column, choose Order and select Order by [column name]
ASCor Order by [column name]DESC. -
Sorting columns in data Result Set Order/filter Settings window:
-
Open the Result Set Order/filter Settings window.

The Order column shows sorting priority. To set or change sorting:
-
Click the cell in the Order column next to the column name:
- One click: ascending order (↑).
- Two clicks: descending order (↓).
- Three clicks: removes sorting.
-
Click OK to apply the changes.
You can also quickly manage sorting order using these toolbar buttons:
Button Action 
Move columns up or down Reset to default
-
Sorting columns in data table
You can rearrange columns two ways:
- Drag the column type icon in the header to a new position.
- Open the Result Set Order/filter Settings window, then:
- Click Sort (
 ) to sort columns alphabetically.
 - Click the column name, then use buttons () to move the
column up or down and click OK.
- Click Sort (
Custom filters
Use Custom filters to manually set WHERE and ORDER BY conditions.
To use custom filters:
- Open the Result Set Order/filter Settings window.
- Go to the Custom tab.
- In the Where box, enter a custom SQL condition.
- Example:
InvoiceId = 1
- Example:
- In the Order by box, define how to sort the rows.
- Example:
UnitPrice DESC
- Example:
- Click OK to apply the changes.
Tip
You don’t need to write the full SQL statement - just the conditions. WHERE and ORDER BY keywords are
already implied.