Schema compare
Note
This feature is available in Enterprise, and Ultimate editions only.
DBeaver lets you compare two database structures and see how they differ. You can compare schemas or full databases, view the changes in a clean diff, and generate scripts to bring one side in sync with the other. Under the hood, DBeaver uses Liquibase snapshots to read metadata from both sides and highlight the differences between them.
Supported databases
- Amazon RDS MariaDB
- Amazon RDS MySQL
- Amazon RDS Oracle
- BigQuery
- CockroachDB
- DB2 for LUW
- DB2i
- EnterpriseDB
- Google Cloud MSSQL
- Google Cloud MySQL
- Google Cloud PostgreSQL
- Greenplum
- HSQL
- Informix
- MariaDB
- MySQL
- Netezza
- Oracle
- PostgreSQL
- SAP HANA
- Snowflake
- SQL Server
- SQLite
- Teradata
- Vertica
- YugabyteDB
Schema Compare process
Select two entities to compare
-
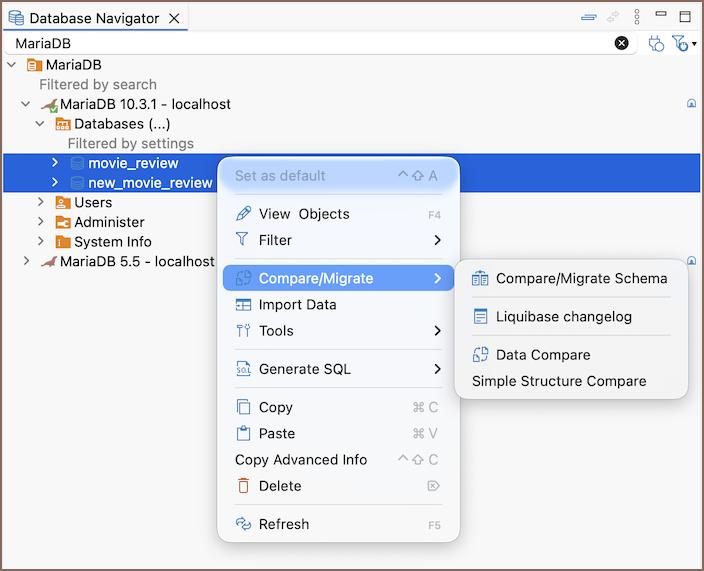
In the Database Navigator, select two objects you want to compare - schemas or databases, depending on what your database supports
Tip
You can also start a compare through AI by sending a short request in AI chat. For supported commands, see Data transfer actions.
-
Open the context menu
-
Choose Compare/Migrate -> Compare/Migrate Schema to open the comparison window
Specify objects for comparison
-
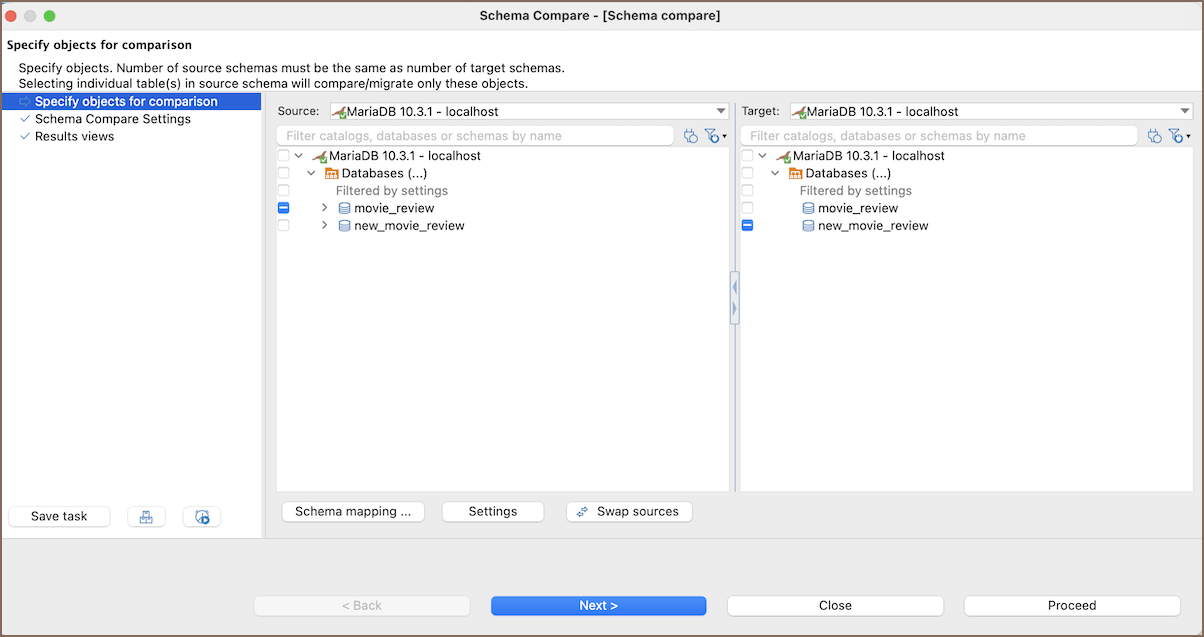
Make sure you selected the correct objects
Tip
If needed, switch source and target using Swap sources.
Select only containers that actually hold tables:
- Schemas - when the database supports schemas
- Databases - when the database uses catalogs but not schemas
- Individual objects - such as tables or views, when supported by the driver
- Datasources - when the database doesn’t support schemas or catalogs
Tip
Use Preferencies to adjust additional Schema Compare options.
-
If everything looks right, click Next to continue to comparison settings
Schema Compare settings
-
Review and adjust the settings you want to use
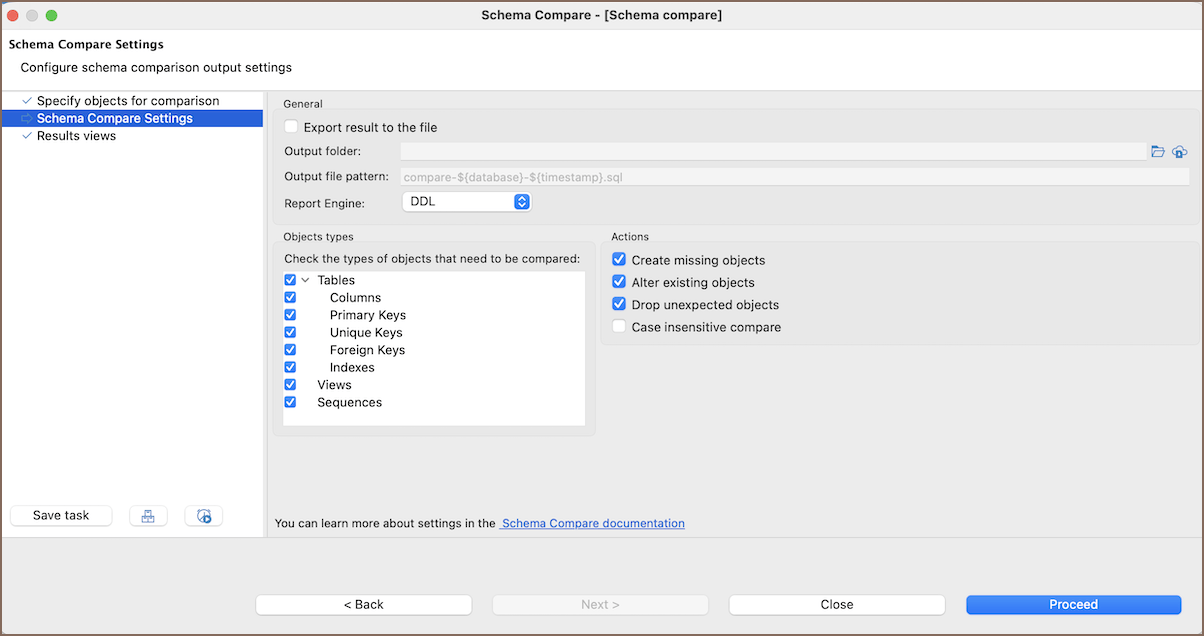
Setting Description Export result to the file Additionally saves the generated diff to a file. Output folder Folder where the generated file will be saved. Enabled only when Export result to the file is turned on. Output file pattern Lets you use variables such as database name or timestamp to build the file name. Enabled only when Export result to the file is turned on. See more details about Pre-configured variables. Report Engine Selects the output format: DDL, Change Log, JSON, YAML, or Plain text. Enabled only when Export result to the file is turned on. Object types Chooses which structural objects to include in comparison (tables, columns, keys, views, etc.). With Liquibase PRO, you can work with extended metadata. For details, see the Liquibase PRO guide. Create missing objects Enables generation of CREATEstatements for objects missing on target.Alter existing objects Enables generation of ALTERstatements for changed objects.Drop unexpected objects Enables generation of DROPstatements for objects missing on source.Case insensitive compare Ignores case differences in object names ( testvsTesT). -
Click Proceed to generate the diff report
Tip
You can export the results of a Schema Compare operation to a remote file system
via Cloud Storage using the Browser remote file system
button  .
.
Results view
By default, you get a DDL diff. It shows the CREATE, ALTER, and DROP statements you need to run to make the
target schema match the source schema.
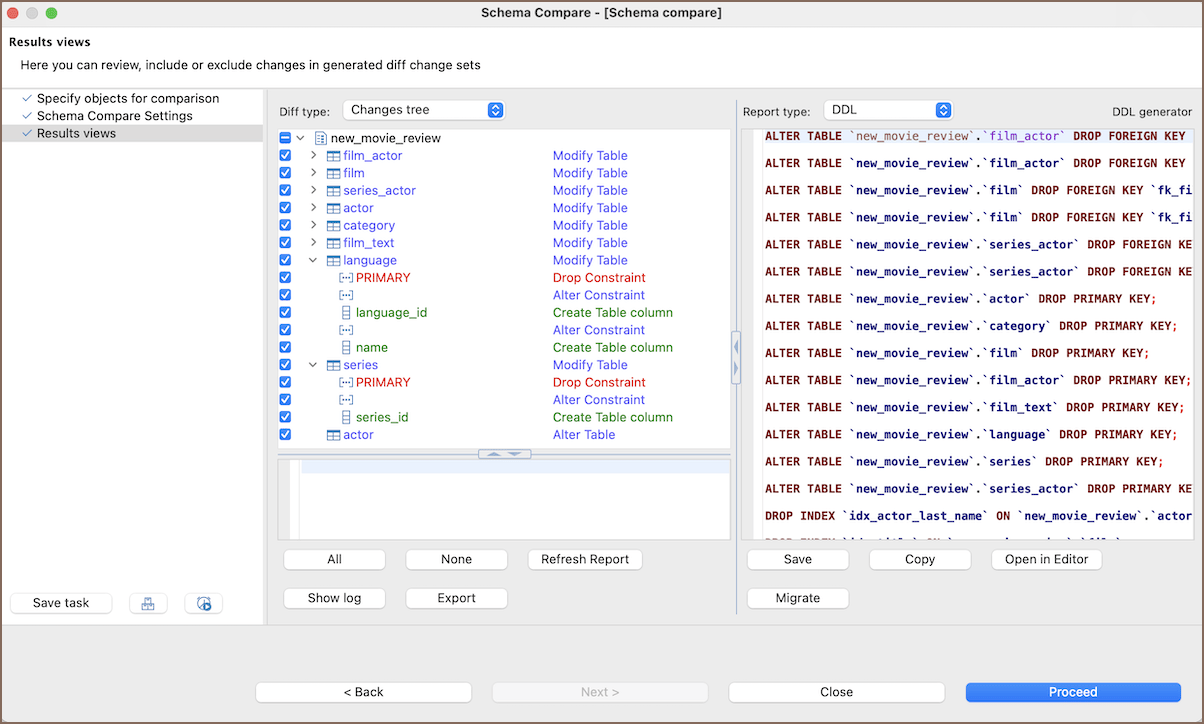
Use the action panel to manage the results:
| Button/Option | Description |
|---|---|
| All | Enables all changes in the changes tree. |
| None | Disables all changes in the changes tree. |
| Refresh Report | Updates the comparison report to reflect any changes made to the selection or schema. |
| Show log | Opens the Schema Compare log. You can control the log detail level in Preferences. |
| Export | Exports the current diff report to a .txt file. |
| Save | Saves the current state of the report. |
| Copy | Copies the generated SQL or report text to the clipboard. |
| Open in Editor | Opens the current diff report in the SQL Editor. |
| Migrate | Executes the generated SQL statements on the target database, applying all selected changes. |
Warning
Migration can’t be undone automatically. Make sure you have a backup or can restore the target database before applying changes.
Save operation as a task
If you run Schema Compare regularly, save it as a task. You can execute the task at any time or add it to a schedule.
You can also include Schema Compare in a composite task. For example, if you export the result as a script, the next step in the composite task can run that script automatically.
Schema Compare global preferences
Go to Preferences -> Editors -> Schema Compare to configure global Schema Compare settings.
| Setting | Description |
|---|---|
| Create missing objects | Include CREATE statements for objects that exist only on the source side. |
| Alter existing objects | Include ALTER statements for objects that differ between sides. |
| Drop unexpected objects | Include DROP statements for objects that exist only on the target side. |
| Case insensitive compare | Ignore case differences in object names when comparing structures. The exact behavior depends on the database. |
| Quote all objects names in the DDL log | Define how object names are quoted in the generated DDL log. When enabled, all object names are quoted. Otherwise, only reserved words or names with special characters are quoted. |
| Log Level | Set how much detail appears in the log: OFF, SEVERE, WARNING, INFO, DEBUG. |
| Import Liquibase Pro Key | Import a Liquibase PRO license key. For details, see Liquibase PRO. |
Troubleshooting
If a comparison fails or produces unexpected results, try reducing the set of objects you compare. Some databases supported by Liquibase may expose metadata differently through JDBC.
Turn off specific object types - such as sequences or views - and run the comparison again. This often helps when a driver returns incomplete or unusual metadata.