

Keycloak OpenID authentication
Note
This feature is available in Enterprise, AWS, and GCP editions only.
Keycloak OpenID lets users sign in to CloudBeaver with their Keycloak accounts through OpenID Connect (OIDC). There's no separate set of logins to manage. You just enter your Keycloak server URL and realm, and CloudBeaver builds the sign-in, token, and logout URLs for you.
Info
Before configuring Keycloak OpenID in CloudBeaver, make sure you've already configured the required client and settings in
your Keycloak realm. This article covers the configuration in
Configuration steps
Enabling Keycloak OpenID authentication
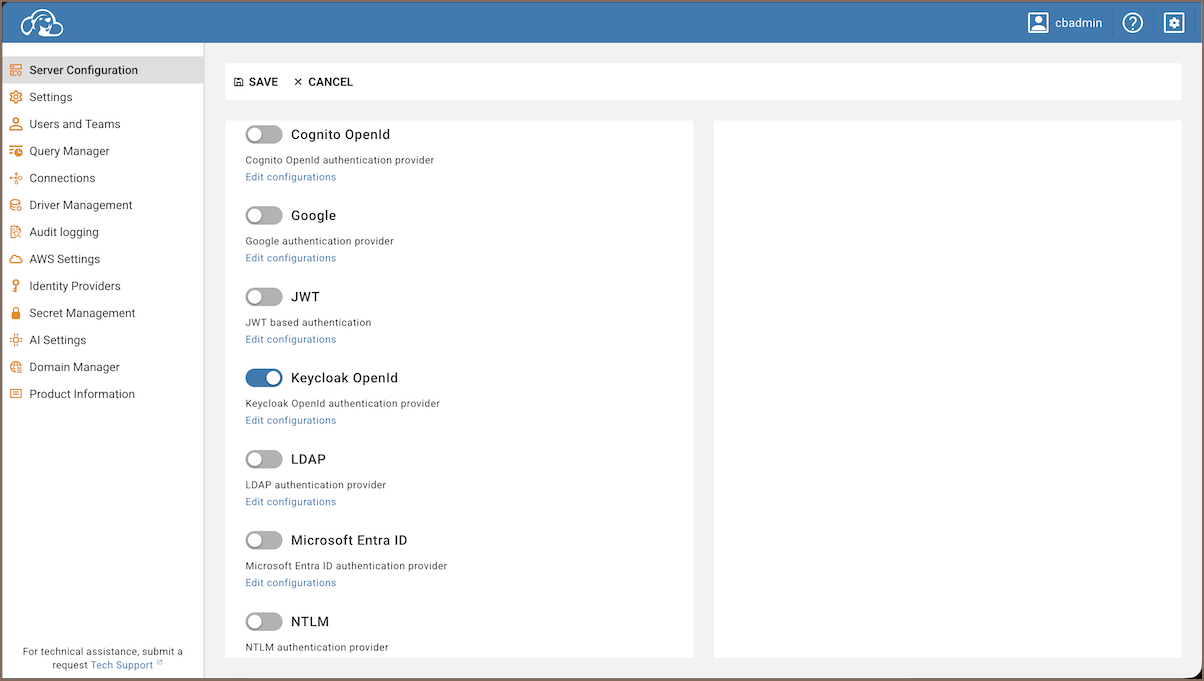
- As an administrator, go to Settings -> Server Configuration.
-
Find the Keycloak OpenId option in the Authentication Settings section and activate it.
-
Save the changes.
Adding an identity provider
- As an administrator, navigate to Settings -> Identity Providers.
- Click the + Add button.
-
Fill in the following fields:
Field Description Provider Type Select Keycloak OpenIdfrom the dropdown menuID Enter a unique identifier for the configuration Configuration name Enter a descriptive name for this configuration Description Provide a brief description of this identity provider configuration Icon URL Enter the URL of an icon to represent this provider Disabled Leave unchecked to enable this identity provider Client ID The client identifier registered in your Keycloak realm Client Secret The client secret associated with the client ID Server URL The Keycloak server base URL, for example https://keycloak.example.comRealm The name of the Keycloak realm that holds your clients and users Read Keycloak group information If checked, the groupsscope is requested for team mapping. The Keycloak client must also be configured to include group membership in thegroupsclaim.
Important
Enabling Read Keycloak group information only requests the groups scope. You must also
configure a group membership mapper for your Keycloak client (or a client scope that includes one) to add group
information to the groups claim. Otherwise,
- Click the Create button.
-
Copy Redirect and Sign out links:
- Enter the newly created identity provider.
- Copy the Redirect link and the Sign out link.
-
Update redirect URIs in Keycloak:
- In the Keycloak admin console, open your client under Clients -> [your client] -> Settings.
- Paste the copied Redirect link into Valid redirect URIs.
- Paste the copied Sign out link into Valid post logout redirect URIs.
- Click Save in Keycloak to finalize these configurations.
Tip
CloudBeaver derives the authorization, token, userinfo, and logout endpoints from the Server URL and Realm, so you don't enter them manually.
Logging in
- Go to the login screen.
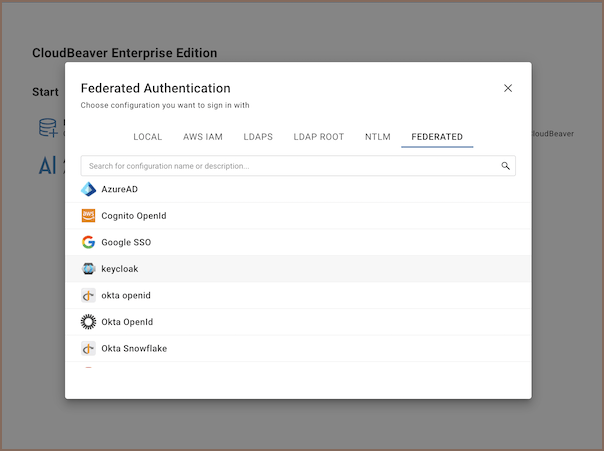
- Select the Federated authentication method, labeled with the Configuration name you specified.
-
Click the authentication method. You're redirected to the Keycloak sign-in page.
-
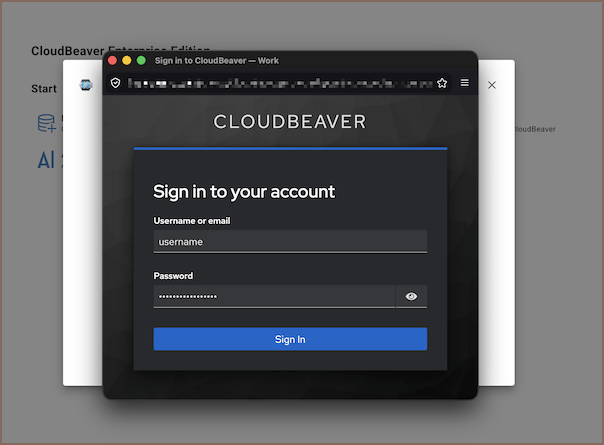
Enter the username and password of your Keycloak account. You're redirected back and logged into CloudBeaver.
Mapping teams to Keycloak groups
You can associate CloudBeaver teams with Keycloak user groups, so members of a Keycloak group automatically get the matching team.
Info
For creating and managing teams, see Teams.
- Enable Read Keycloak group information in the identity provider configuration.
- As an administrator, navigate to Settings -> Teams and open a team.
- In the Keycloak Group ID field, enter the unique ID of the Keycloak group you want to link to this team.
Use the group's unique ID from Keycloak, not its display name, to make sure the association stays stable if the group is renamed.
Important
The checkbox only requests the groups scope. For the group claim to actually appear in the token, add a
group membership mapper to your Keycloak client (or a client scope that includes one). Without it, no group
information reaches CloudBeaver and team mapping stays empty.
Importing users from Keycloak
You can import users from your Keycloak realm ahead of time, instead of waiting for each user to sign in. For the import steps, see User provisioning.
Before importing users, make sure the Keycloak client is configured with:
- Client authentication enabled
- Service accounts enabled
- The service account has the view-users role from the realm-management client
- A client secret configured in the identity provider settings
Note
You don't need service accounts for regular sign-in. Configure them only if you plan to import users from Keycloak.