

Role management
This article explains how to assign and change user roles in the web and desktop clients.
Assign a role when creating a user
Assign a built-in Team Edition role when you create a user or change the role of an existing user.
Info
For more details on user management, see Users.
- As an Administrator, go to Settings -> Administration -> Users and Teams -> Users.
- Select Create.
-
On the Info tab, select a role from the Role list.

-
Enter the required user information.
- Select Create.
- As an Administrator, go to Window -> Show View -> Administration.
- Select the Users tab.
- Select Create.
-
Select a role from the Role list.

-
Enter the required user information.
- Select OK.
Change a role
Open an existing user to assign a different role.
- As an Administrator, go to Settings -> Administration -> Users and Teams -> Users.
- Select the username.
-
On the Info tab, select a role from the Role list.

-
Select Save.
- As an Administrator, go to Window -> Show View -> Administration.
- Select the Users tab.
- Select the user.
-
Select a role from the Role list.

The new role is saved automatically.
Info
After an Administrator changes the role of a signed-in user:
- The web client prompts the user to apply the updated permissions.
- The desktop client displays a warning and restarts to apply the updated permissions.
Initial role setup with identity providers
When a user logs in for the first time through an identity provider, Team Edition assigns the role with the lowest level of access available under the current license. An identity provider can assign a different role through automatic role mapping. To assign a role manually, see Change a user's role.
Note
With a multi-server license, the initial role can be assigned from the DBeaver website.
Automatic role mapping
To assign roles automatically when users sign in, use one of these methods:
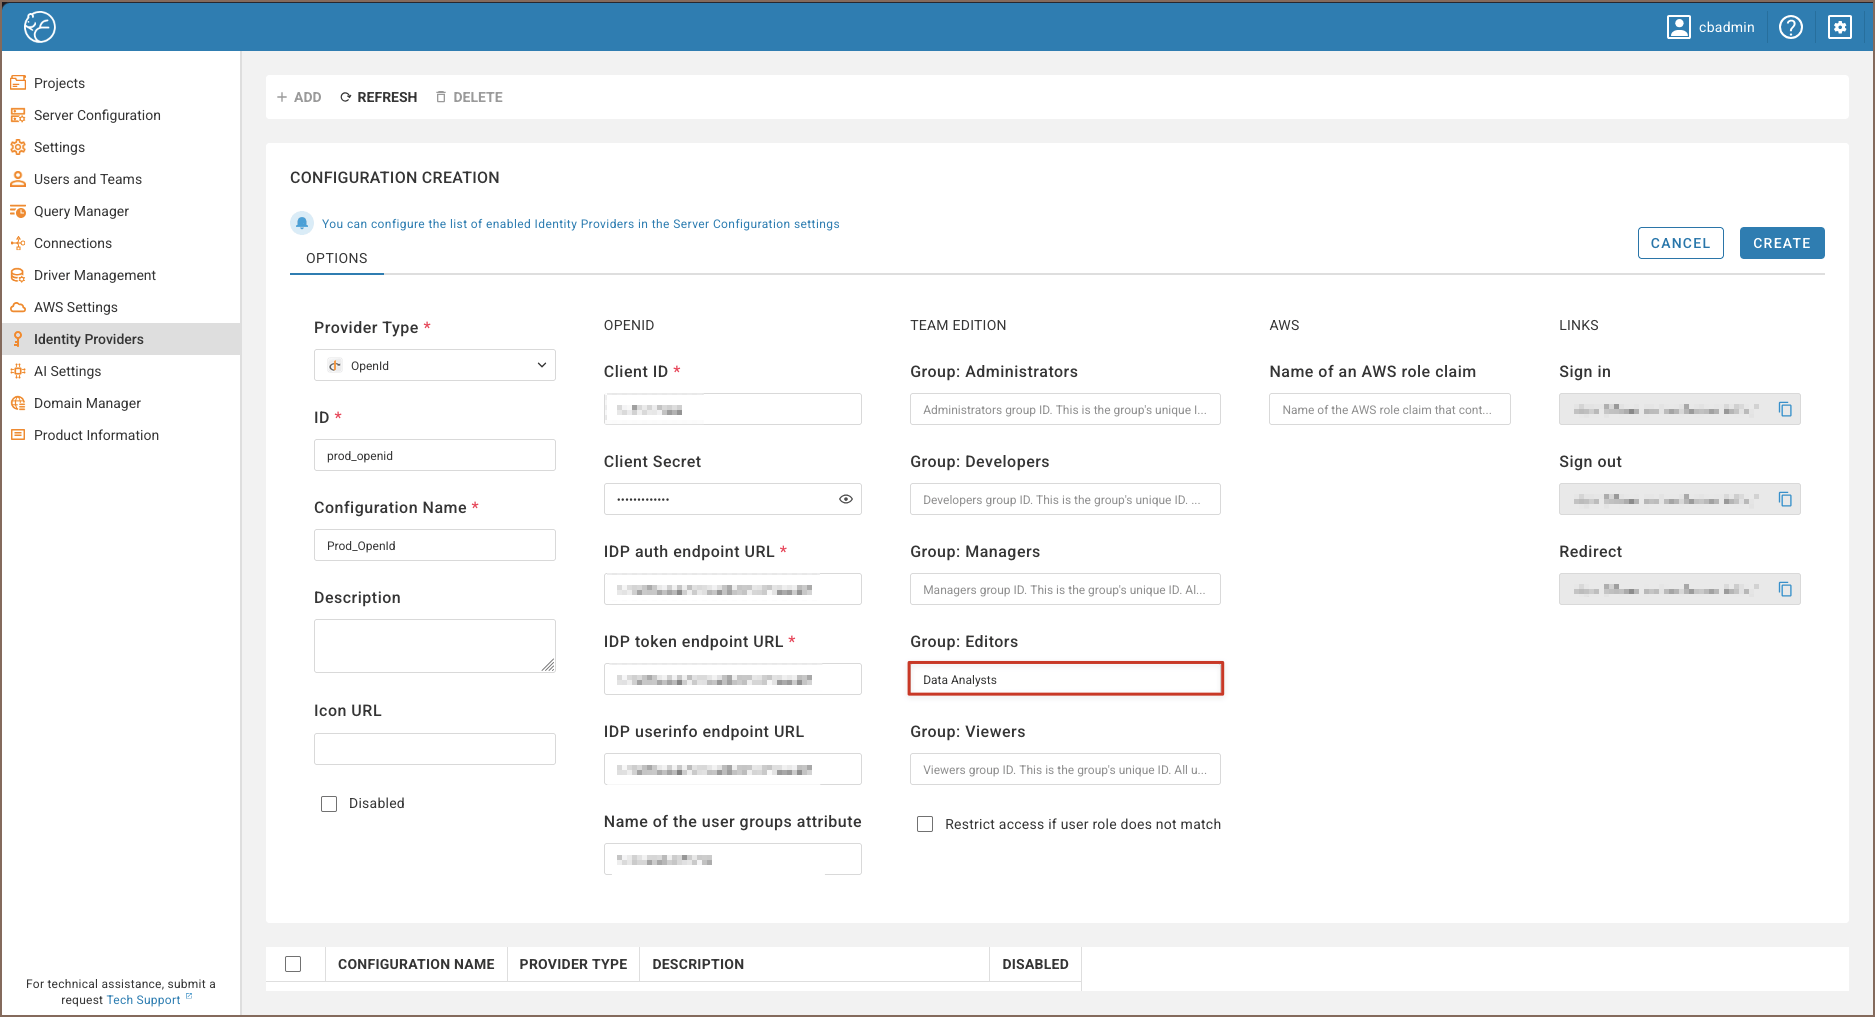
Enter an identity provider group name or ID for each Team Edition role you want to assign. The value must match the group name or ID from your identity provider.
Available providers include:
If a user belongs to groups mapped to different roles, Team Edition assigns the role with the highest level of access.
In this example, users in the Data Analysts group receive the Editor role when they sign in.
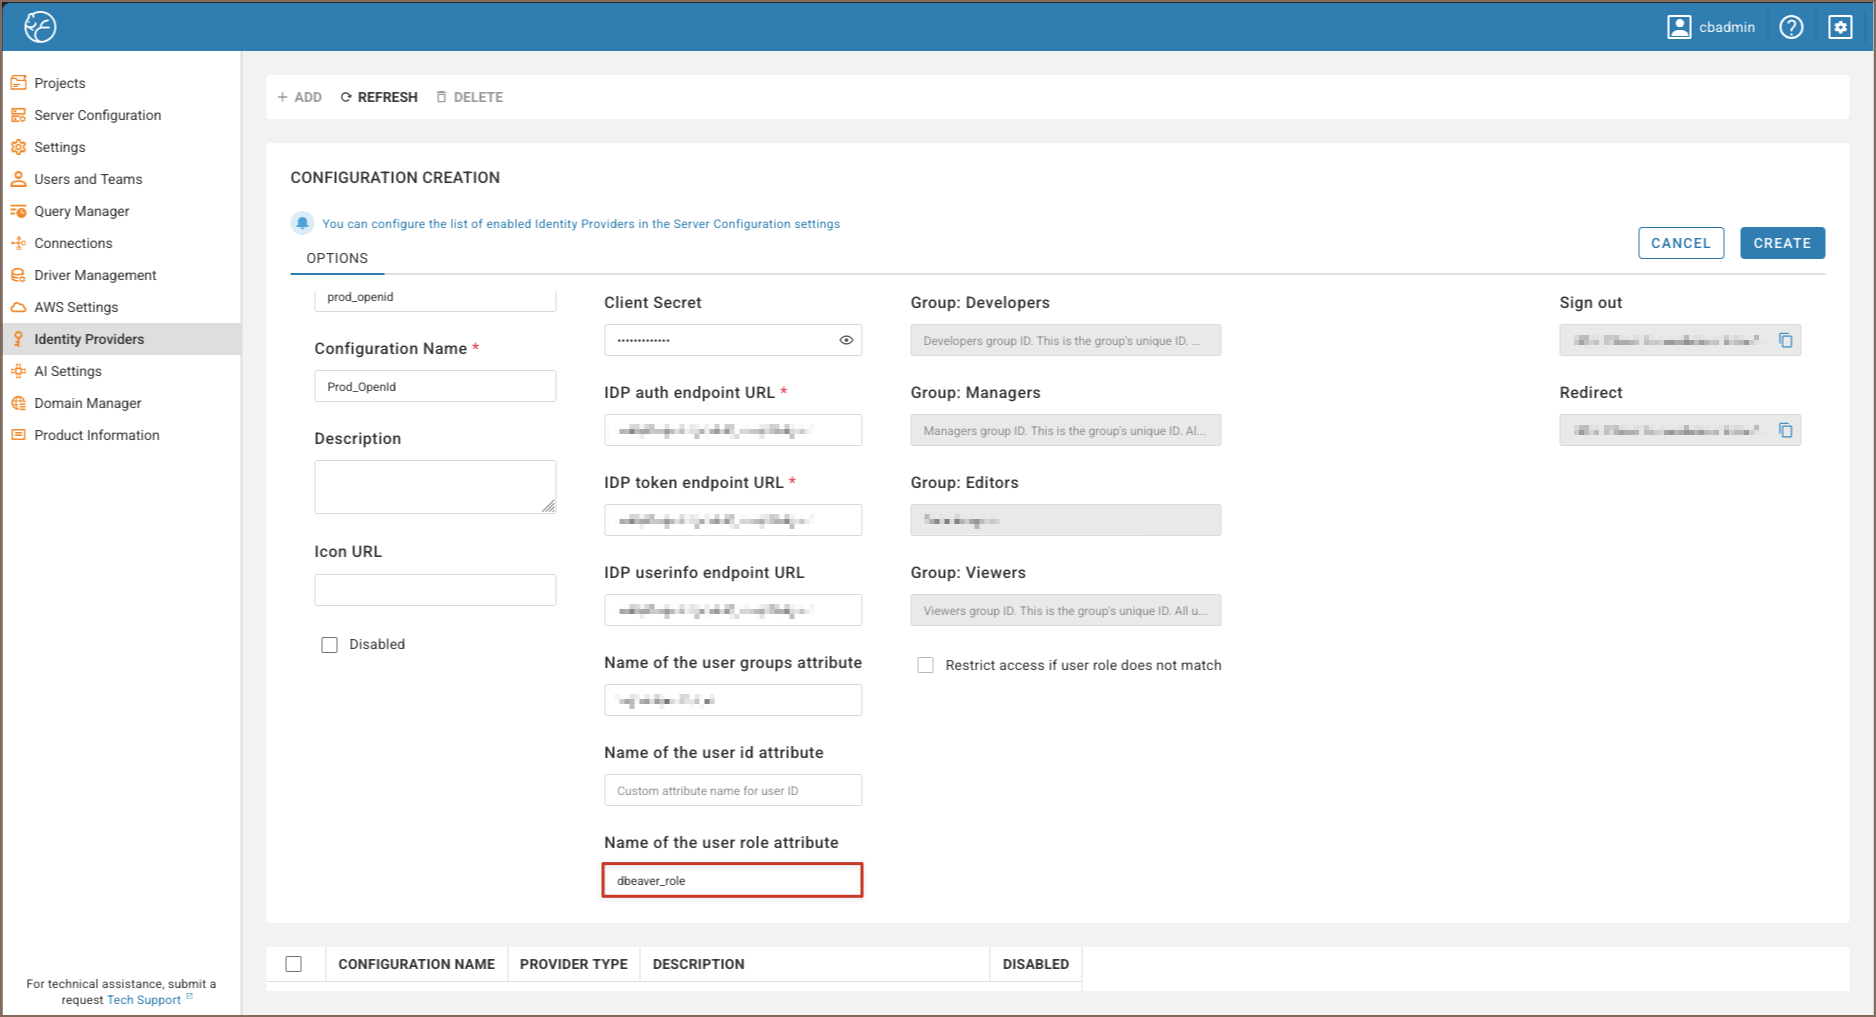
Enter the name of the identity provider attribute that contains each user's Team Edition role.
Supported providers:
In this example, dbeaver_role is the attribute name, not the role itself. Configure the identity provider to set
this attribute to a Team Edition role, such as EDITOR. When the user signs in, Team Edition reads the value and
assigns the Editor role.
Info
JWT and Reverse proxy work differently. They send the role directly in a token or HTTP header, so you don't need to configure group mapping.