

Reverse proxy header authentication
Team Edition offers a feature for authorization and authentication using reverse proxy headers. This method allows to authenticate users via specific HTTP header fields.
Important
Reverse proxy authentication trusts the configured HTTP headers. If users can access Team Edition directly or send these headers themselves, they can authenticate as any user. Expose Team Edition only through a properly configured reverse proxy.
Secure the reverse proxy
Before enabling reverse proxy authentication:
- Make sure Team Edition is reachable only through the reverse proxy. Do not expose its internal port or another network interface directly to users.
- Configure the reverse proxy to remove or overwrite all authentication headers supplied by the client before forwarding
the request. Header names are case-insensitive. This includes the default headers
X-User,X-Team,X-Role,X-Role-TE,X-First-name,X-Last-name, andX-Full-name. Remove any custom header names configured for the identity provider as well. - Preserve Team Edition's CSRF protection. Do not configure authentication cookies with the
SameSite=Noneattribute unless the deployment includes equivalent CSRF protection.
Configuration Steps
Enabling Reverse proxy authentication
-
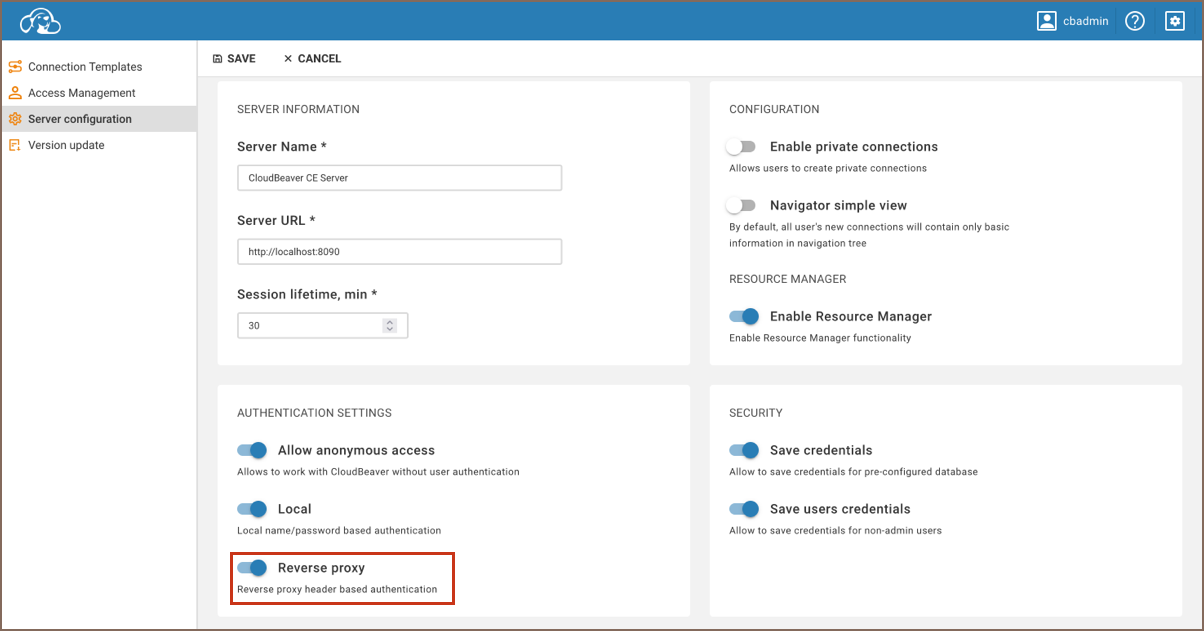
As an administrator, navigate to the Settings -> Server configuration.
-
Locate the Reverse proxy option and activate this setting to allow reverse proxy authentication.
-
Save changes.
Reverse proxy identity provider configuration
To configure reverse proxy authentication in the Team Edition using the graphical user interface (GUI), follow these steps:
- Log in as an administrator.
- Navigate to Settings -> Server configuration in the Team Edition interface.
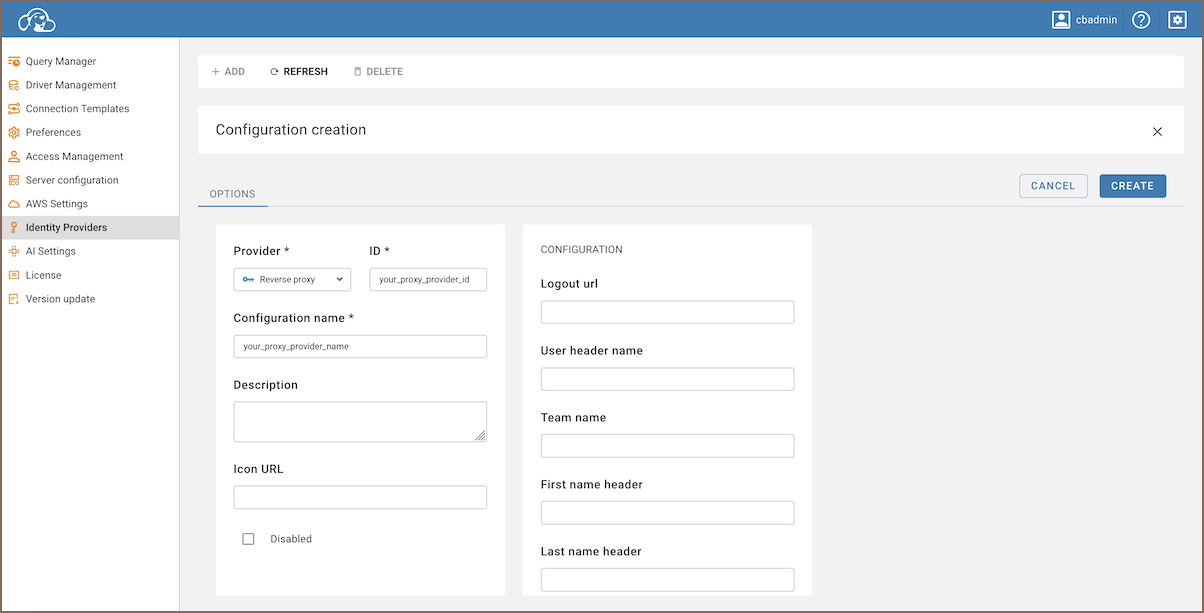
- Click on the + Add button to create a new authentication provider.
- In the Provider dropdown menu, select Reverse Proxy.
- Enter a unique identifier in the ID field and a name for the configuration in the Configuration name field.
- Enable Auto-create users to create a Team Edition user automatically when a user logs in for the first time. If you disable this option, only existing users can log in.
- Click on Save to apply the changes.
Configuring default HTTP header fields
Configure the standard HTTP header fields as follows:
| Header | Description |
|---|---|
X-User |
user login |
X-Team |
user teams |
X-First-name |
user profile firstname |
X-Last-name |
user profile lastname |
X-Full-name |
user profile fullname |
X-Role |
deprecated header for user teams |
X-Role-TE |
user roles |
You can change the header names in the reverse proxy identity provider configuration. Remove or overwrite the custom names in the reverse proxy as well.
Header example
Consider a user named newuser, belonging to both user and admin teams. To access an application with reverse proxy
header authentication enabled, the following HTTP headers should be set in the request to the Team Edition application:
Tip
Team Edition categorizes users into two default teams: user and admin. Default delimiter used to separate
teams in the header is | (could be customized in team-delimiter parameter, all characters are allowed).