Data compare
Note
This feature is available in Enterprise, Ultimate and Team editions only.
Overview
DBeaver provides functionality to compare two tables or query results, which is useful when you need to identify minor differences in datasets that appear almost identical. This capability is essential for tasks such as:
- Quickly visualizing and navigating differences.
- Exporting data that differs between sources.
Steps for comparing data
First, select the tables you wish to compare from the Database Navigator.
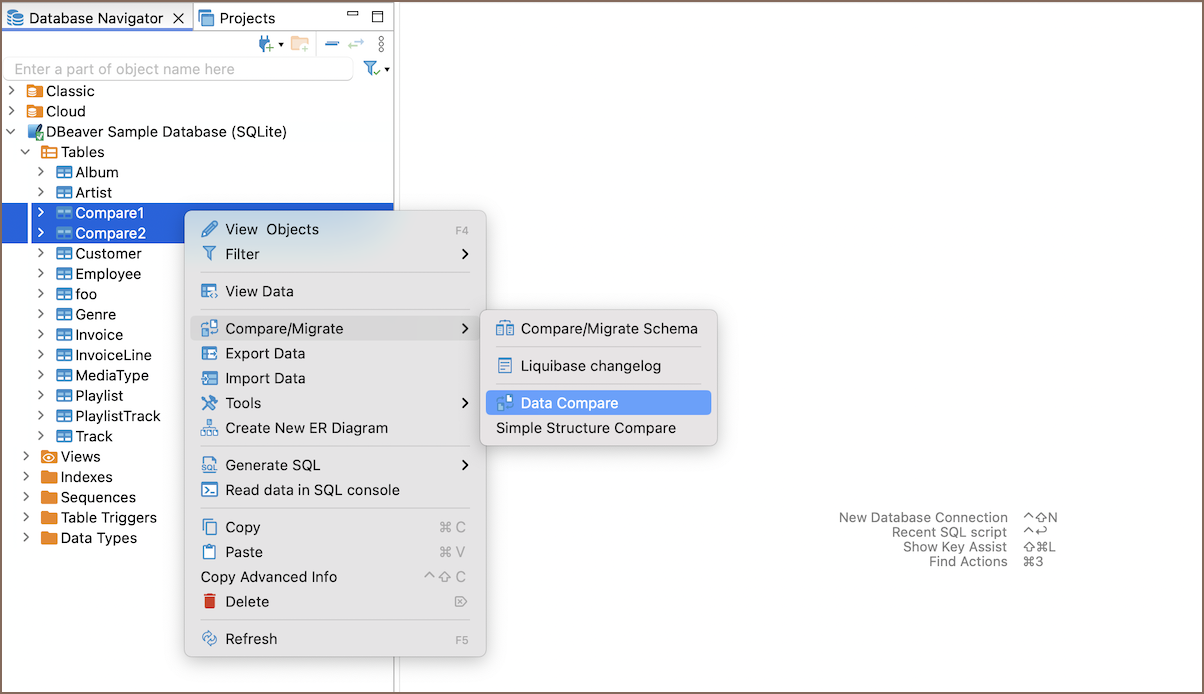
Choose a comparison type
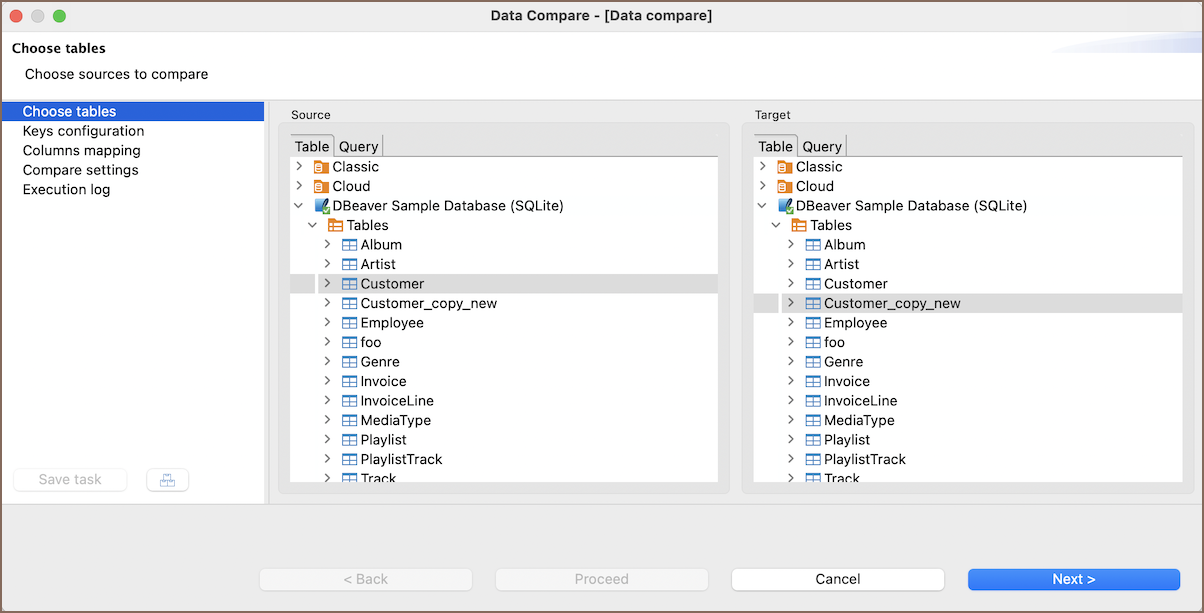
Select what you will compare by choosing the appropriate tab in the Source / Target windows.
-
Tables: Compare two tables.
-
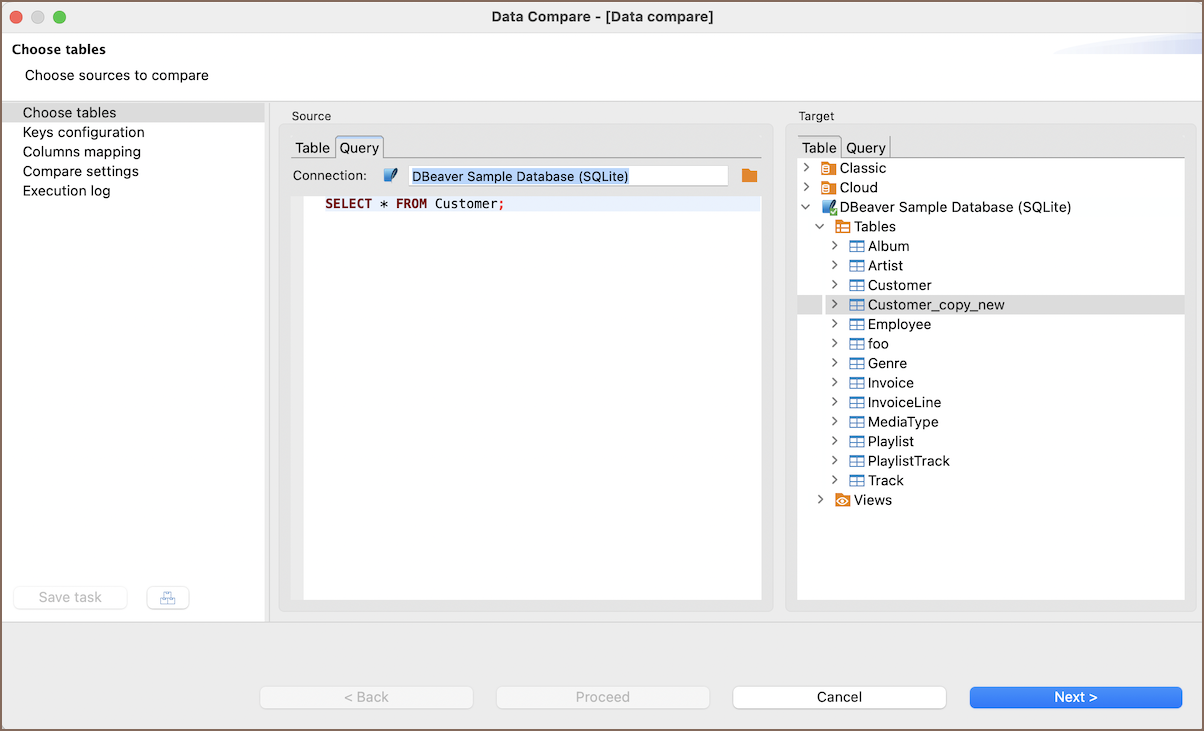
Table to Query: Compare a table with the result of an SQL query.
-
Queries: Compare the results of two SQL queries. When comparing the results of two SQL queries, you have two methods to perform this operation:
-
Use Source/Target Query tabs
Select the Query tab in both the Source and Target windows. Enter your SQL queries directly into these fields to set up the comparison.
-
Use SQL Editor
Alternatively, write your SQL queries in the SQL Editor. Highlight the queries and choose Execute -> Data Compare from query.
Tip
You can compare objects from the same or different databases, or even between different Relational Database Management Systems (RDBMS), such as PostgreSQL and MySQL.
Keys configuration
Select one or more columns that will serve as the unique key for the comparison. Choosing the wrong keys may result in invalid comparison results.
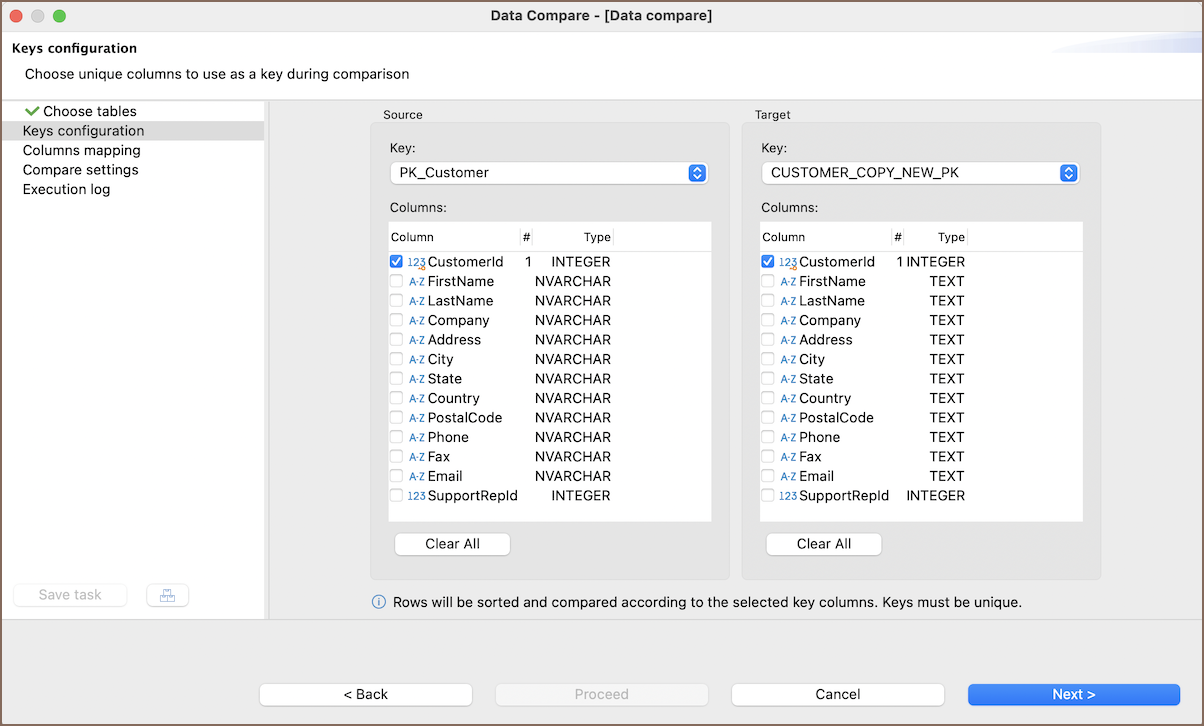
Note
By default, if the table has a unique key, it will be selected automatically during the initial setup. If the table doesn’t have a primary key, you can manually select one or more columns to define a unique key.
Composite keys
When you select multiple columns, they form a composite key. Composite keys uniquely identify rows based on a combination of values across the selected columns.
Tip
Select columns for composite keys that, together, uniquely identify each row. Avoid columns with duplicate or null values, as they may impact comparison accuracy.
Column mapping
If the objects you are comparing have different ordering, naming, or quantities of columns, you can adjust their mappings or skip columns that are not of interest.
You can use the Auto assign button to automatically link columns with the same names.
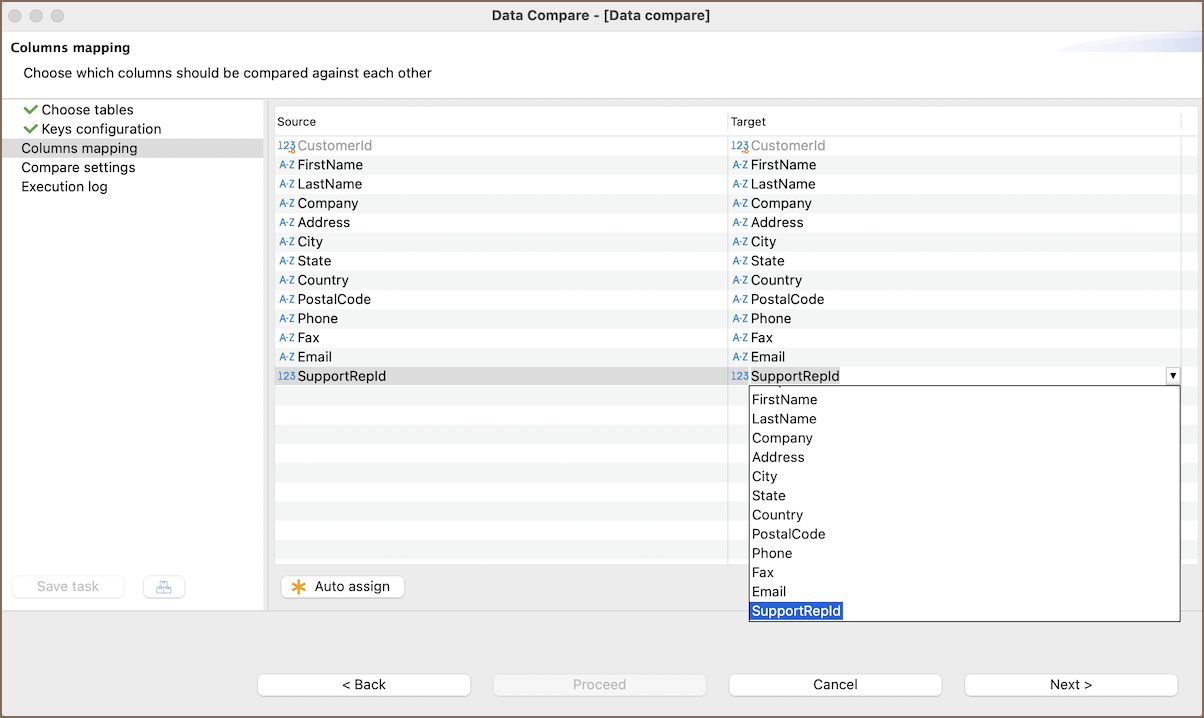
Note
This page will only feature columns that are not used as the primary key configured on the previous page.
Compare settings
On the final page of the Data Compare wizard, configure settings to tailor the data comparison to your needs:
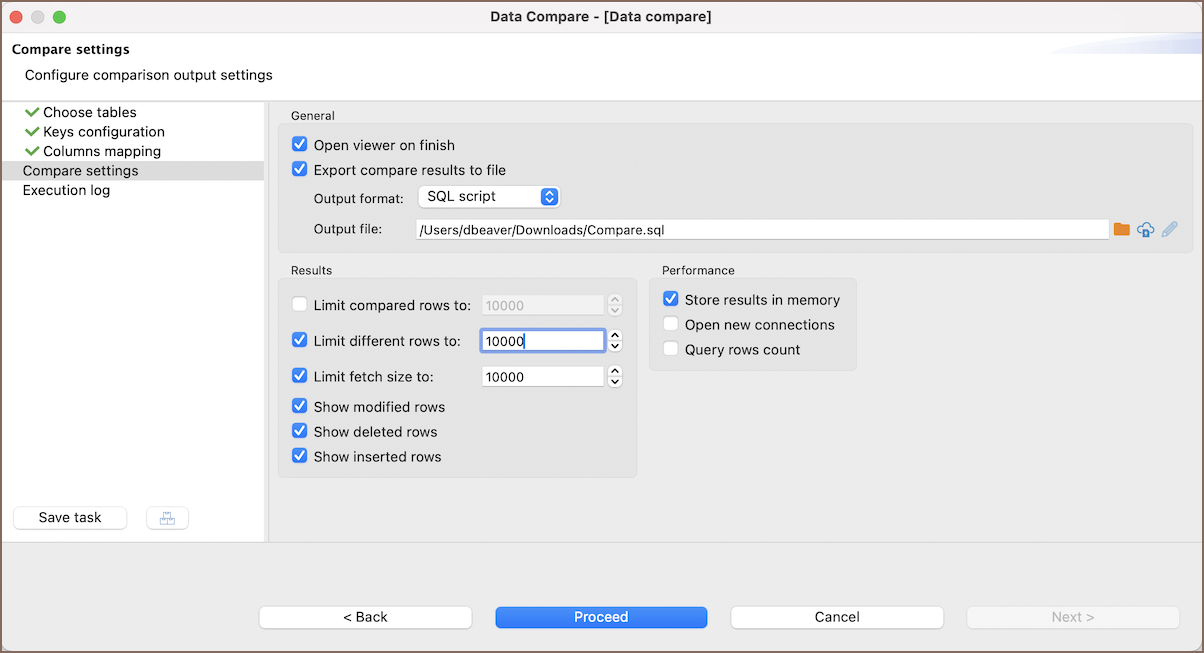
| Setting | Description |
|---|---|
| Open viewer on finish | Opens the compare viewer for a visual overview of the differences once the comparison is complete. |
| Export compare results to file | Exports the SQL script diff to a file. You can choose the output format and specify the output file path. |
| Limit compared rows to | Limits how many rows must be compared against each other before ending the comparison. |
| Limit different rows to | Limits how many rows must be differ between each other before ending the comparison. |
| Limit fetch size to | Determines how many rows should be fetched at once, which helps manage memory and performance during comparison. |
| Show modified rows | Determines whether modified rows should be included in the diff or not, allowing you to track changes in the data. |
| Show deleted rows | Determines whether deleted rows should be included in the diff or not, providing insight into data that has been removed from the database. |
| Show inserted rows | Determines whether newly inserted rows should be included in the diff or not, allowing you to see additions to the database. |
| Store results in memory | Stores results in memory for further processing. Note that DBeaver might run out of memory when comparing large tables if this option is enabled. When disabled, results will be stored in a temporary database. |
| Open new connections | Opens new physical connections for data reading, which can help manage resources and ensure the stability of data comparison operations. |
| Query rows count | Queries row count before performing compare. This lets you track the progress of the comparison but may cause performance faults in some cases. |
| Save task | Opens the Save Task window to assist in creating a task during the compare process. This window provides options and settings for creating and configuring a task related to the compare operation. |
Tip
You can export file to a remote file system via Cloud Storage using the
Browser remote file system button  .
.
Execution log
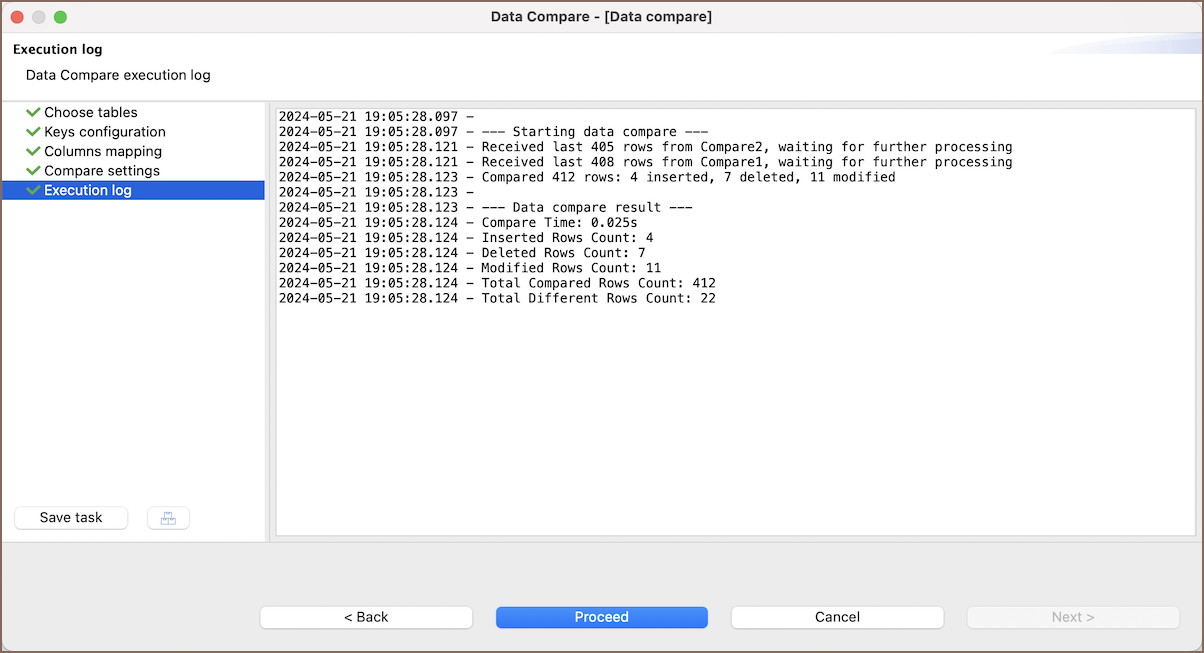
Once you have configured all settings and clicked Proceed, the Data Compare wizard will perform the comparison operation:
- An Execution Log window will display the progress and outcome of the comparison process.
- Simultaneously, a separate window will open showing the comparison results. This window provides a detailed view of differences between the datasets based on the specified settings.
Viewing the results
After the comparison process is complete, you can view the results in the viewer. It highlights the differences between the datasets in detail, with each row that shows a discrepancy being clearly marked.
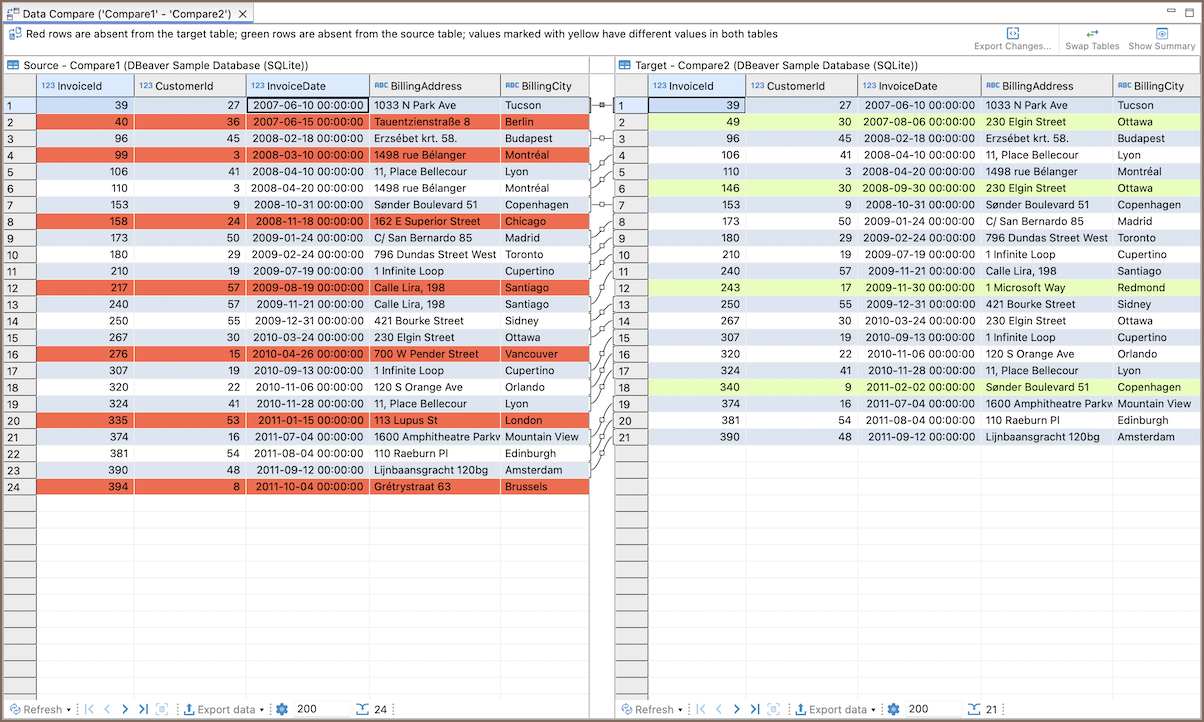
Note
A complete visual preview of the results is available only when Data Compare is launched through the wizard. If launched as part of a task, the visual editor will not open. Instead, only statistics will be recorded in the execution log.
Additional tools
The viewer not only displays the differences but also provides tools to manage and interpret these differences effectively. Here's what you can do within the compare viewer:
| Feature | Button image | Description |
|---|---|---|
| Export changes |  |
The results of the Data Compare can be exported as an SQL script, which includes DELETE, INSERT, and UPDATE statements to make the data in the second table match the first. Alternatively, you can export the results in an HTML format as a table for easy viewing and sharing. |
| Swap tables |  |
The Swap tables button allows you to switch the positions of the source and target data panels within the viewer. |
| Show summary |  |
By clicking the Show Summary button, you can access a statistical summary and analysis of the differences found between the datasets. This summary provides a quick overview of the total changes, including the number of modified, deleted, and inserted rows. |
Tip
You can also export the comparison results table through Export data button
 in the bottom toolbar
or copy rows or individual values that differ.
