ODBC JDBC driver
Note
This feature is available in Lite, Enterprise, Ultimate and Team editions only.
Overview
ODBC allows you to create a connection to almost any database in DBeaver by using native ODBC drivers. You can use it as an alternative to DBeaver drivers, or if DBeaver does not have a driver for your database.
As of now, we aim to support any ODBC drivers. However, the following database drivers have been verified for compatibility:
- Amazon Redshift
- BigQuery
- DB2 for LUW
- DB2 for IBM i
- MariaDB
- MySQL
- Microsoft Access
- Oracle
- PostgreSQL
- SQL Server
- SQLite
- Snowflake
Important
DBeaver does not and will not support 32-bit ODBC drivers due to the technical limitations of the 64-bit Java Virtual Machine (JVM).
Installing ODBC driver manager
DBeaver works with ODBC drivers using ODBC driver manager. A driver manager is a component is installed in your operating system that provides access to drivers written in native programming languages.
- On Windows, a driver manager is already installed by default.
You can access it by pressing WIN+R and typingodbcad32. - On Linux and macOS, you need to install this component separately.
We recommend the iODBC driver manager as it's confirmed to work flawlessly with DBeaver against Linux and macOS. To install, follow the provided instructions.
You can access it by typingiodbcadm-gtkin the terminal.
Installing ODBC drivers
- On Windows, it's done by installing a driver using Windows Installer (
.msi). The installation is the same as for any other software. - On Linux and macOS, a driver can be either installed from a package manager or by building it manually.
Once a driver is installed, you need to add it to the driver manager. Open the driver manager, go to ODBC Drivers tab, press Add a driver and select required files.
Configuring ODBC data sources
Note: The process is mostly the same for all operating systems.
- Open the driver manager
- Go to User DSN or System DSN tab
- Choose User DSN if you want to create a data source accessible only by the current user
- Choose System DSN if you want to create a data source accessible by all users
- Click Add and choose the appropriate driver
- Configure data source settings and click OK
Creating ODBC connections in DBeaver
Open the New Database Connection dialog and select ODBC (Not ODBC - Legacy).
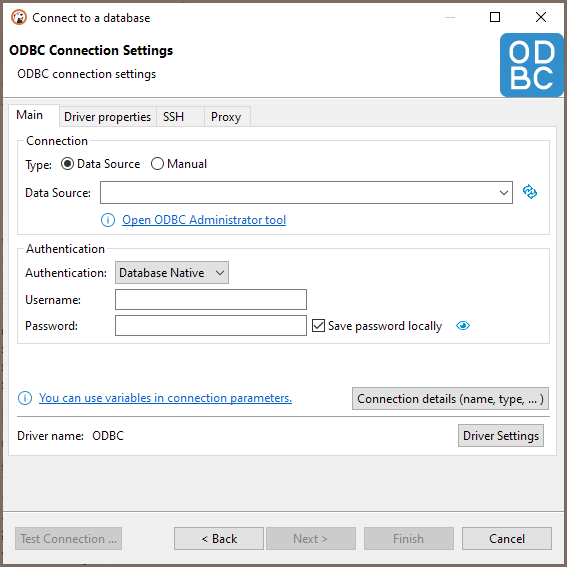
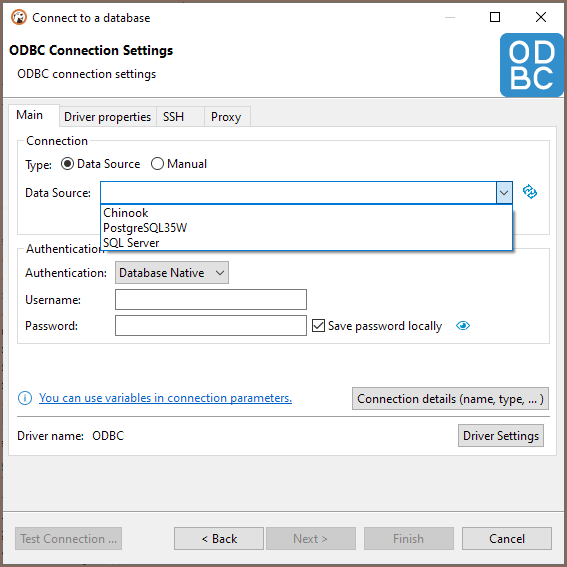
If you want to use a configured ODBC data source, switch to Data Source connection type and choose it from a drop-down menu:
| Data Source | Data Source (drop-down) |
|---|---|
 |
 |
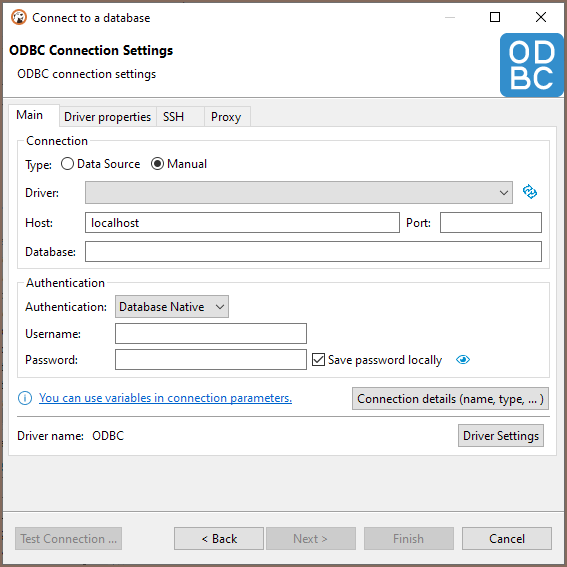
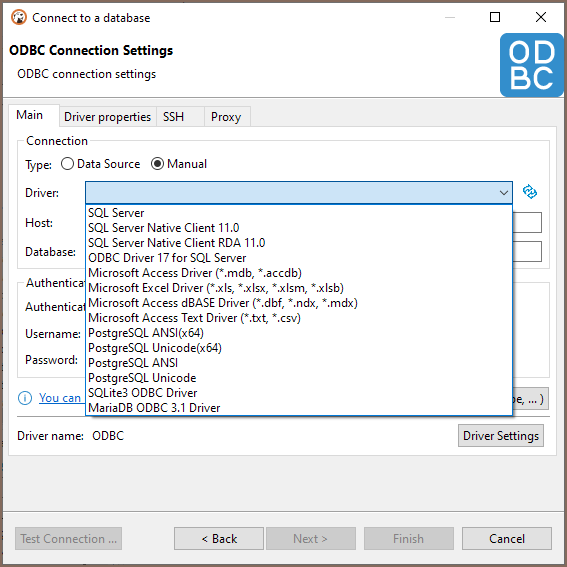
If you want to use an ODBC driver directly and manually configure connection parameters, switch to Manual connection type and choose an appropriate driver from a drop-down menu and fill the rest of the fields according to your configuration:
| Manual | Manual (drop-down) |
|---|---|
 |
 |
Making existing DBeaver connections use ODBC driver
DBeaver allows you to replace the underlying database driver of a connection with our ODBC driver. This is not the same as creating a new ODBC connection as it keeps all database-specific functionality untouched.
Note
In this mode, you can't use database-specific authentication methods and settings.
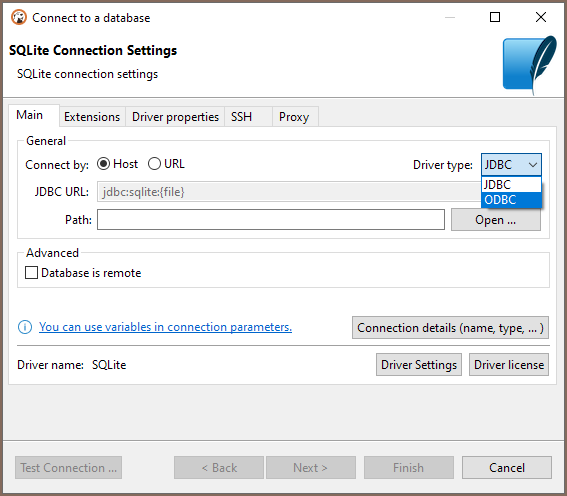
To do so, open existing connection and choose ODBC as the driver type from the drop-down menu:
