Database partitions
Partitioning is a database design technique when data is split across multiple tables or databases but is logically still one table. This technique is proper when dealing with large tables, as it can improve query performance, manageability, and availability.
Note
Not all databases support partitioning, and the level of support and specific functionalities may vary among those that do. Always refer to your specific DBMS documentation to understand the partitioning capabilities it offers.
Creating Partitions
-
The first step to creating Partitions is to create a table. Consider a table with the following columns:
-
Next, go to the Properties tab, and find the Partition by field. Here, you need to specify the Partition criteria. For instance, to Partition the data based on the
yearcolumn, you can useRANGE (year). -
Navigate to the Partitions in tabbed Editors. Right-click and select Create New Partition. This action will open a new Partition table window.
-
In the new window, specify the Partition Expression. This expression defines the boundaries for the Partition. For example, to create a Partition for the years
2023and2024, you can useFOR VALUES FROM (2023) TO (2024).
Creating Partitions using SQL Editor
You can also create a Partition by using SQL statements. The specific SQL command may vary slightly depending on the type of your database.
-
Here's an example of how to create a partitioned table
ordersbased on a range of Partition on theyearcolumn using PostgreSQL syntax:CREATE TABLE orders ( orderid int NOT NULL, customerid int NOT NULL, orderdate date NOT NULL, "year" int NOT NULL ) PARTITION BY RANGE ("year");Note
The example provided above uses PostgreSQL syntax for partitioning. For other databases, such as Oracle, MySQL, or SQL Server, it is necessary to use the syntax that corresponds to the specific database system.
-
Next, you would create Partitions within this table. For instance, if you want to create a Partition for the year
2023:
Saving changes
Once you have configured the Partition properties, saving these changes to the database is essential. Until you commit your modifications, the new Partition will only exist within DBeaver and will not be added to the actual database table. Here are three options for committing the changes:
- Click on File -> Save -> Persist.
- Select the desired table in the Database Navigator and press Ctrl+S (or CMD+S for macOS), choose Persist to save the changes.
- Utilize the Save button
 located at the bottom of the
Properties editor and press Persist to save the changes.
located at the bottom of the
Properties editor and press Persist to save the changes.
Creating Partitions in Oracle
Partitions in Oracle are useful for managing large tables by dividing them into smaller, more manageable pieces. For a detailed guide on creating partitions and understanding the benefits of each partitioning type, refer to the Oracle Database Partitioning Documentation.
To create partitions in Oracle via DBeaver, follow these steps:
Tip
Besides using the GUI for creating partitions, you can also create partitions through the SQL Editor. For instructions on using the SQL Editor for partitioning, refer to the Creating Partitions using SQL Editor section.
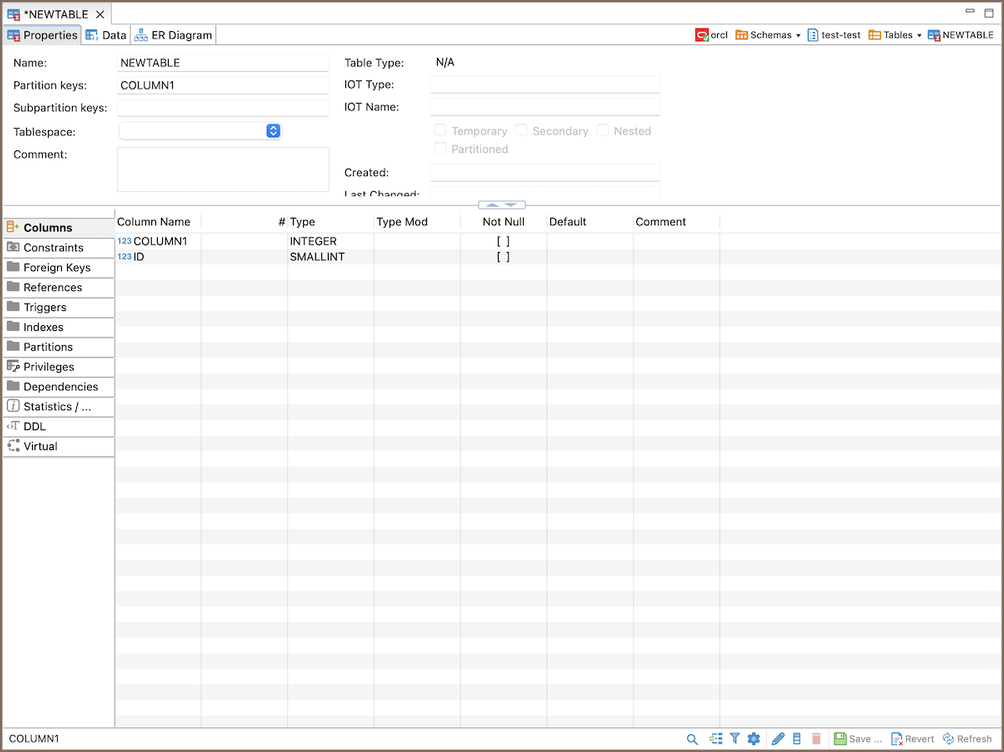
Step 1: Create a new table and columns
-
Create a new table including the columns that you need.
-
Specify the column(s) that will be used for partitioning in the Partition keys field.
-
If necessary, specify any subpartition keys by entering the relevant column name(s) in the Subpartition Keys field.
Tip
You can list multiple columns separated by commas. The case of the column names does not matter, you can
use column1 or CoLumN1.
Step 2: Modify a partitioning type
Optionally, navigate to the Statistics tab for partitioning customization.
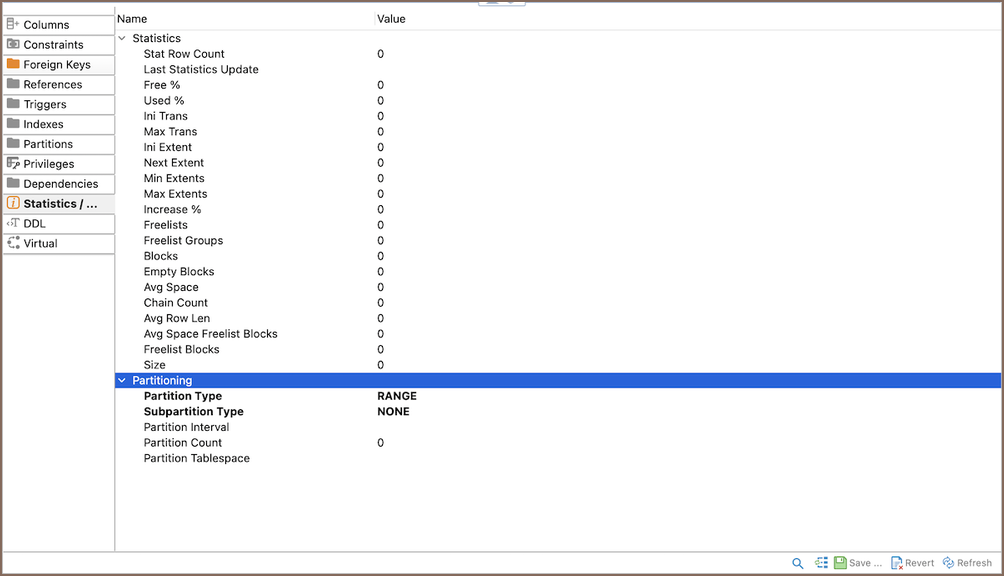
| Setting | Description | Default Value |
|---|---|---|
| Partition Type | Determines the method used for partitioning the table. | RANGE |
| Subpartition Type | Defines the method for subpartitioning, if subpartitions are used. | RANGE |
Note
You can only change the Partition Type and Subpartition Type for a new table, not an existing one.
To customize the partition and subpartition types:
-
Click on the Partition Type or Subpartition Type value field.
-
A dropdown menu will appear where you can select from options such as
RANGE,HASH,LIST, orSYSTEM.
| Partitioning Type | Description |
|---|---|
| RANGE | Organizes data into partitions based on a range of values. |
| HASH | Distributes data across partitions based on a hash key. |
| LIST | Groups data into partitions based on a list of explicit values. |
| SYSTEM | Allows manual control over which partition stores each row. |
Each type serves a different purpose and can be selected based on the specific requirements of your data organization strategy.
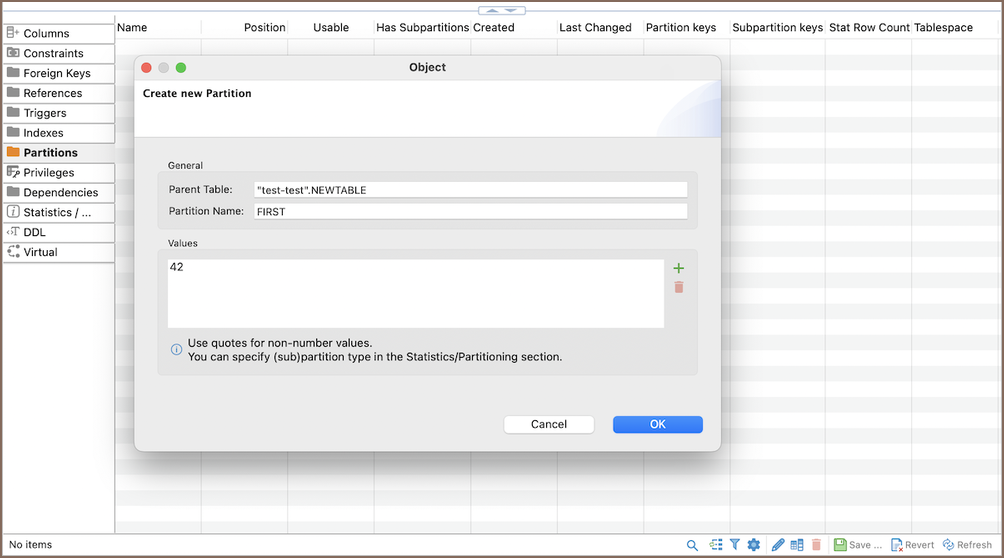
Step 3: Create a new partition
-
Go to the Partitions tab.
-
Create a new partition with the desired values.
Creating a subpartition
Once you have defined the partition keys and, if needed, subpartition keys, you can create a subpartition by following these steps:
-
Navigate to the Partitions tab.
-
Right-click on the partition within which you want to create a subpartition.
-
From the context menu, select Create and then Subpartition from the subsequent options.
Important
Ensure that the subpartitioning keys and types are already defined as these will dictate how the subpartitions are organized.
Step 4: Save the table
After setting up the partitions, save the table to finalize the creation process.

Working with partitioned tables
After you've created a partitioned table in DBeaver, you can interact with it just like any other table. Remember, though, that the Partition expression will impact which data goes into which Partition.
Consider the table you created before, partitioned by RANGE (year) with a Partition for the years 2023 to 2024.
-
To insert data into the table, you would use a regular
INSERTstatement:INSERT INTO orders (orderid, customerid, orderdate, "year") VALUES (1, 101, '2023-01-01', 2023), (2, 102, '2023-06-01', 2023), (3, 103, '2024-01-01', 2024);Each row of data would be automatically directed to the appropriate Partition based on the year value. For instance, the first two rows would be stored in the Partition for
2023, and the third would be stored in the Partition for2024. -
To retrieve data from your partitioned table, you use a standard
SELECTstatement:This will return all rows from the
2023Partition.
Deleting Partitions
Deleting a Partition in DBeaver is simple and can be done via the Database Navigator, the Properties Editor, or the SQL Editor.
Warning
When a Partition is deleted, all the data stored in that Partition is permanently lost. The Partition is also removed from the table's Partitioning scheme. It is always recommended to back up the data before deleting a Partition.
Database Navigator
-
In the Database Navigator, expand the table which contains the Partition you want to delete.
-
Right-click on the Partition, then click Delete.
Properties Editor
-
Go to the Partitions tab of the Properties Editor for your table.
-
Right-click on the Partition, then click Delete.
SQL Editor
You can also delete a Partition by using SQL statements. The specific SQL command may vary slightly depending on the type of your database.