Configure secret providers
Note
This feature is available in Lite, Enterprise, and Ultimate editions only.
Before configuring a secret provider in DBeaver, ensure that:
- Secret provider is set up.
Info
See step-by-step example for creating and using a secret.
Add a secret provider
-
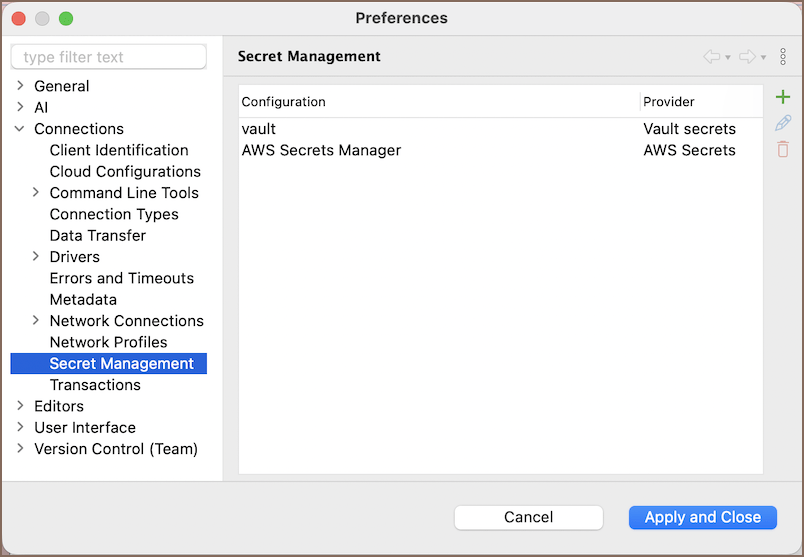
Open Window -> Preferences -> Connections -> Secret Management.
-
Click Add button (
 ).
). - Select a provider from the dropdown menu and click OK.
AWS Secrets Manager
-
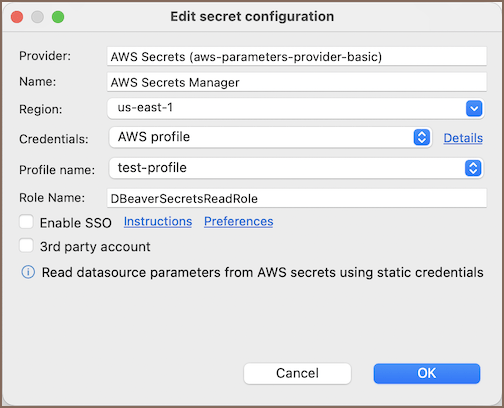
Fill in the required fields.
Field Description Name Custom identifier for this secret configuration. Region AWS region where your secrets are stored. Credentials Method used to authenticate with AWS. Learn more Role Name IAM role to assume when accessing the secrets. Enable SSO Use AWS Single Sign-On for authentication. 3rd party account Access secrets located in a different AWS account. -
Click OK and Apply and Close to save the configuration.
AWS Integrated Cloud Secrets
-
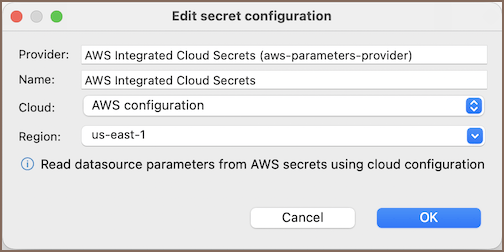
Fill in the required fields.
Field Description Name Identifier for the secret configuration in DBeaver. Cloud AWS configuration settings. For more details on configuring AWS Cloud in DBeaver, see AWS Cloud Explorer. Region AWS region where secrets are stored. -
Click OK and Apply and Close to save the configuration.
Vault secrets
-
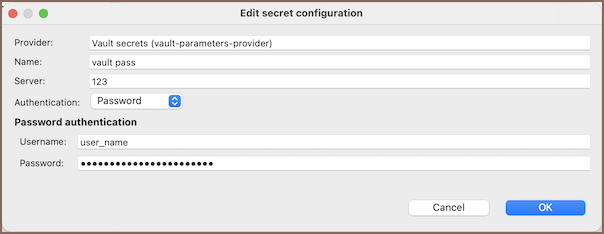
Fill in the required fields.
Field Description Provider Identifier for the secret configuration in DBeaver. Name Unique name for this secret configuration. Server URL of the Vault server used to retrieve secrets. Authentication Type Select an authentication type ( Token,OAuth2,Password). -
Click OK and Apply and Close to save the configuration.
- Import certificate if required.
Authentication types
Password authentication
Use a username and password to authenticate with the Vault server.
| Field | Description |
|---|---|
| Username | Username for authentication. |
| Password | Password for authentication. |
Token authentication
Use an authentication token to access the Vault server.
| Field | Description |
|---|---|
| Token | Authentication token required to access the Vault server. |
OAuth2 configuration
When you select OAuth2, Vault uses a JWT (JSON Web Token) issued by the OAuth2 provider after the user logs in.
Info
Make sure your OAuth2 provider issues JWTs, and Vault is configured to validate them. The JWT must include the claims needed for Vault role mapping.
| Field | Description |
|---|---|
| JWT provider ID | Path where the JWT authentication method is enabled in Vault, for example, auth/jwt/. |
| JWT role | Vault role name to match against a claim in the JWT token. |
| Auth URL | OAuth2 Authorization endpoint (for example, https://example.com/oauth2/authorize). |
| Token URL | OAuth2 Token endpoint (for example, https://example.com/oauth2/token). |
| Callback port | Local port used to receive the OAuth2 authorization code. Default: 8000. |
| Callback URL | Full callback URL automatically generated using the port. Example: http://localhost:8000/callback. |
| Client ID | OAuth2 client ID registered in your OAuth2 provider. |
| Client secret | OAuth2 client secret registered in your OAuth2 provider. |
Info
For details on configuring JWT authentication in Vault, see Configuring JWT authentication.
JWT configuration
Configuring JWT authentication
JWT authentication requires an external Single Sign-On (SSO) provider (e.g., Okta) because Vault does not generate JWTs internally. It works with any OpenID Connect (OIDC) provider that issues JWT tokens.
This configuration happens on the Vault side and includes setting up authentication methods, validation rules, and role mappings.
-
Enable the JWT authentication method in Vault
- Enable JWT authentication.
- Configure JWT validation settings, such as issuer and audience.
-
Create a role in Vault
- Vault does not assign roles automatically.
- Use the API to create a role.
- Define policies and specify claims for user identification.
a. Configure role assignment in the SSO provider
- Ensure your SSO provider includes user roles in the JWT.
Info
Use the SSO provider's documentation to configure role claims.
b. Match the Vault Role Claim with a JWT claim
- The Vault Role Claim field should match the custom claim in the JWT token.
- If it does not match, authentication will fail.
Info
See the Vault documentation for more details.
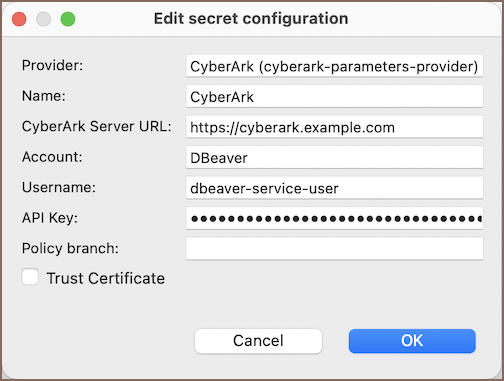
CyberArk
-
Fill in the required fields.
Field Description Name Unique identifier for the secret configuration in DBeaver. CyberArk Server URL URL of the Conjur OSS server (e.g., https://conjur.example.com).Account Conjur tenant or organization account name (e.g., myorg).Username Conjur user ID used for authentication. API Key API key associated with the Conjur user for authnlogin.Policy branch Path to the policy namespace where secrets are stored (e.g., dev/app).Trust Certificate (Optional) Trust the CyberArk server's SSL certificate without manual import. Enable this if you're using a self-signed certificate or connecting to a server whose certificate isn't trusted by default. Info
For more details on authentication, policy structure, and SSL configuration, CyberArk official documentation.
-
Click OK and Apply and Close to save the configuration.
- If required, import the certificate.