

CData drivers
DBeaver lets you connect to databases, cloud services, and business applications such as Salesforce and HubSpot through commercial CData JDBC drivers. You can start a 30-day trial directly in DBeaver or open CData's website to purchase a special CData license for personal use.
Info
For information on available JDBC drivers, see the CData JDBC driver catalog.
Enable CData drivers
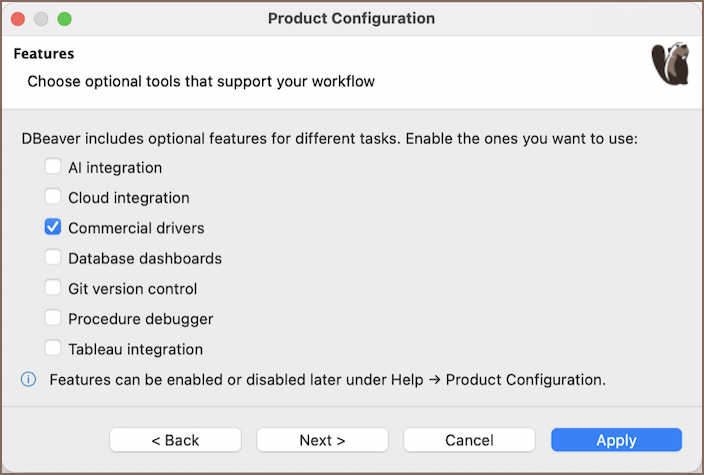
CData drivers are enabled by default through the Commercial drivers feature. If you've disabled this feature and can't find CData drivers in the connection wizard, enable it again:
-
Open Help -> Show Product Configuration....
Info
Learn more about Product Configuration.
-
On the Features page, select the Commercial drivers checkbox.
-
Select Apply to save the change.
- Restart DBeaver to apply the change.
Set up a connection
-
Open the New Connection Wizard from the toolbar.
Info
For information on the connection wizard, see Create a connection.
-
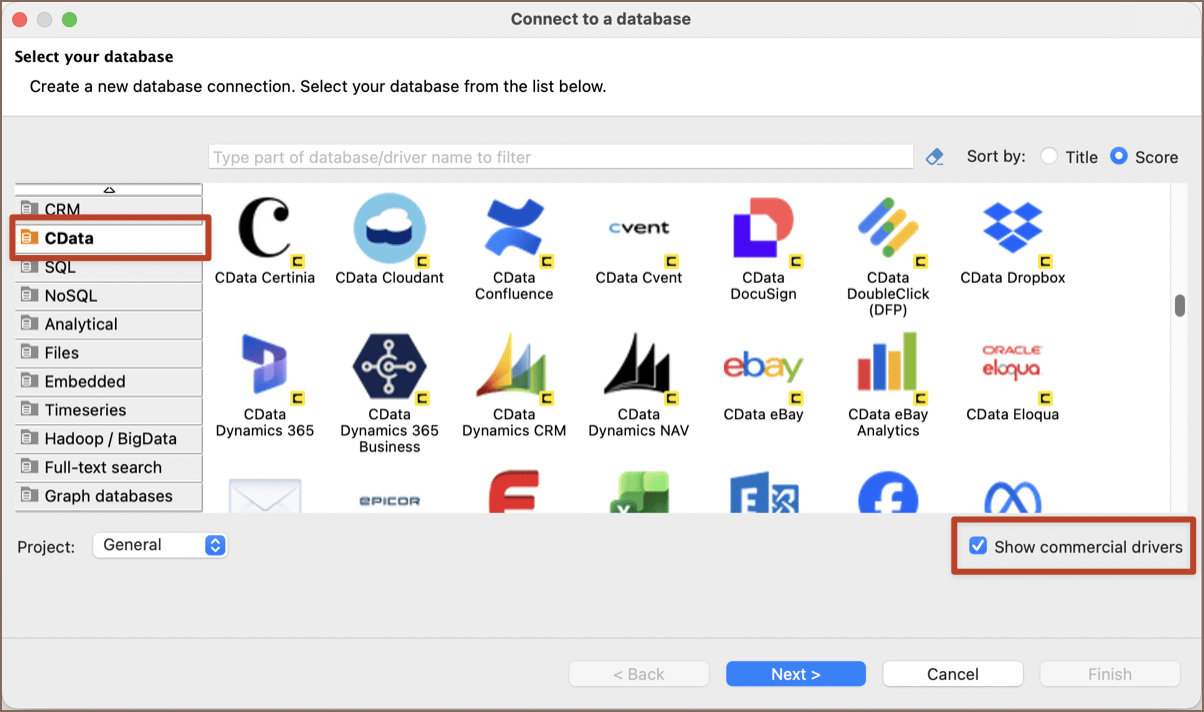
Select the Show commercial drivers checkbox below the driver list to display CData drivers.
-
Browse the CData category, or type your data source name in the filter field.
-
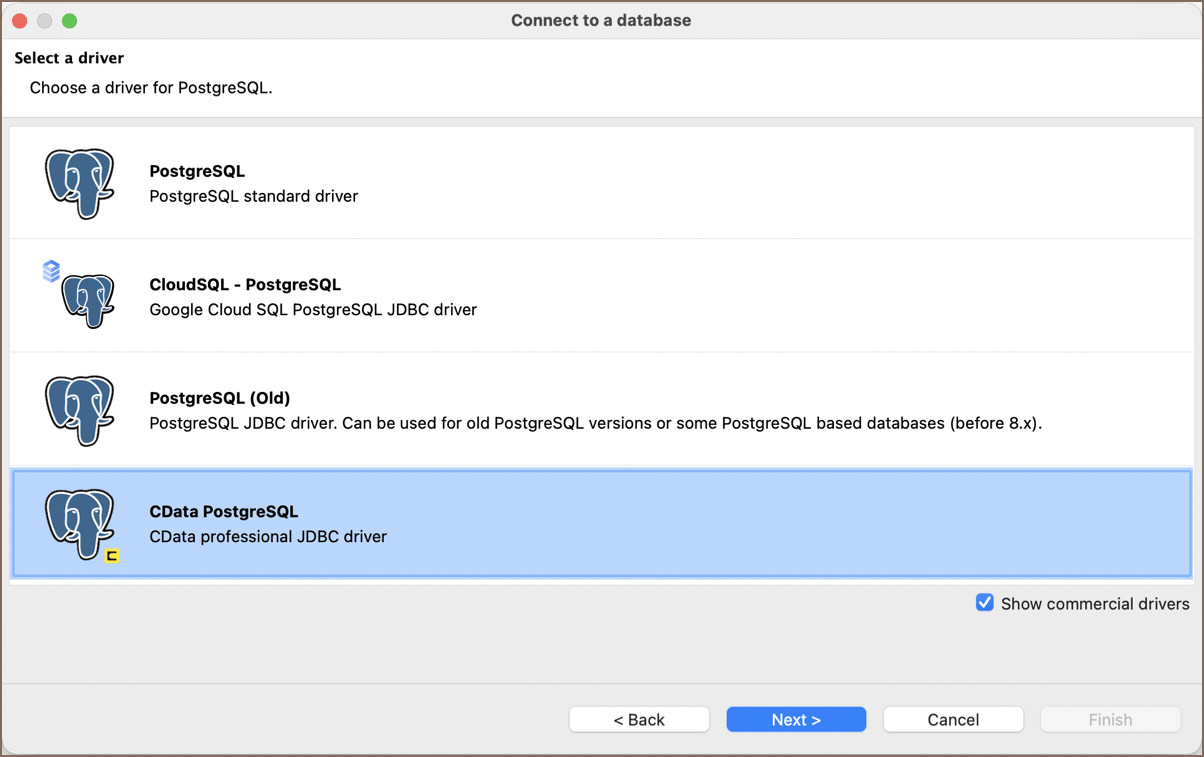
Select the CData driver for that source, and select Next. If another driver-selection page opens, select the CData driver there and continue.
-
If DBeaver prompts you to download missing driver files, complete the download before configuring the connection.
Configure connection settings
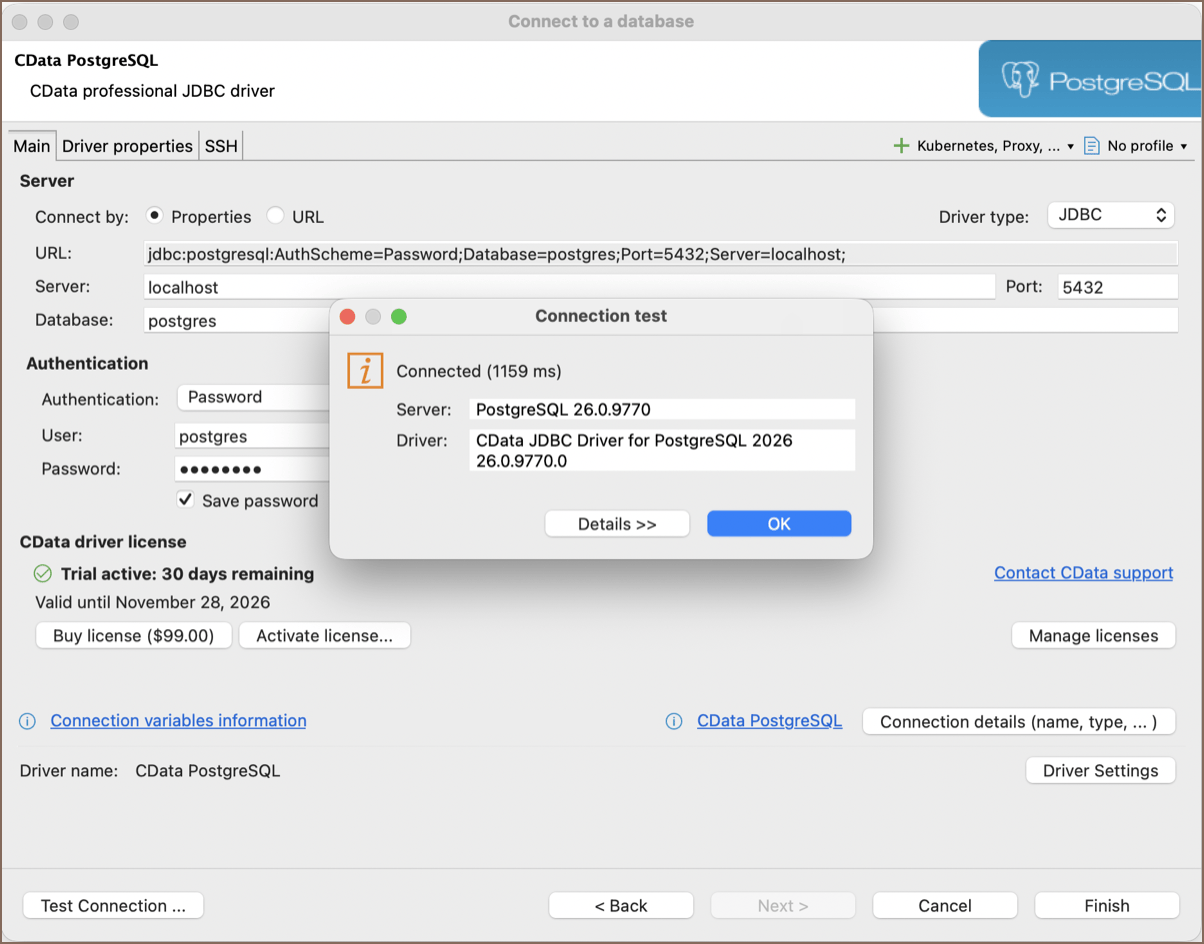
Use the CData connection page to configure the JDBC URL or enter individual properties.
| Setting | Description |
|---|---|
| URL | Enter the JDBC connection URL for the selected CData driver |
| Properties | Enter connection settings in the fields below the URL |
| Authentication fields | Enter the credentials required by your driver when these fields appear |
In Properties mode, DBeaver fills in the URL automatically as you enter the connection settings. To paste or edit the URL yourself, select URL.
-
Choose URL to enter a JDBC URL, or Properties to fill in individual settings.
Info
If DBeaver can't load the connection settings, it may show Open URL configurator. Select it to open the CData driver's separate configuration tool, set the connection parameters there, and copy the generated URL into the URL field in DBeaver.
-
Enter the authentication details required by the selected CData driver's guide.
- Start a trial or activate your purchased license in the CData driver license group.
-
Select Test Connection to verify the settings, and then select Finish to save the connection.
Note
The available properties and authentication fields depend on the selected driver and its loaded property definitions. Use the guide for that driver rather than copying settings from another connector.
CData driver properties
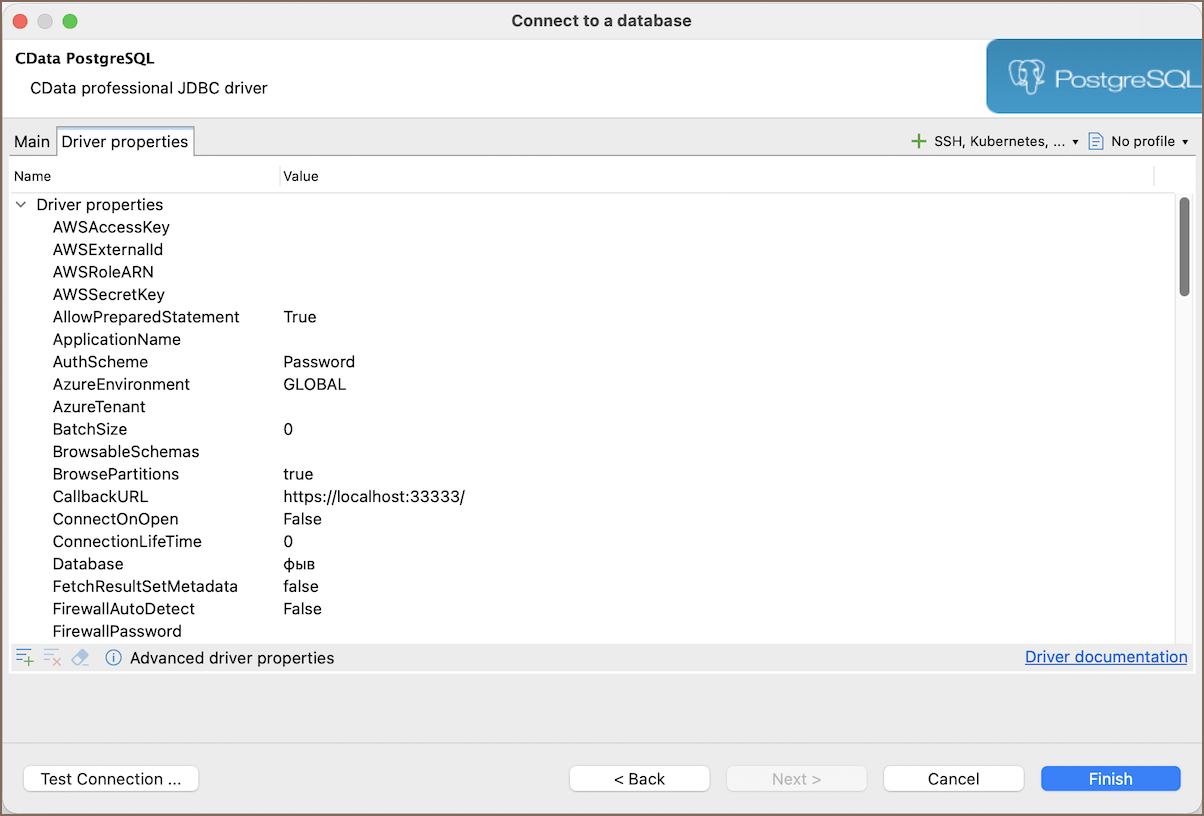
Use additional driver properties for settings beyond the main connection fields. Check the selected CData driver's documentation for property names, accepted values, and defaults.
Info
For information on general driver configuration, see Driver manager.
Manage a CData license
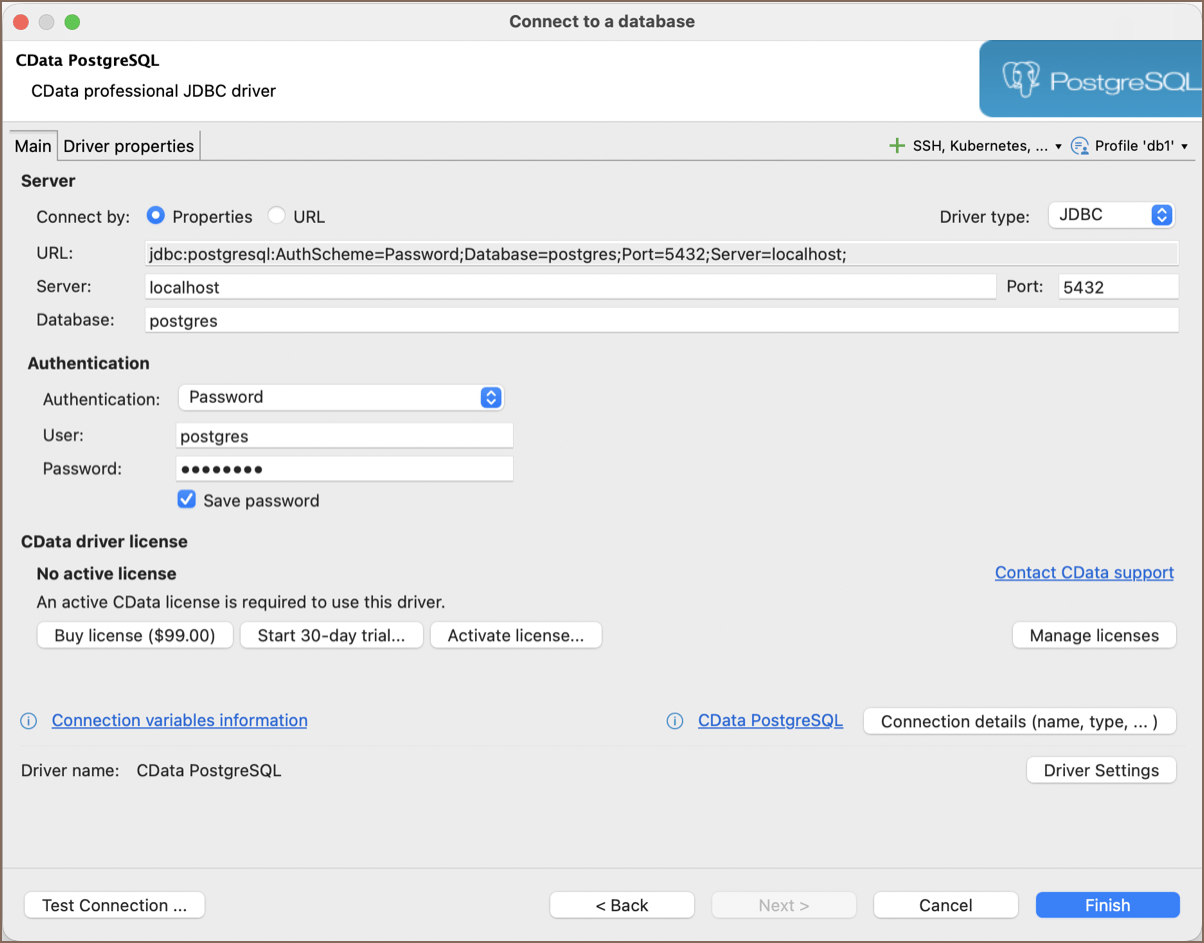
The CData driver license group on the connection page provides trial, purchase, activation, and license-management controls.
Start a trial
Request and activate a trial for the selected CData driver directly from its connection page. You don't need a purchased product key.
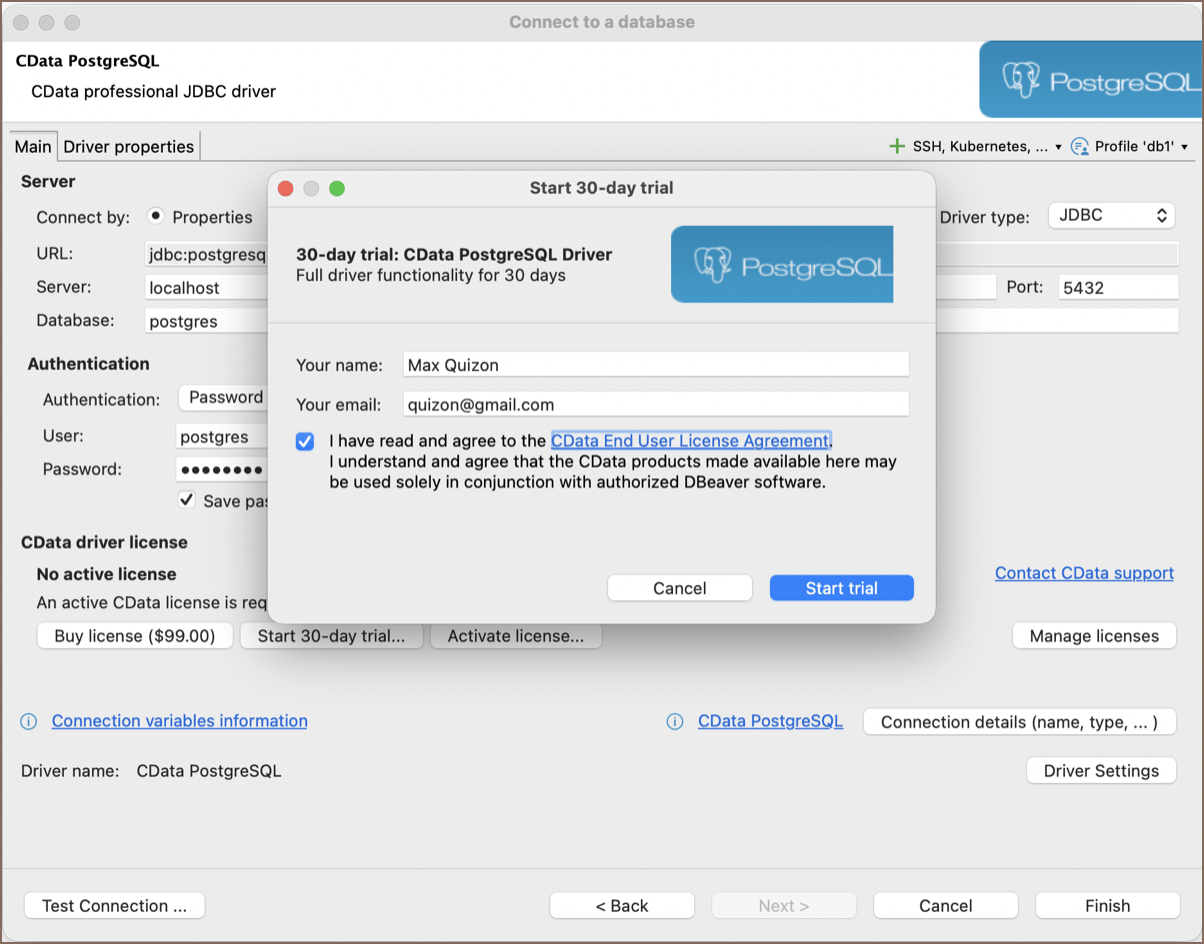
- Select Start 30-day trial... in the CData driver license group.
- Enter Your name and Your email. Use a valid email address.
-
Read the CData end-user license agreement, and select the consent checkbox to accept it.
-
Select Start trial to submit your name and email address to the driver's activation process.
-
After successful activation, the trial license is installed and validated. Return to the connection settings and test the connection.
Info
You can also find JDBC trial downloads on the CData JDBC trial download page.
Buy and activate a license
Purchase a license for the CData driver you're configuring, then activate it in DBeaver with the purchased product key.
- Select Buy license... in the CData driver license group. DBeaver opens the purchase page for the selected driver.
- Complete the purchase with CData, and obtain the product key sent by email.
- Return to the connection page for the same CData driver, and select Activate license....
- Enter Your name, Your email, and Product key.
- Read and accept the CData end-user license agreement.
- Select Activate.
After successful activation, the license is installed for the selected driver. Test the connection with your data source settings.
Manage licenses
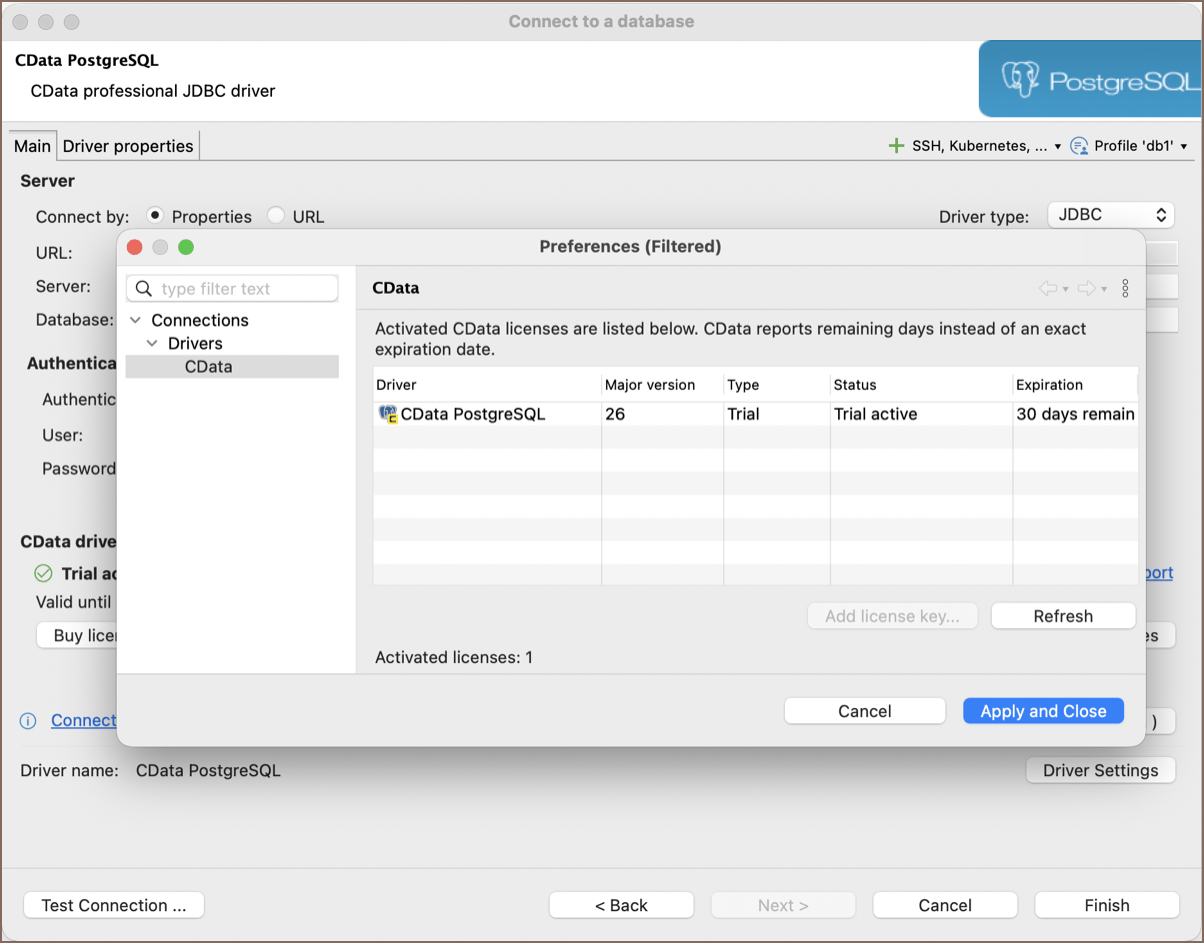
Select Manage licenses in the CData driver license group to open the CData license preferences. This page lists activated licenses.
- Select a trial or expired license in the list, then select Add license key... to activate a purchased license for that driver.
- Select Refresh to update the displayed license list.
Contact CData support
Contact CData if your trial or purchased license fails to activate, your product key is rejected, or you need help resolving an error reported by the CData driver when authenticating, connecting, or running a query. Include the driver name and the exact error message.
When creating a CData connection, select Contact CData support on the connection page to open CData's support portal. You can also contact CData through its support page.